Introduction
- I had seen this 2D DNA Animation at codepen.io and thought to replicate the same DNA effect in PowerPoint. You can download and open the presentation from the link below and the first step you need to note is to look into the Animation Pane from the Animations tab as shown in Figure 1.1.
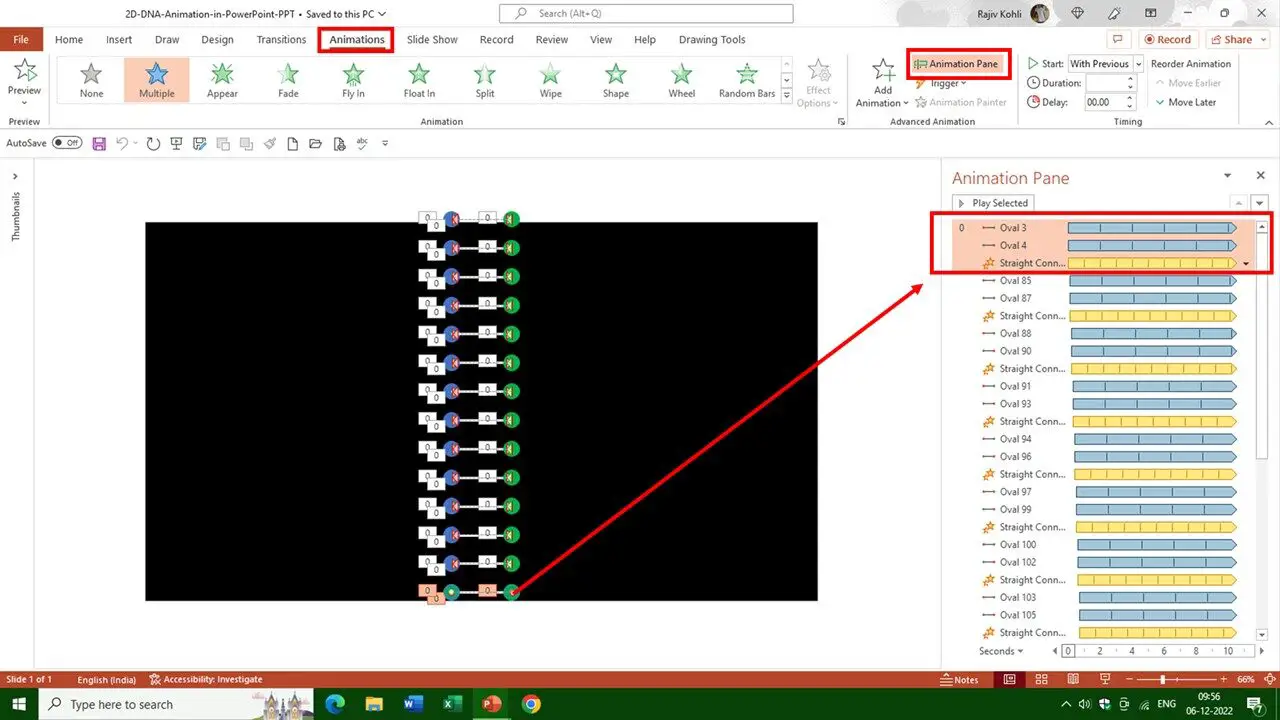
Figure 1.1
DNA Shapes Design and Animation Effects
- Basically, we are using three shapes to create a single DNA string which are 2 Oval shapes and 1 Straight Line shape. So, we are applying the Right Motion Path Animation effect to the left oval and the Left Motion Path to the right oval. Do also note that Auto Reverse has been used over both the Left and Right Motion effects as shown in Figure 1.2:
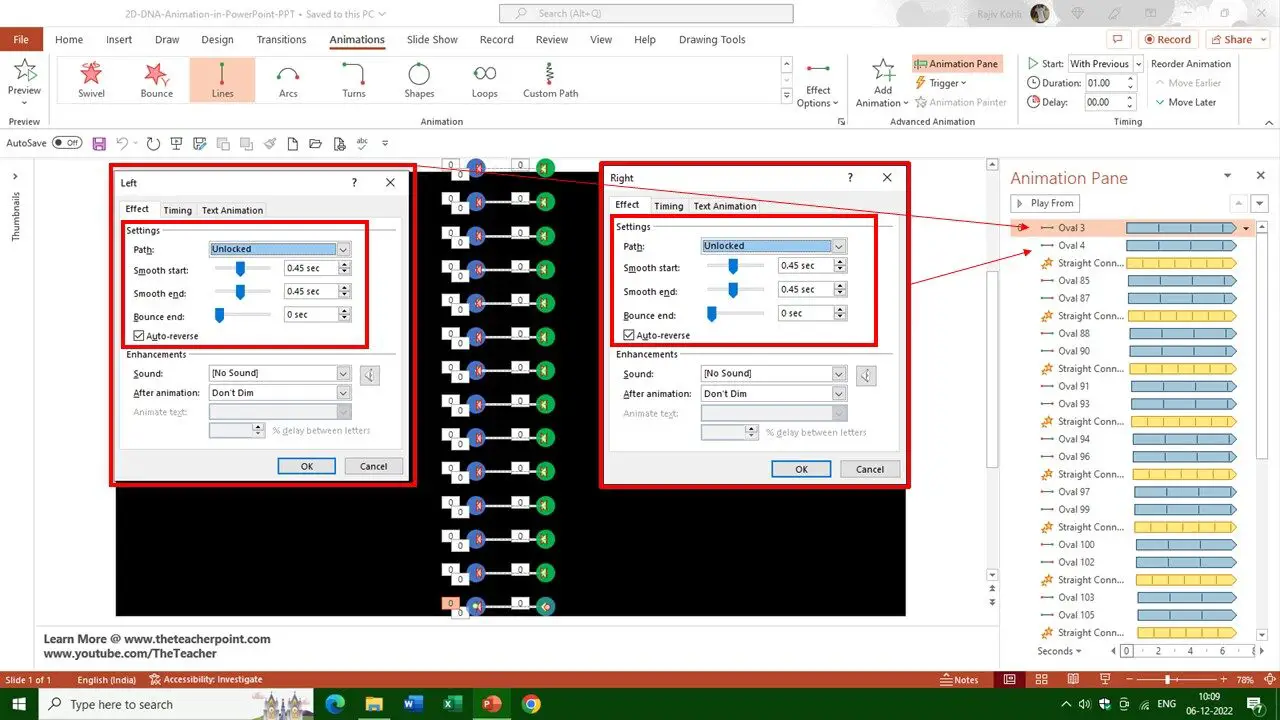
Figure 1.2
- The Time Duration of both the Motion Path is 1 second with Auto Reverse. So, it will take 2 seconds to complete one loop for each oval to move left or right and reverse back to the same position. You can increase or decrease the time duration to speed up or slow down each DNA string movement.
- To understand this better, you can open the Selection Pane from the Home tab and use the Hide All to hide all the objects from the slide and then use the Eye button to only make Oval 3 and 4 shapes visible. Run the slideshow and you will see the left oval moving to the right and the right oval moving to the left and both auto-reversing as shown in Figure 1.3:
Figure 1.3
- To make an endless loop of an animation effect, that supports the Repeat Until End of Slide feature, you can double-click that effect from the Animation Pane to open the Effect Options window. Here from the Timing tab, you can set the effect to Repeat Until the End of the Slide.
Applying Grow/Shrink Effect
- Then we have the Straight Line shape, which has been drawn in the middle of both oval shapes. We used the Grow/Shrink effect over the Straight Line shape. You can turn on the Straight Connector 6 shape from the Selection Pane.
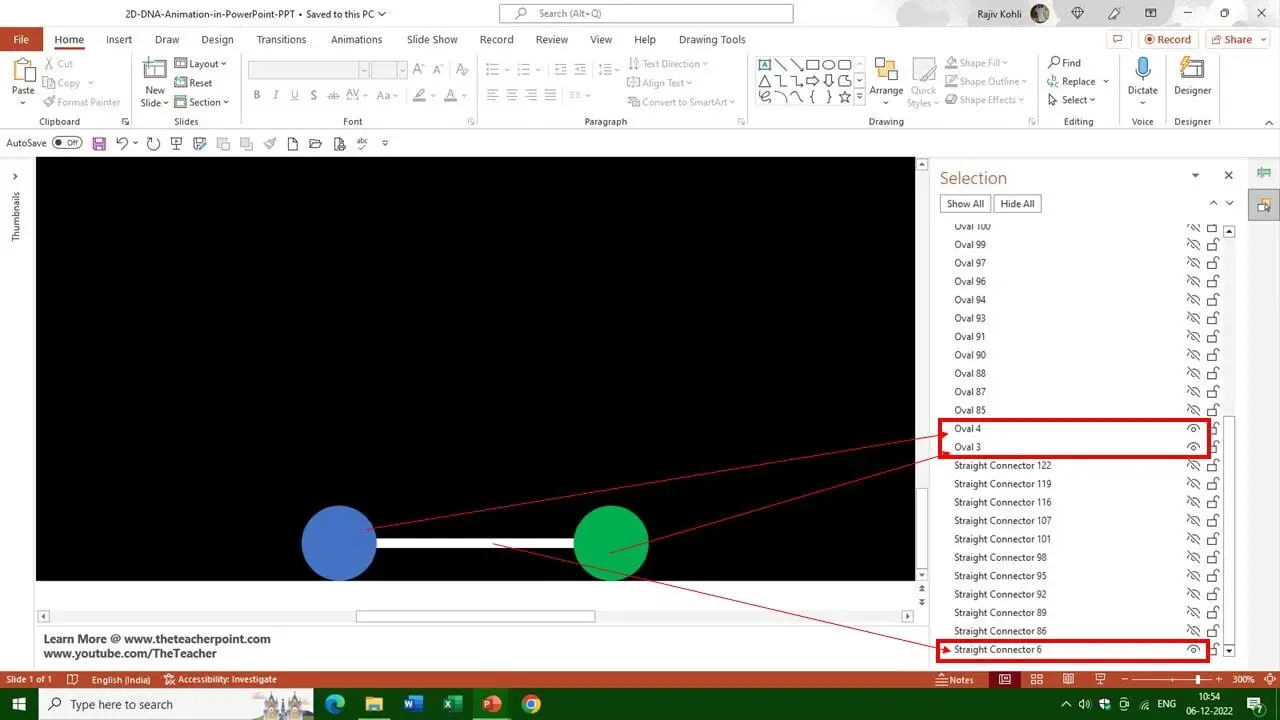
Figure 1.4
- Now, open the Animations tab and then double-click the Grow/Shrink effect to see the Effect Options. We are shrinking the Straight Connector shape to 10% Horizontal alone with Default Smoothness and Auto Reverse.
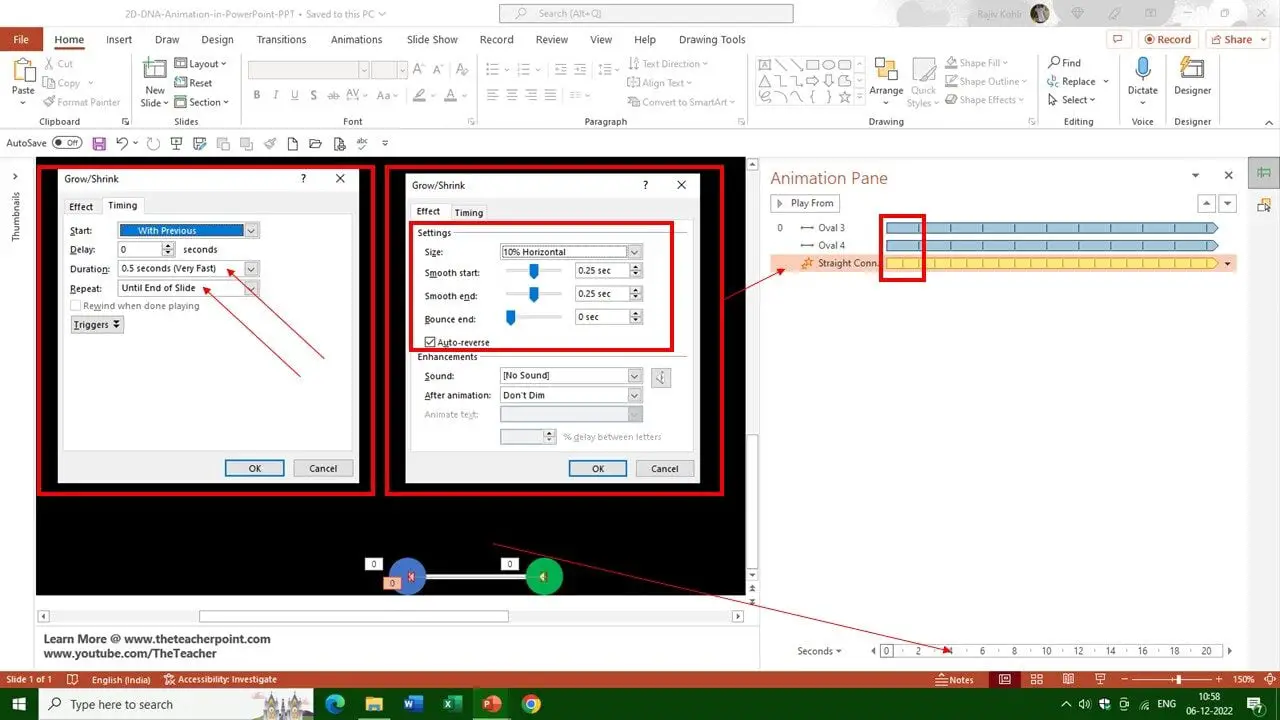
Figure 1.5
- The Timings tab in Figure 1.5 shows the Time Duration is 0.50 seconds and also Repeats this effect until the end of the slide. All the animation effects on the slide are set to Start With Previous. So, the Straight Line will shrink to 10% Horizontally alone in half a second and will then Auto Reverse back to its original size. So one loop of the Straight Connector will take a total of 1 second.

Figure 1.6
- If you combine these 3 animation effects, you will then have a single string of 2D DNA Animation ready!

Figure 1.7
Duplicating Shape Layers
- You then need to make several duplicates of these 3 shapes on top of each to create more 2D DNA strings and fill the entire slide vertically. That is why you are seeing a lot of Oval Shapes and Straight Connector shapes in the Selection Pane.
- After making duplicates and filling the entire slide vertically, if you will run the slideshow then all the 2D DNA strings are going to move at the same time and speed as shown in Figure 1.8:
Figure 1.8
- Take a look at Figure 1.9, where all the effects are set to Start With Previous without any Delay. That is why all the DNA strings are moving at the same speed. So, to add a delay between the DNA strings and to make a cruel in the middle, we need to add a Delay Timing between each set of 3 animation effects that we applied to each of the DNA strings.
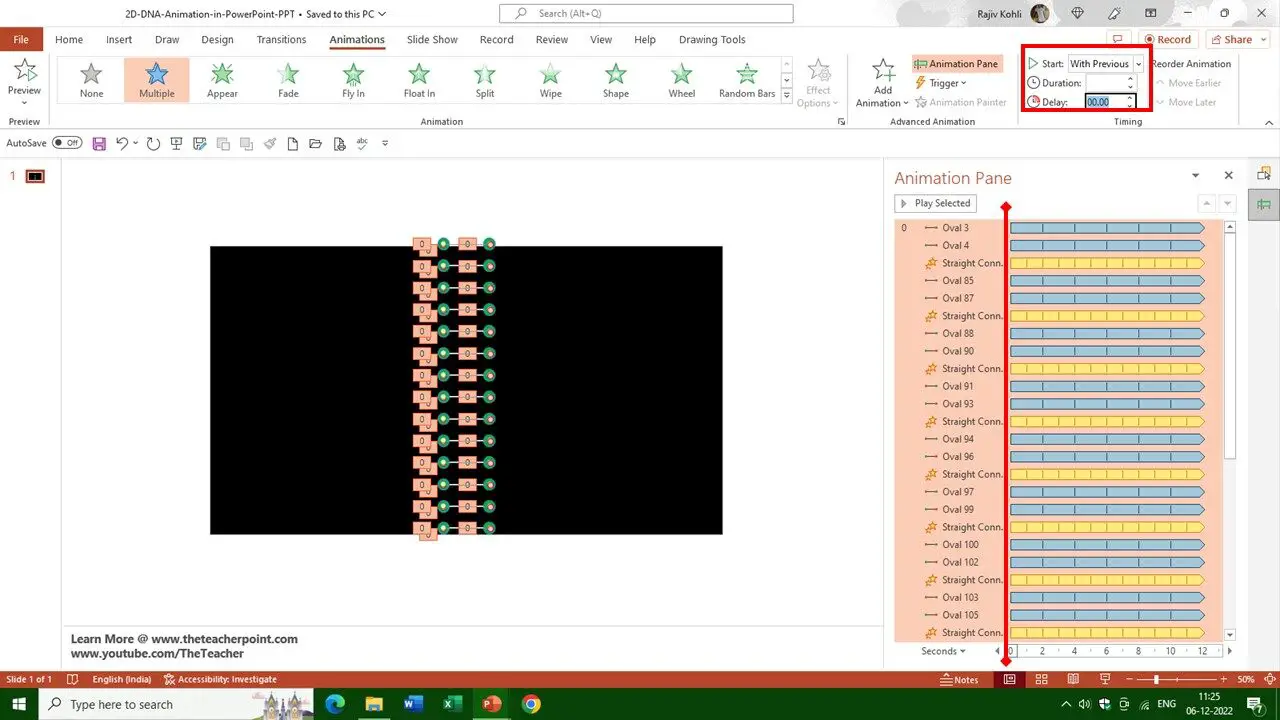
Figure 1.9
- We added a delay of 0.10 seconds between each set of DNA Strings. Like, 0.10 Seconds delay for the next 3 effects over the 2nd string, 0.20 seconds delay for the 3rd string set, and so on.
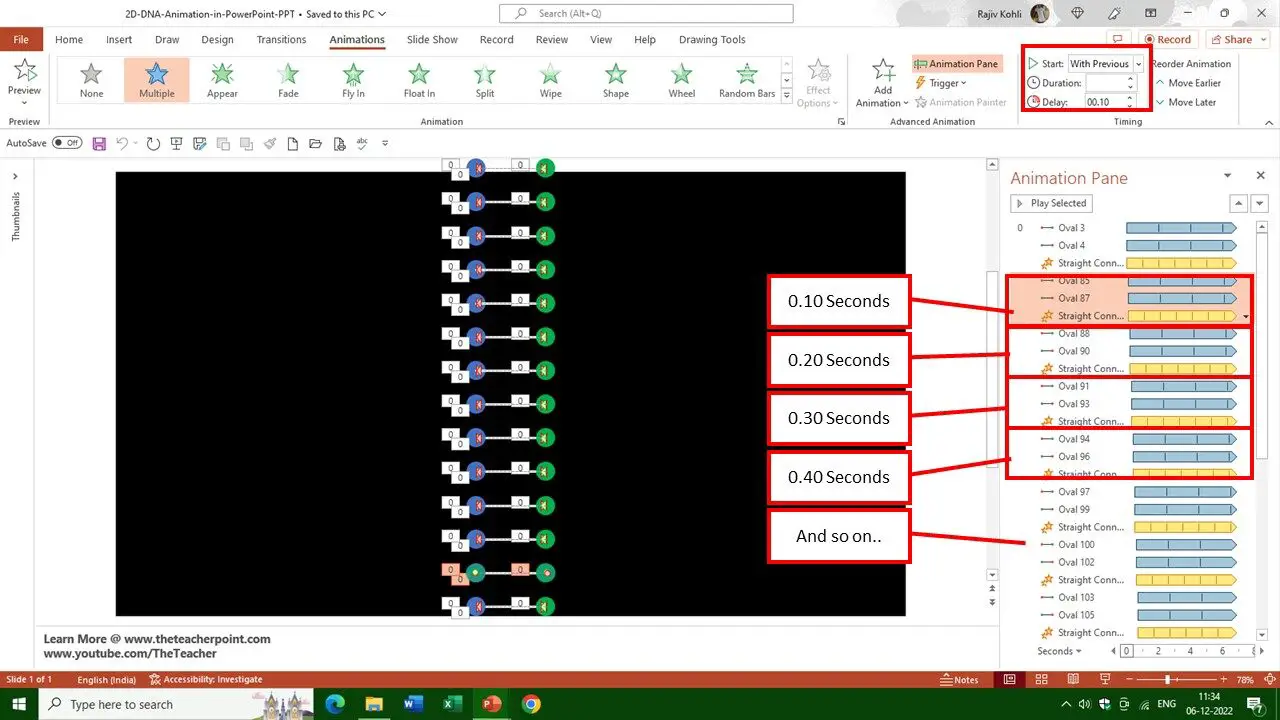
Figure 2
- After adding the delay timings for all the DNA string 3 animation sets, run the slideshow and there you have a nice 2D DNA Animation ready.
I hope you got The Teacher Point!
Watch 2D DNA Animation in PowerPoint Tutorial
The article DNA Animation also applies to the following versions:
- PowerPoint 2007
- PowerPoint 2010
- PowerPoint 2013
- PowerPoint 2016
- PowerPoint 2019
- Microsoft 365
Download 2D DNA Animation PowerPoint PPT
PPT Info.
PowerPoint Template
Youtube Intro
File Type: PPT / PPTX
File Size: 43KB
Number of Slides: 1
Download 2D DNA ANIMATION POWERPOINT TEMPLATE
DON’T FORGET TO LEAVE A RESPONSE.