How to Make 3D Pop-Out Photo Effect in PowerPoint 2016 / 2019 Video tutorial is without narration and subtitles. So, this article will explain all the steps to create this realistic Image Pop-Out effect.
Turn On Volume
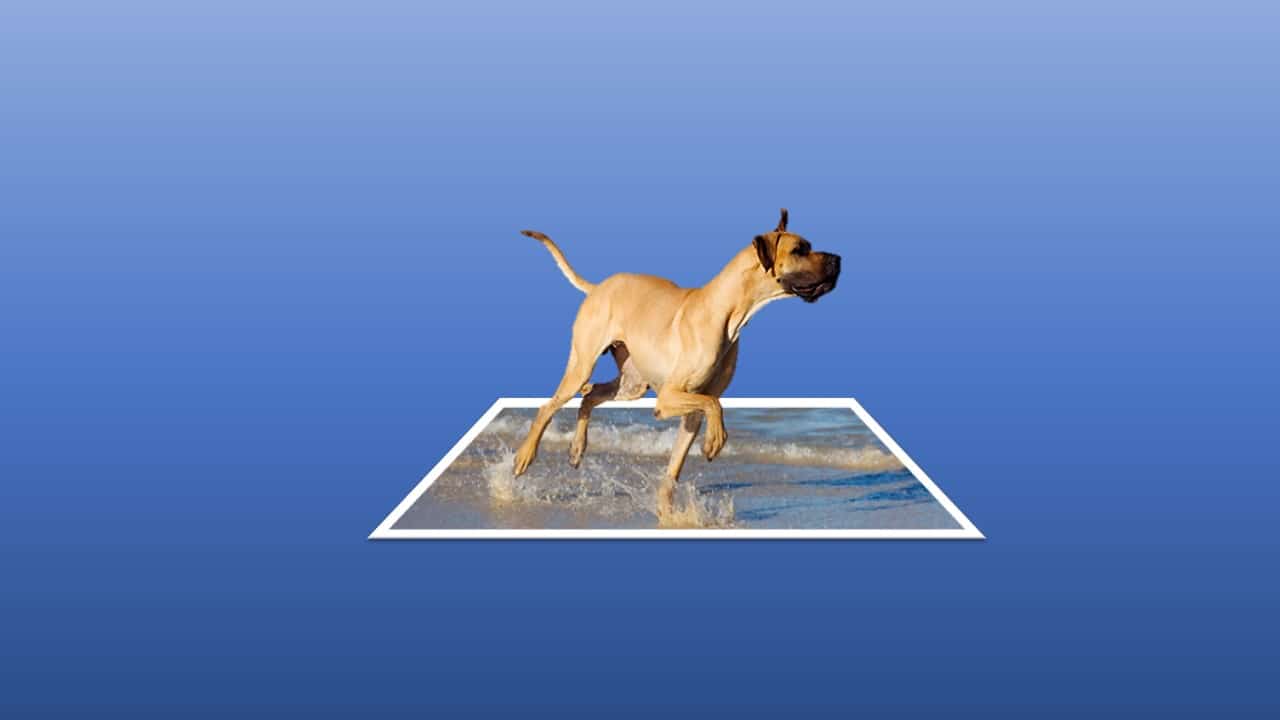
You see 3 different slides creating an illusion of a 3D effect, which in actuality are 2D flat images. They have been placed in a manner with Grow / Shrink animation effect to create the Parallax Zoom-In effect and you feel as if the images are poping-out of the scene.
Slide 1 Setup
- A slide-size Sea Background image has been inserted on the first slide from the Insert tab – Picture option.
- On top of the Sea Background image, we inserted another DOG PNG image from the same Insert-Picture option.
- The Dog image file is in PNG format (Portable Network Graphics), which is mostly associated with images having a transparent background. So, when we place Dog PNG on top of Sea Background then it doesn’t hide any additional area of the background sea image.
- Re-size the dog picture to match the size according to the Sea Background picture.
- After adjusting the size and positioning, we applied the Grow / Shrink effect on both of the images but having different animation effect properties.
- For the Sea Background image, we are starting the Grow / Shrink effect With the Previous with a Duration Timing of 15 Seconds, 115% Grow Rate for both Vertical and Horizontal growth, No Smoothness, Without Auto Reverse, and No Repeat.
- For Dog transparent image, we again applied the same animation properties as the Sea Background image except the Grow / Shrink rate of the dog image has been set to 110% with Duration Timings of 12 seconds. The Dog image will grow slower but the background image will grow faster, which creates the Parallax Zoom-In effect and it seems as if the dog is poping-out as a 3D image.
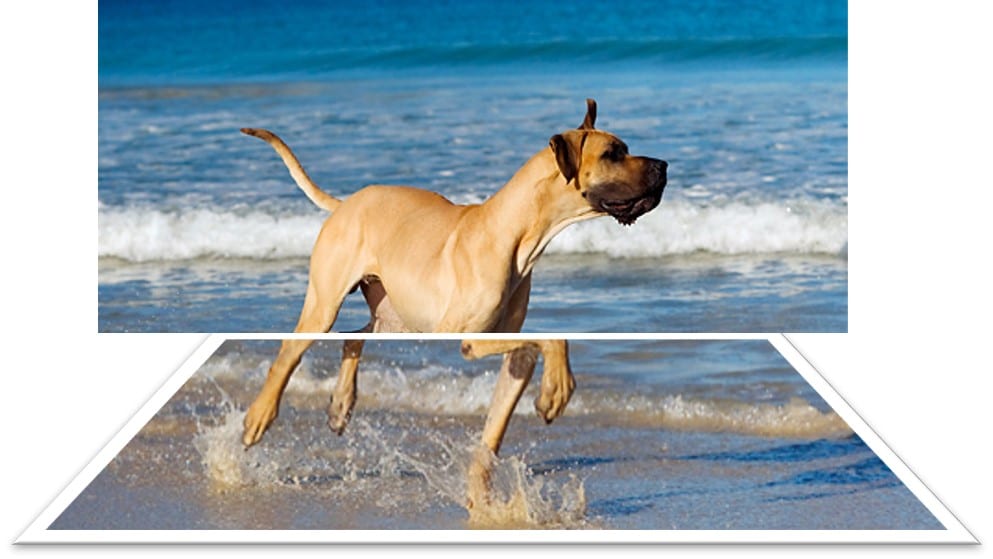
Slide 2 Setup
- On 2nd slide, we used no animation effects but you can go with the same Grow / Shrink effects if you want to.
- We will first make a duplicate of the same picture and will place both images side by side.
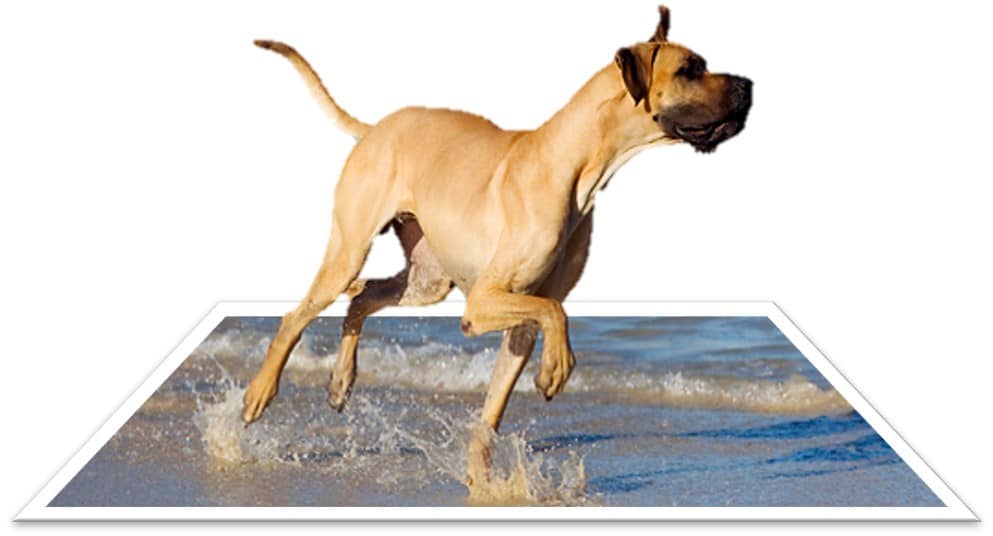
- Crop the first image to show the legs of the dog alone.
- After cropping the picture up to the Legs, again apply the Crop To Shape – using a Trapezoid shape and then use the Yellow handler to adjust the position.
- Then applied the Single Frame, White from the Format tab – Picture Styles.
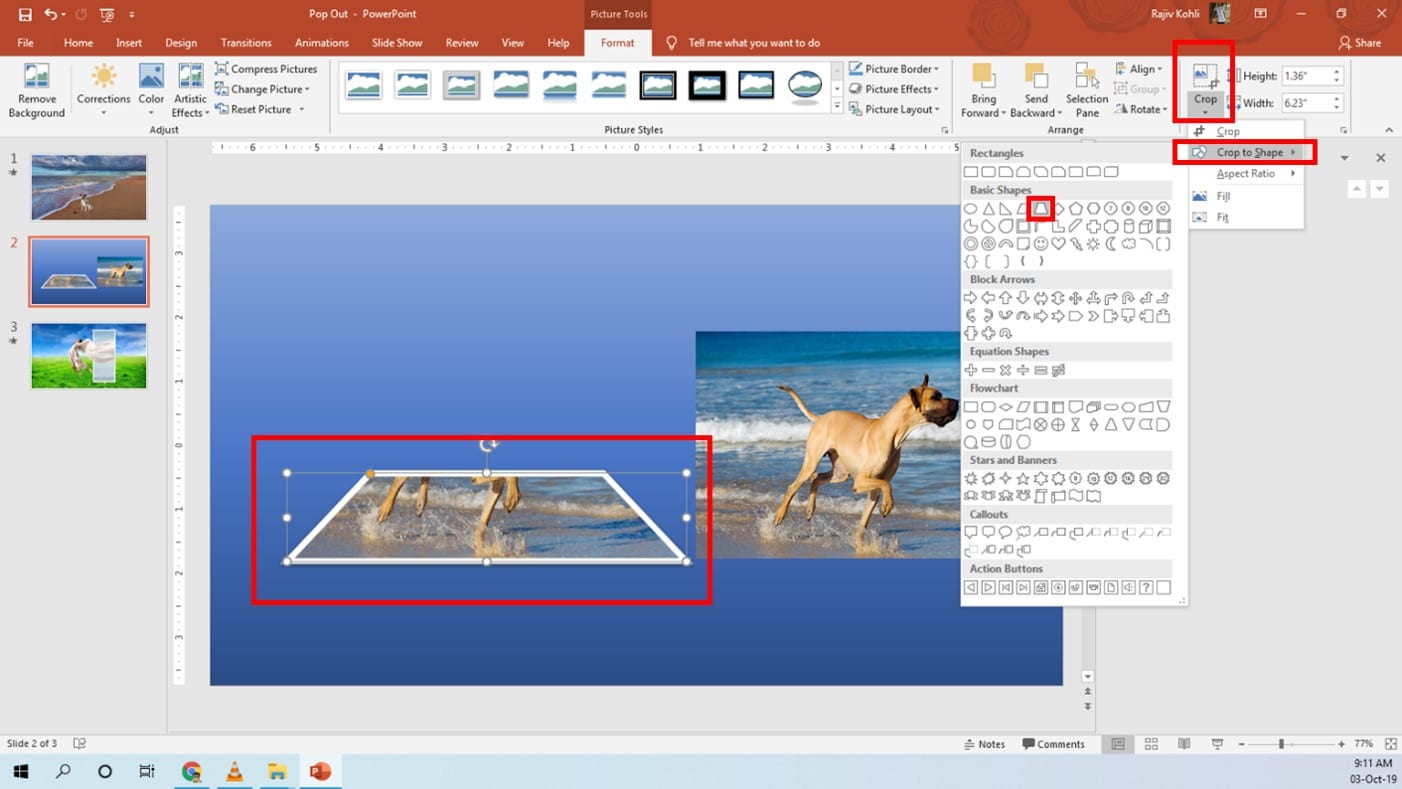
- We need to crop the second image and place the body part of the Dog on top of the first image but as that is a full size-image having no transparency. So, only cropping the second image and placing it on top of the first image will look like this:
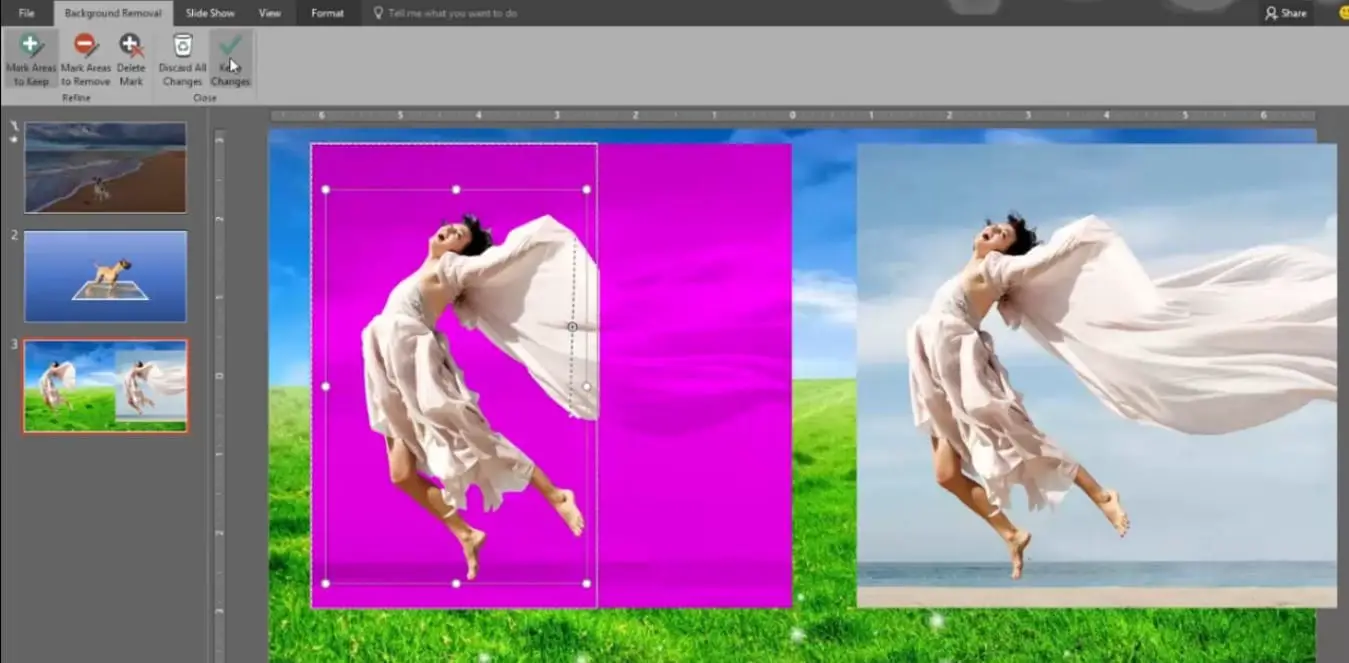
- You also need to remove the background, so viewers may see only the top body part of the dog in the second image. You can also read our post on How to Make Talking Animation in PowerPoint, where we used the same Remove Background command to clear the unnecessary elements from an image.
- Select the second upper body image of the dog and click Remove Background from the Format tab and you will notice the Ribbon tabs are now completely changed and showing a new Background Removal tab having various options like Mark Areas to Keep, Mark Areas to Remove, Delete Mark, Discard All Changes, and Keep Changes. The picture on the slide will also start showing you a Magenta color in the image background.
- The Magenta color indicates that if you will press the Keep Changes button then the area having Magenta color in the image will get cleared having 100% transparency. So, now you need to Mark the areas of the image you want to Keep or Remove. You can watch our embedded video below for more information.
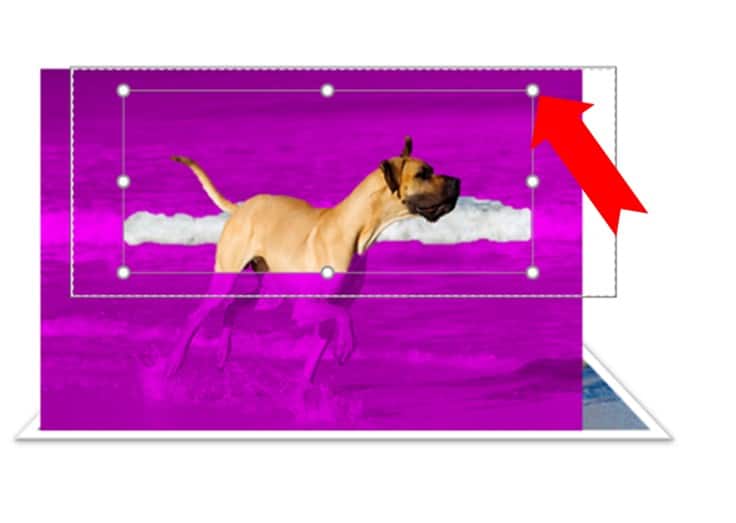
- The easiest way to Keep or Remove areas from the image is to adjust the rectangle as shown in the image above, instead of using Marks Area to Keep or Remove.
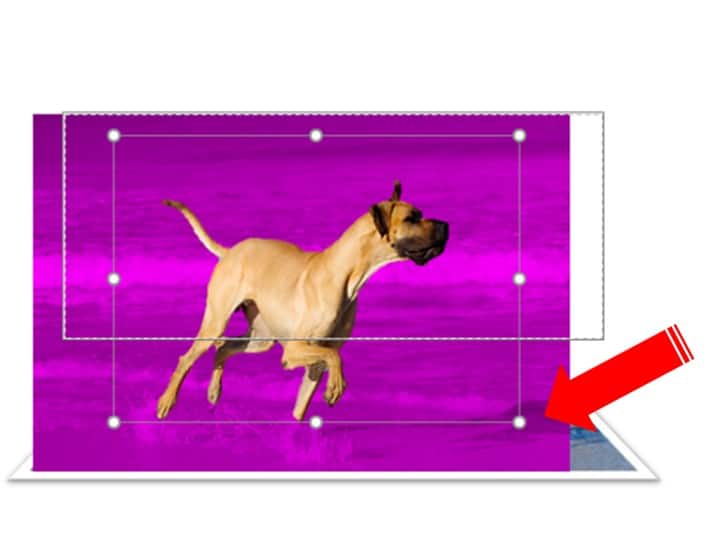
- As in this example, adjusting the size of the dotted rectangle around the image is showing only the Dog image in full colors and the rest of the image background is shown in Magenta color. So, pressing the Keep Changes button from the Remove Background tab will keep the dog alone and will remove the rest of the elements and colors from the image.
- Bring the image on top from the Format tab – Bring To Front option and then adjust the position to make a 3D Pop-Out effect.
Slide 3 Setup
On the 3rd Slide, we used the same Animations and Remove Background techniques as we did for the 1st and 2nd slides.
- Making a duplicate of the same image, placing them side-by-side, and then using the Remove Background in the same manner as we did for 2nd slide.
- Then you need to Crop the second image and keep only the floating part of the cloth.
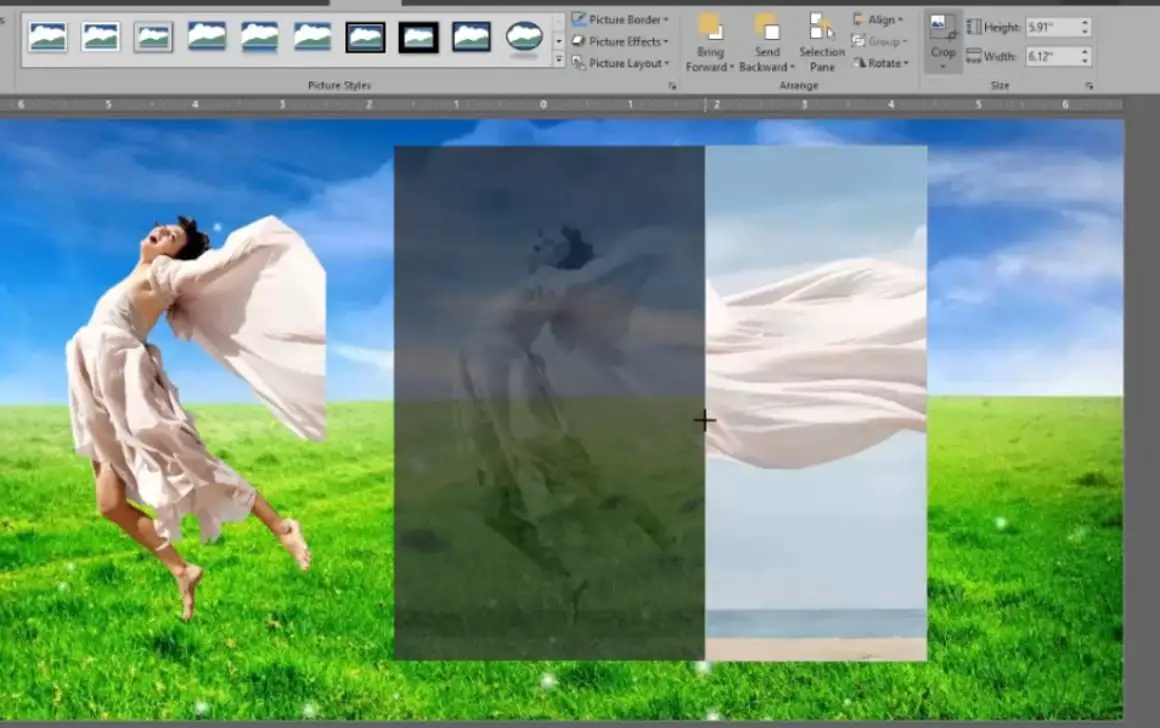
- Apply the same Single Frame, White border to the second image and then adjust their position. Make sure to bring the Girl image on top.
- You can then apply the same Grow / Shrink animations to these images as we did in our first slide.
I hope you got The Teacher Point!
Watch 3D Pop-Out Photo Effect PowerPoint Video Tutorial
The article How To Make Animation with Vector Files also applies to the following versions:
- PowerPoint 2007
- PowerPoint 2010
- PowerPoint 2013
- PowerPoint 2016
- PowerPoint 2019