Nowadays Audio Players and Audio CDs are out of trend but you might have a collection of your favorite songs and you wish to RIP Audio CD to MP3 (CDA to MP3) Files to save them on a computer. Keep in mind that the files you see inside an Audio CD contain just the track information, not the audio itself. When you play a file/track from an Audio CD, the CD Player just moves the Read/Write Player’s Head to that location. See Figure 1.1:
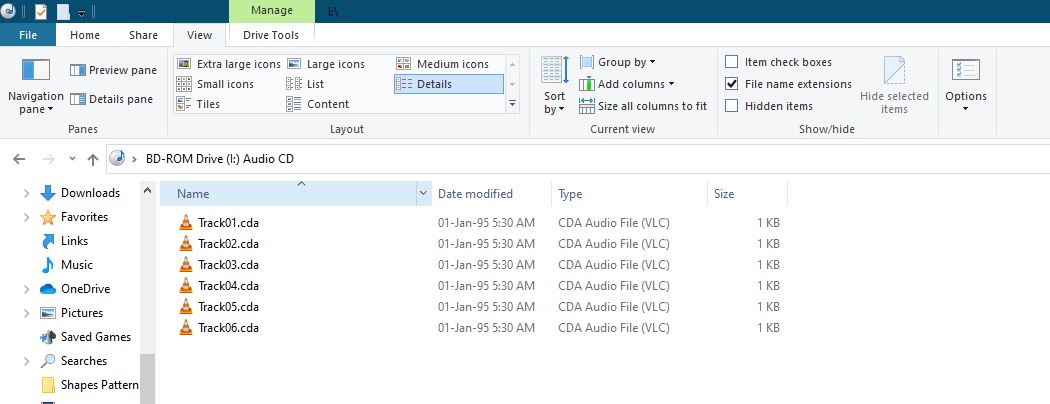
Figure 1.1
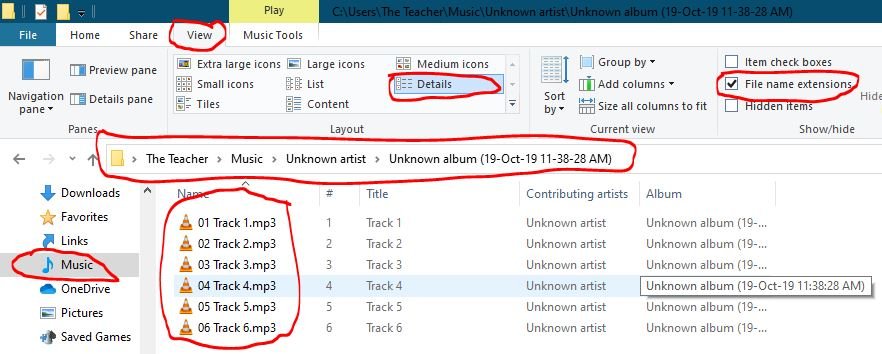
You just cannot simply Copy/Paste Tracks from an Audio CD. Figure 1.1 shows that View Tab is selected and Layout is set to Details and you are seeing a list of Tracks with filenames having CDA extension. Note down the file size of each track which is 1KB for all.
Why Do You Need To Rip Audio CD To MP3 (CDA To MP3)?
CDA is a common filename extension that contains a small 44 Bytes (Rounded To 1KB in Figure 1.1) generated by Windows for each audio track on a CD. These Stub files appear to the users to be on disk and available for use but could be either in part or entirely on a different storage medium.
The point is, copying those CDA files alone to your computer will not actually save the tracks. After copying those tracks, double-clicking on those files might play a particular audio track but only if the physical CD is inside the player. You want to store the audio track to your computer as a file and MP3 file format can store your tracks in a coding format as digital audio files.
Windows Media Player as CDA TO MP3 Converter
So, this tutorial is about how you can convert an Audio CD (CDA) into a Digital Audio Format (MP3) and Windows Media Player is an inbuilt application in Windows 10 that can do the work for you without the need of any third-party tool. But before we begin, you should always check that which version of Windows 10 and Media Player you have on your system. To check the Windows Version:
- Press Windows Key+R to bring the Run dialog box.
- Type WINVER and hit OK.
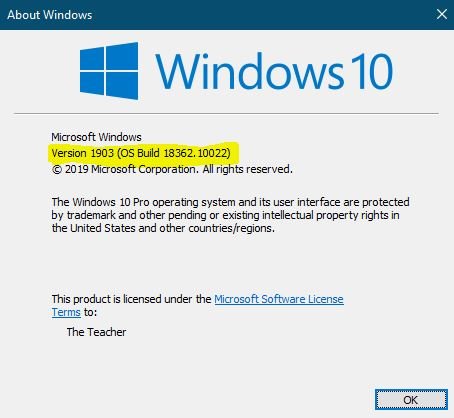
Windows 10 Version 1903
- Open Windows Media Player – click Help – About Windows Media Player (If you don’t see the Menu bar, press the ALT key once). See Figure 1.3:
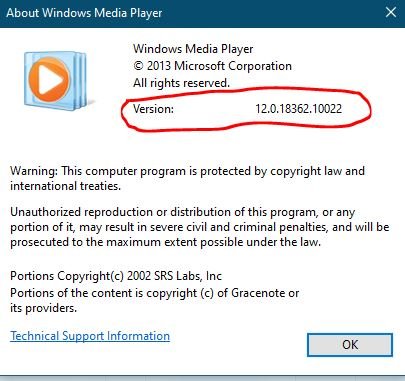
Windows Media Player Version 12
Knowing the versions is important as you might see a different interface and options for Windows Media Player. Earlier versions of the Media Player can convert the CDA to WMA format only. The Media Player version will be according to the Windows version. You can also check if the version of the Media Player installed on your system supports conversion to MP3 Format.
- Click the Tools menu – and then click Options. Switch to Rip Music tab and under Rip Settings – Format, see if MP3 is listed.
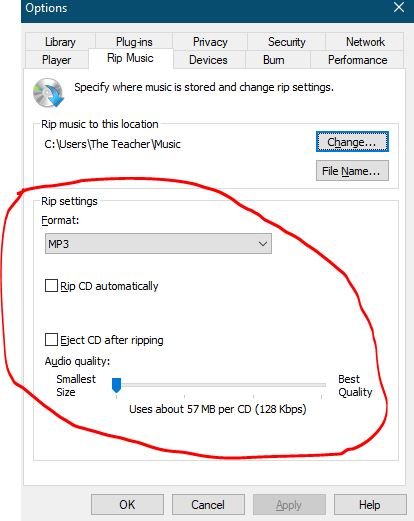
Also supports various other formats.
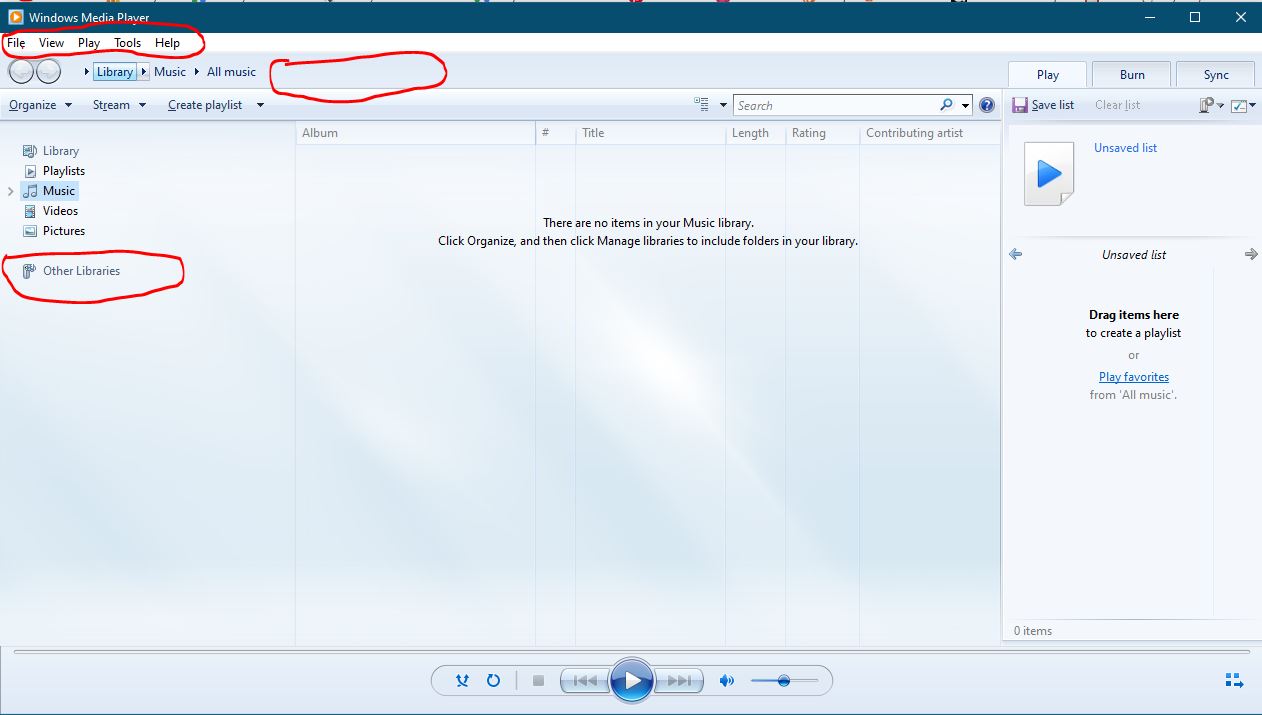
- Take a look at the Windows Media Player 12 interface in Figure 1.5 and you might not find any option related to Audio CDs. So, it is important to know that you might see different options depending on whether there is an Audio CD in the player or even if there is a physical CD player is installed on your system.
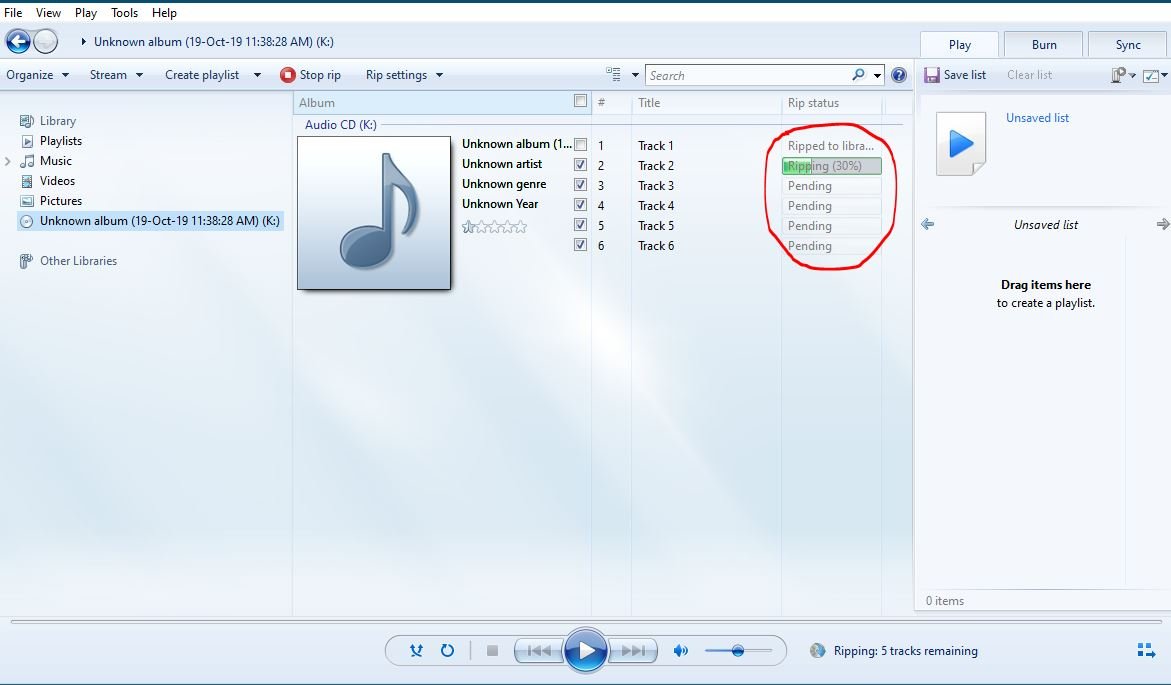
In Figure 1.6, you can see that after inserting an Audio CD into the drive, we selected the drive from the Left Side Pane, and RIP CD and RIP Settings options are now available in the main interface.
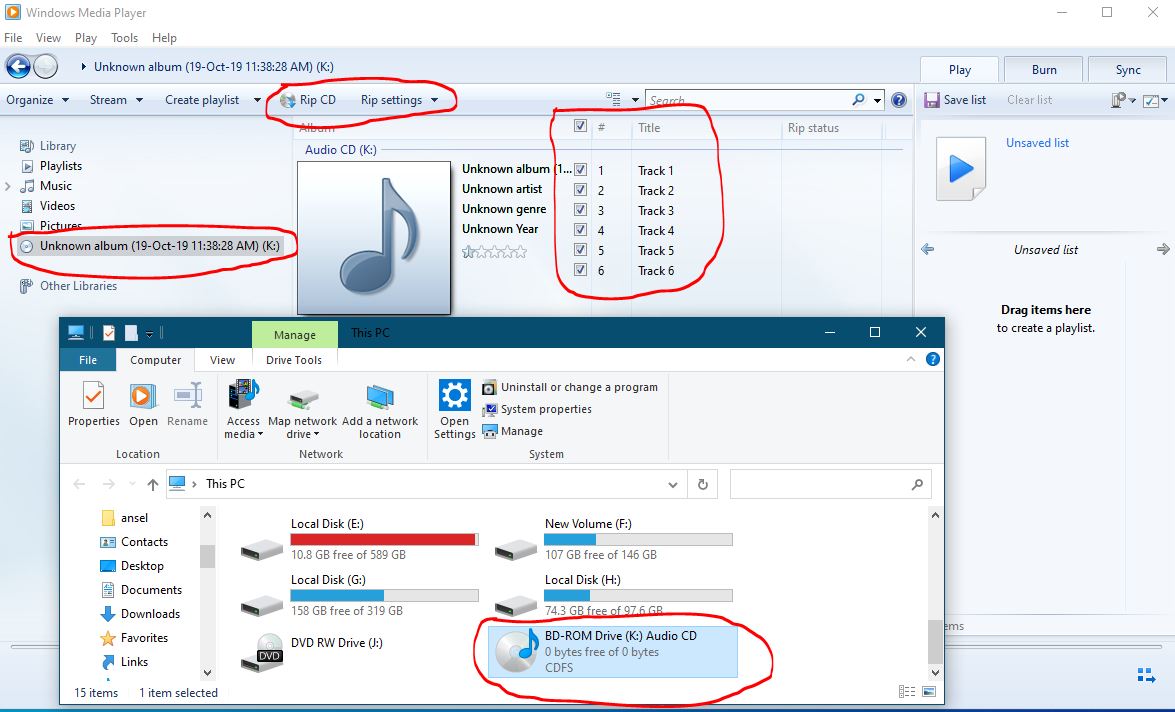
- Select the Audio Tracks that you wish to convert into MP3 from the list and press the RIP CD button.
The default storage folder for the converted MP3 files as shown in Figure 1.4 is “USER\USER NAME\MUSIC”. Music is a default system library folder and you will find that Media Player automatically created sub-folders according to Audio CD Label. See Figure 1.8:
Even you can rename the MP3 files after the conversion according to the Song Title but it is good to change the Tracks information inside the Windows Media Player before pressing the RIP CD button. See Figure 1.9:

I hope you got The Teacher Point!
Watch How To Rip Audio CD to MP3 Format Tutorial Video