Introduction To Train Animation
- My PowerPoint Tutorial on Kids Toy Train Animation begins at 1.15 and before that, you can learn the Graphic Designing process of the Toy Train using the Shape Tools from the Insert tab. This tutorial could be helpful for beginners who just started using PowerPoint for animation purposes. So, let’s start and the original animation inspiration is by:
- Take a look at Figure 1.1 illustrating the WireFrame View (all objects without Fill Color but with just Black Outline) of Toy Train with Selection Pane displaying the name of all the objects on the presentation.

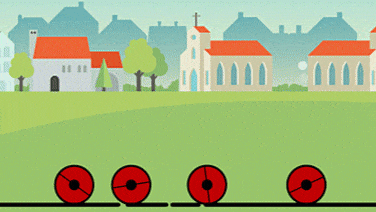
- Figure 1.2 illustrates only those objects which are in motion.
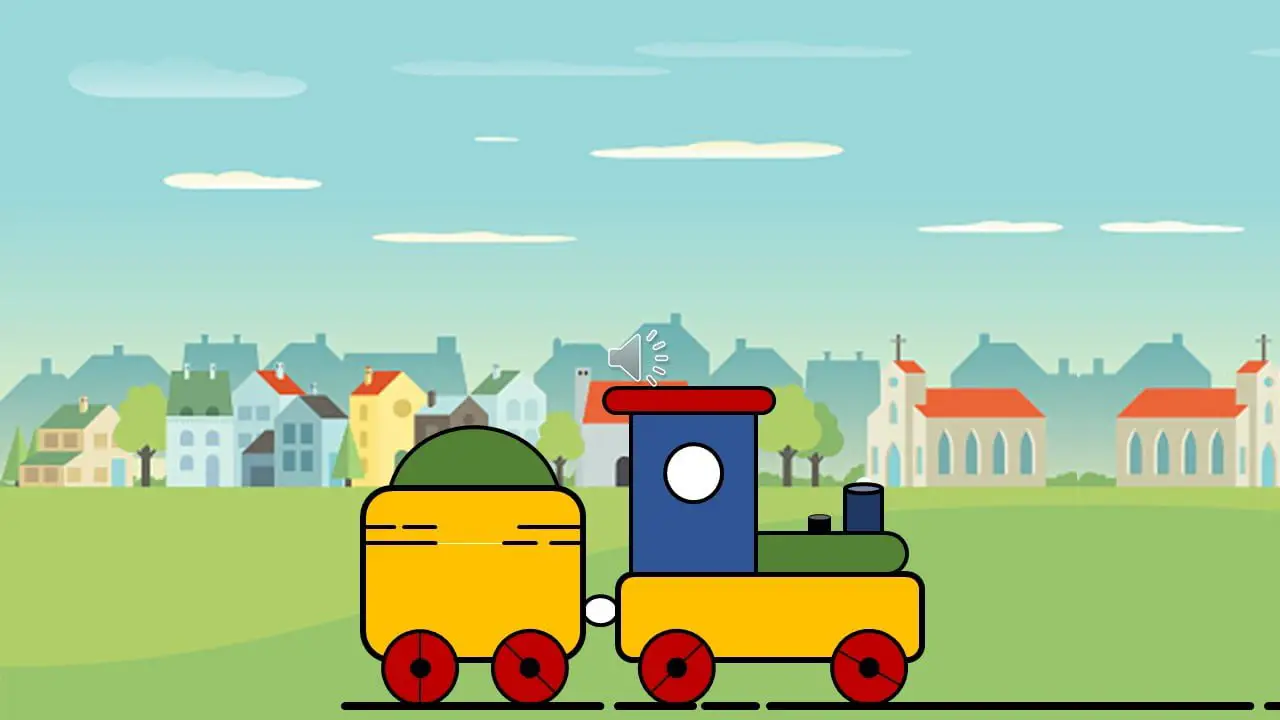
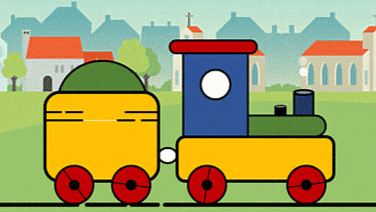
- We only need to animate the Tyres, Railway Line, Smoke, and Background Image and that means the Train Body is standing still and only the background image and tires are moving. Not even the tires as they are just spinning at one position. That is the background image which is creating an illusion of the movement. So, when you fit the body on top, then it completes the Kids Toy Train animation as shown in Figure 1.3:
As I always said, “In PowerPoint, that is the scene and character graphics designing which takes most of the time. Otherwise, applying animation is not a big deal.” Begin by downloading our presentation from the link below and see how quickly you can assign the said animations, once you have all the objects in the right place inside your presentation.
PowerPoint Animation Effects Used:
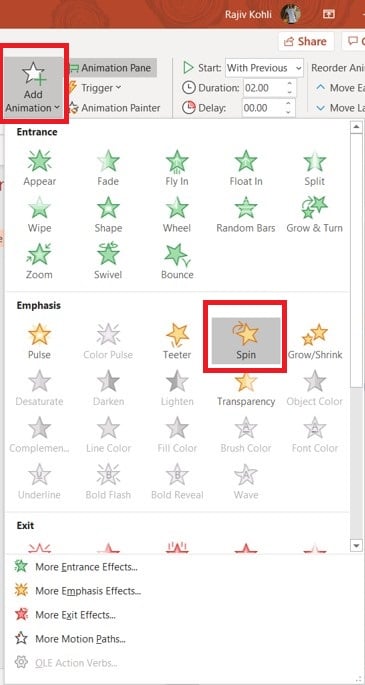
- We will begin by adding the SPIN animation to the Bogie Back Tyre by moving to the Animation tab and then clicking on the Add Animations drop-down button and then clicking on SPIN from the Emphasis effect category. So Beginners; that is how you apply animation effects to your objects in PowerPoint. That’s it and later are just techniques!
You can select the desired animation from the list.
- To explain this in more depth; take a look at Figure 1.5. Here in the Selection Pane, you can see that we hide all the other objects except for the Bogie Back Tyre by clicking on the Eye button once (and that is the answer to the question How You Can Show / Hide Objects in PowerPoint?). BTW, you can open the Selection Pane from the Home tab – Select the drop-down button under the Editing section.
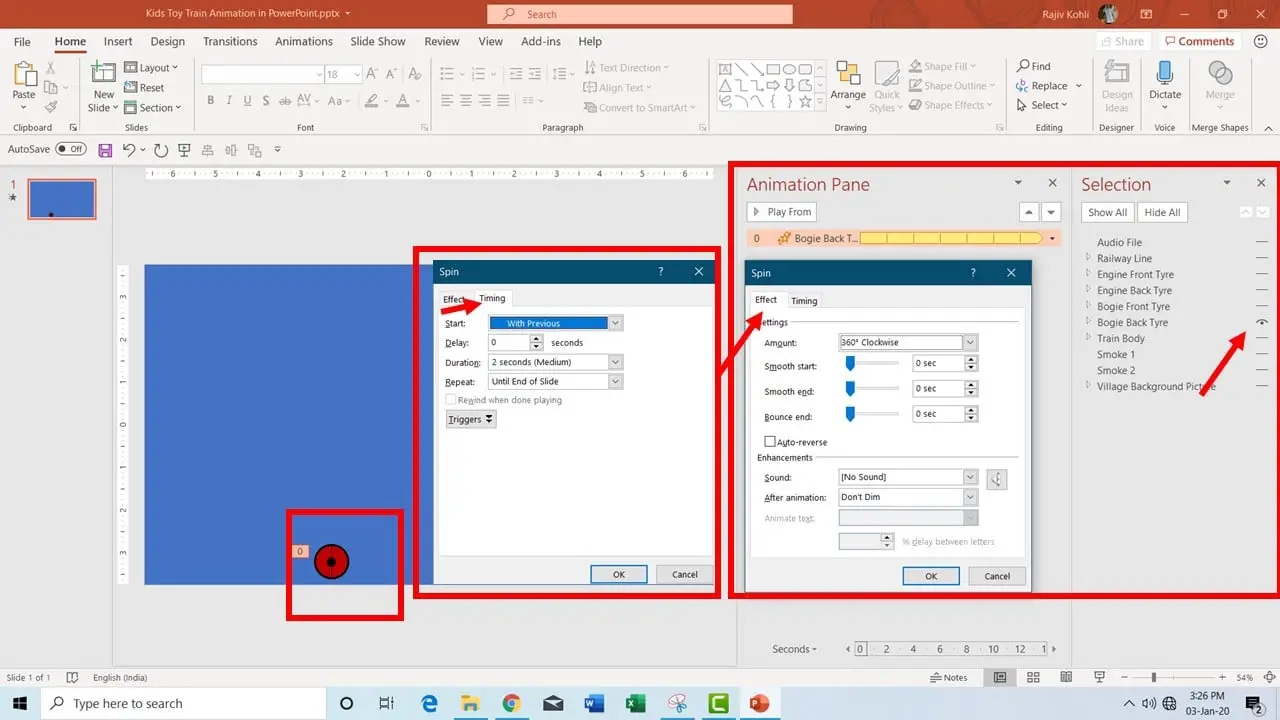
Double-clicking on effect in Animation Pane brings the Effect Options Properties window.
- After applying the SPIN animation effect to the Back Bogie Tyre, you can open the Effect Options Property window by double-clicking on the effect name in the Animation Pane and setting the properties as follows:
- From the Effect tab, set the Amount to 360 Degrees, no Smooth Start, End, and No Bounce timings, and No Auto Reverse, and those are the default settings of the SPIN effect.
- From the Timings tab, set Start With Previous with 0 Delay Timings, 2 Seconds Duration, and Repeat Until End of Slide. Never use After Previous unless necessary when you need to apply animations to multiple objects on a single slide.
- We need to apply the same SPIN animation to the rest of the train tires. So, you can either go with the Animation Painter to quickly replicate the same animation to the rest of the tires or you can repeat the above steps to apply the SPIN animation to the rest of the tires. Without the help of Animation Painter, you have to repeat the above steps 3 more times but the Animation Painter can make your life easier. Now, take a look at Figure 1.6:
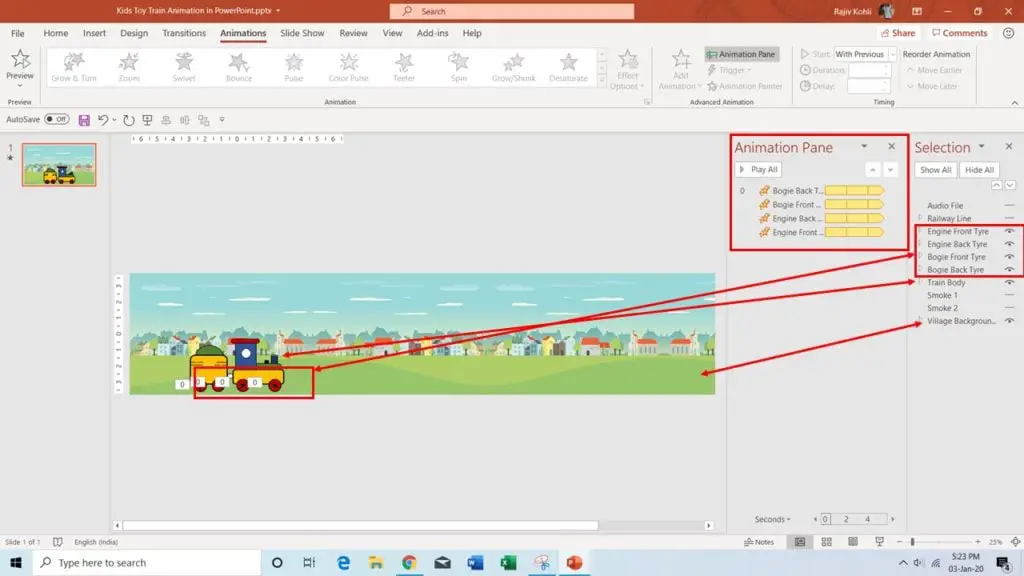
- Using the above steps, we have applied the SPIN animation on all the tires and the static Train Body is now on the top of the tires with a Village Background picture. Also take a look into Animation Pane, where you can see that all the tires now have the Spin animation with similar Effect Options as mentioned above.
- Audio File has been added to create an impression! You can download Free Stock Sounds from Soundbible or Google for the said Search Term.
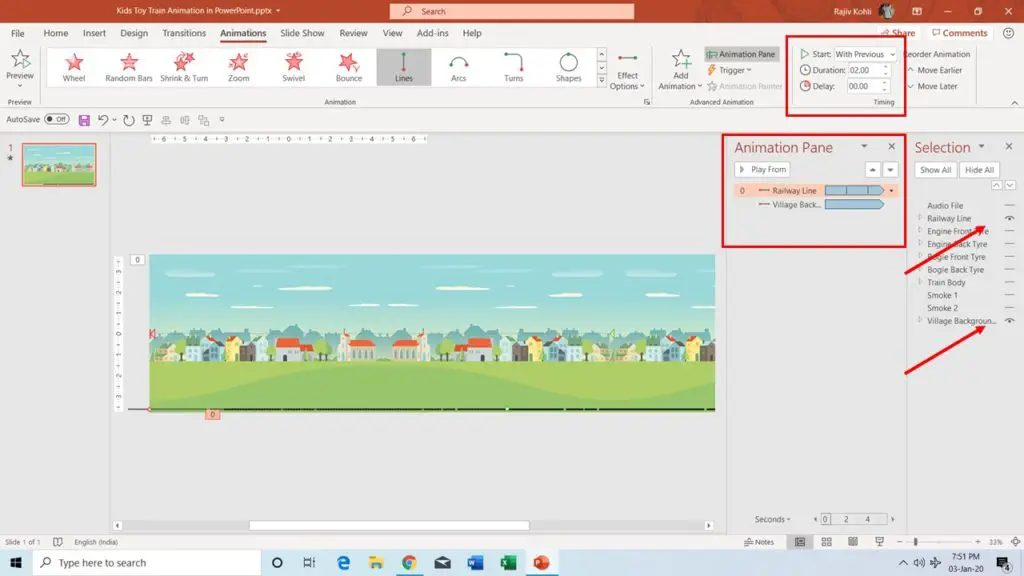
- Railway Line is Grouped Straight Lines – with Cap Tab set to Round from Format Shape properties window, which you can open by right-clicking on a Shape and choosing Format Shape; then under Line. We applied the Motion Path effect to the Background Village image and Railway Line and the rest of the objects and animations are static. Nothing is moving except for these two.
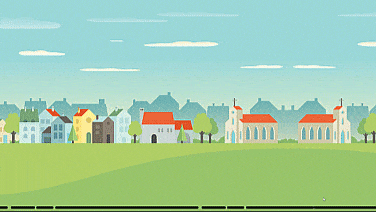
- Background Village Image actually is a group of multiples replication of the same image while flipping them horizontally. Take a close look at the picture and you will guess what I am talking about (same houses, you see!). Also, take a look at the length of the Motion Path and you can apply the Left Motion Path by clicking on the Animations tab – Add Animation – More Motion Paths – Left.
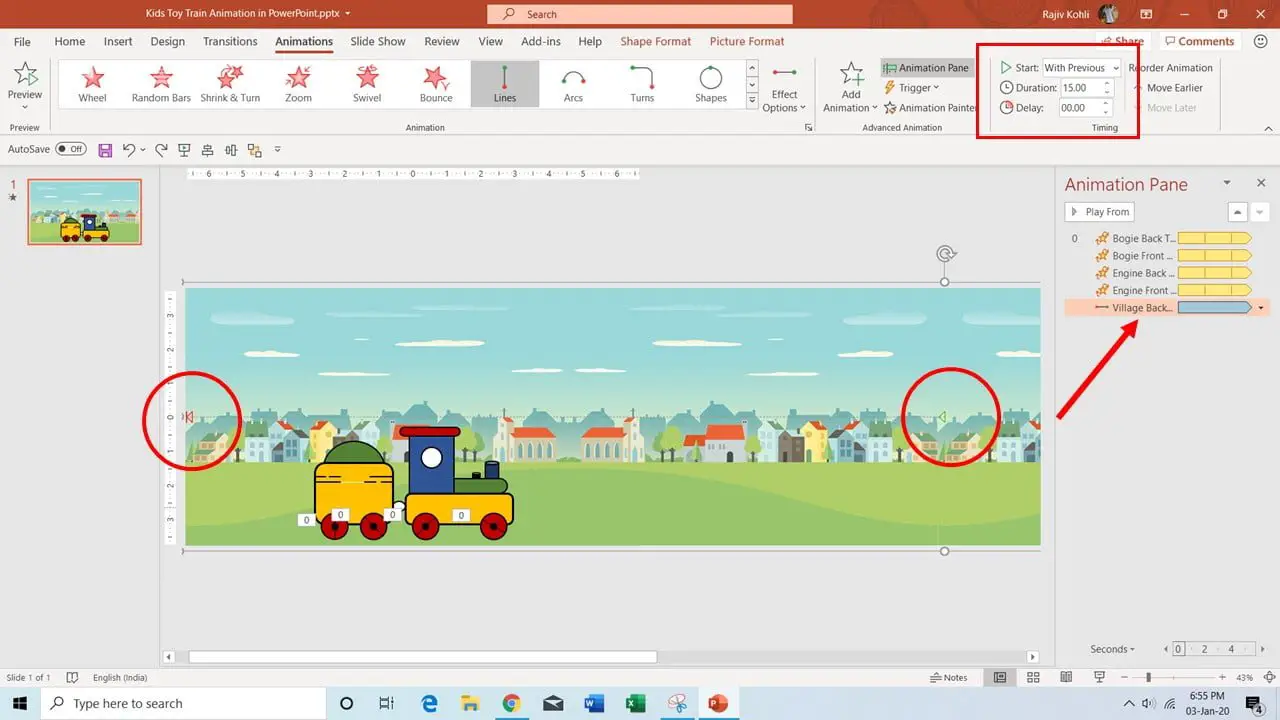
- In Figure 1.7 you can see the Starting Point of the Left Motion Path in the Red Circle on the right with a Green Rectangle and Ending Point in the Red Circle on the left with Red Rectangle. Keep in mind that when you need to create an infinite loop of animation without any flicker then you must be drawn an accurate Starting and Ending Point for the objects in PowerPoint.
- The duration of this Motion Path effect is 15 Seconds, which is long enough and is just for illustration purposes. When making animations in PowerPoint, you might want to show these kinds of scenes just for 3 to 5 seconds. So basically, you don’t have to take much care of what should be the exact length of the motion path.
- The same goes for the Railway Line object. Apply the Left Motion Path with a short duration of just 2 seconds. The objects which are closer should have faster motion than the objects which are further away. The following two figures will illustrate to you that more clearly.
- Finally, the Smoke Effect. Up Motion Path with Fade Out (or Exit) effects has been used for Smoke Effect. A short Up Motion Path effect has been applied to White Color Fill Oval Shapes with a time duration of 2 Seconds and Repeating Until the End of the Slide from Effect Options. No Smoothness, No Bounce, and No Auto Reverse, please!
- Secondly, Fade Out / Exit effect on the same Oval Shapes but with a Delay Timings of 0.50 Seconds because we want those Oval Shapes to fade out after a little while moving upwards. The duration of this effect is just 0.25 Seconds. As both these effects have different duration timings and one effect starts with a delay will create an unseemingly (ovals coming appearing from different locations) bubble or smoke effect as shown below:

Smoke or Bubble Effect

When you combine all the above techniques you get the Kids Toy Train Animation Scene in PowerPoint and I hope you got The Teacher Point!
Watch Train Animation in PowerPoint Tutorial
You can create this Toy Train Animation in the following versions:
- PowerPoint 2007
- PowerPoint 2010
- PowerPoint 2013
- PowerPoint 2016
- PowerPoint 2019
Download Train Animation PowerPoint PPT
PPT Info.
PowerPoint Template
Train Animation
File Type: PPT / PPTX
File Size: 257KB
Number of Slides: 1
Download TRAIN ANIMATION POWERPOINT TEMPLATE
DON’T FORGET TO LEAVE A RESPONSE.