


Introduction
In this Pipes Animation in PowerPoint Tutorial, we will use the Merge Shapes – Subtract command for Masking purposes. Can we do animation in PowerPoint using Masking Techniques like After Effects? Technically, the answer is, No! There are several reasons but in my opinion, the Slide Layout and Shape Layers are not up to the mark in PowerPoint to use for masking to hide objects behind one another during animation.

Turn On Volume
Used Merge Shapes – Subtract command to create an illusion of masking, where Colorful Ovals are hiding or moving in/out through the cylindrical objects.

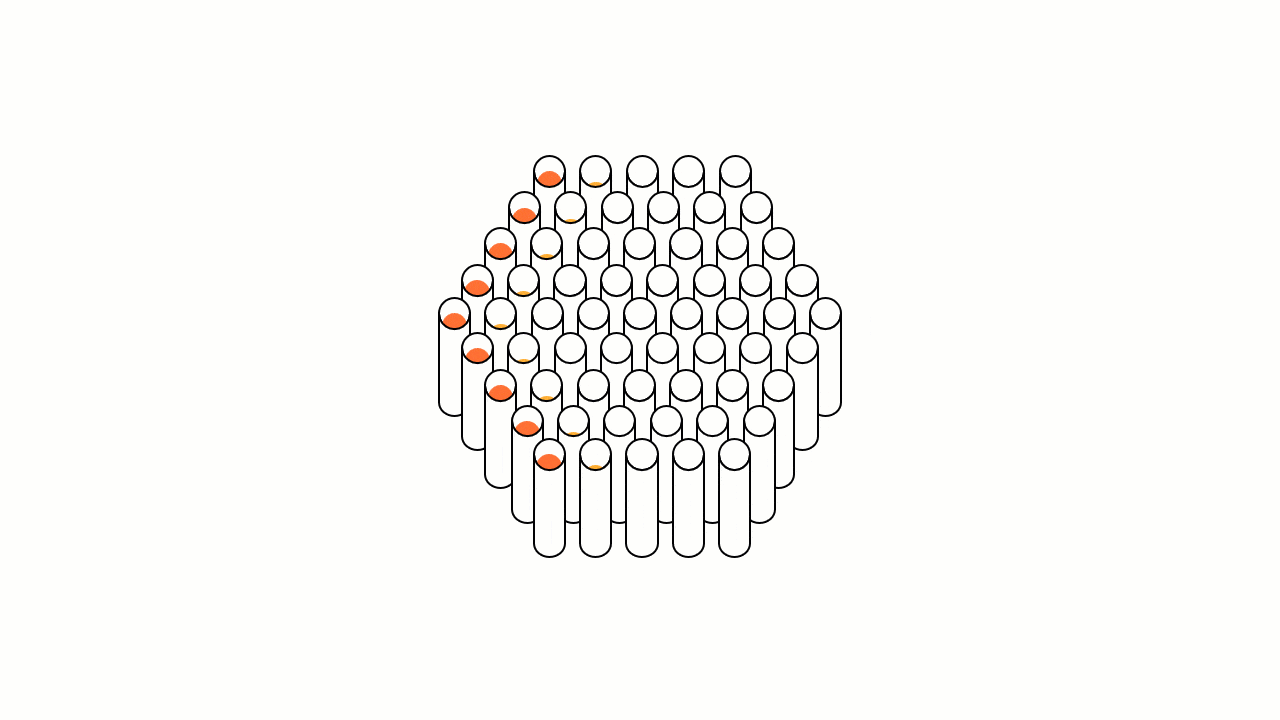
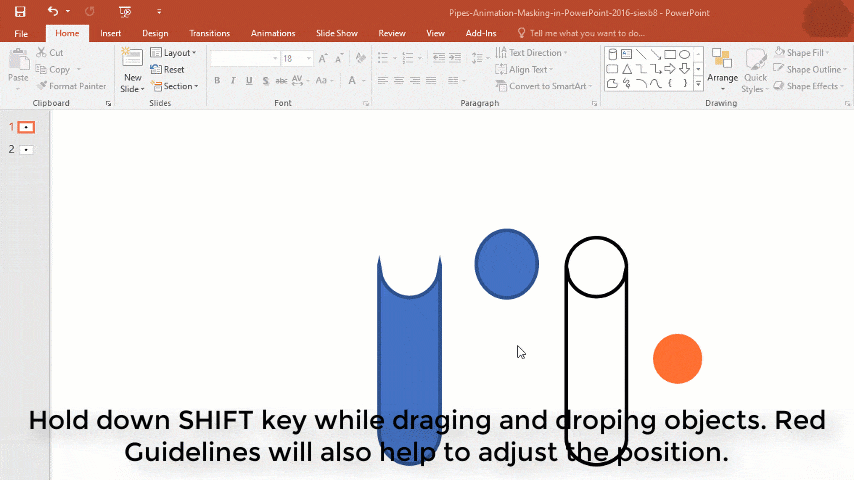
The animation looks cool as it seems that all the colorful ovals are preciously moving in and out through the open holes of the cylinders. But if we talk about PowerPoint Shapes then you cannot hide an Oval Shape inside a Cylindrical Shape through its open mouth. Look at Figure 1.1:

Send To Back or Send Backward
In Microsoft PowerPoint, you can place the shapes or objects either on the front or back of the other objects on the slide. What we want in this animation is to create an illusion as the ovals are moving inside the cylinders.
How To Use Subtract Command in PowerPoint?
As we are talking about Subtract command, so if you are using PowerPoint 2010 then you might not find that command in Office Ribbon. You can read our article on How To Enable Merge Shapes in Microsoft PowerPoint 2010 for more info but if you are using a later version then you can easily accomplish the following tasks.
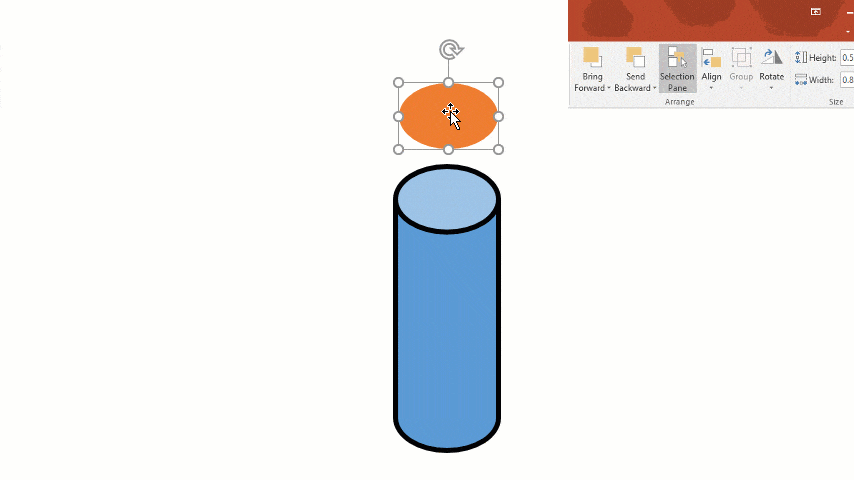
Basically, we just subtracted a cylinder shape into 2 parts: Body and Mouth. Take a look at Figure 1.2:

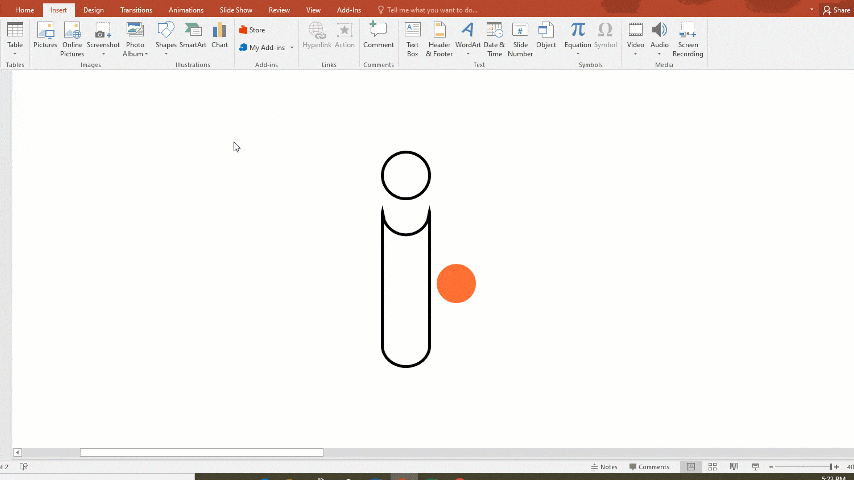
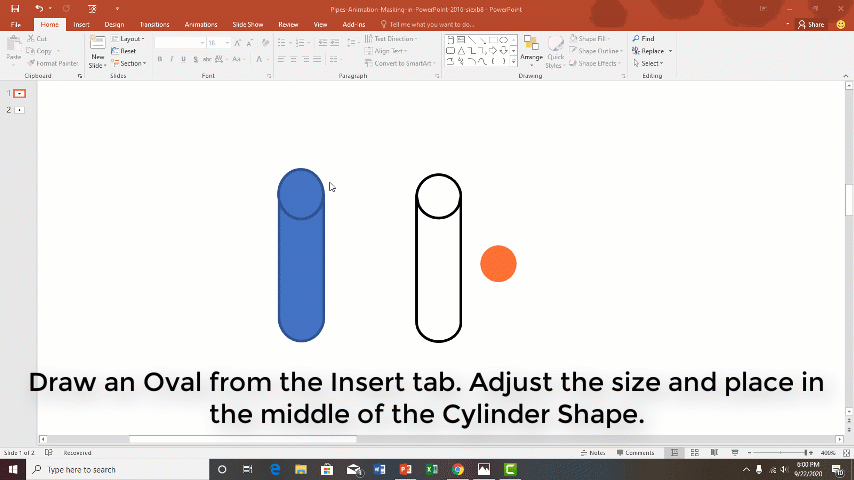
Drawing a Can / Cylinder and Oval Shape
Tip: Hold down the ALT Key while resizing the oval and you can then freely adjust the size according to mouse movement.
Holding ALT key behaves like you are turning ON / OFF Snap To Object Feature while resizing.
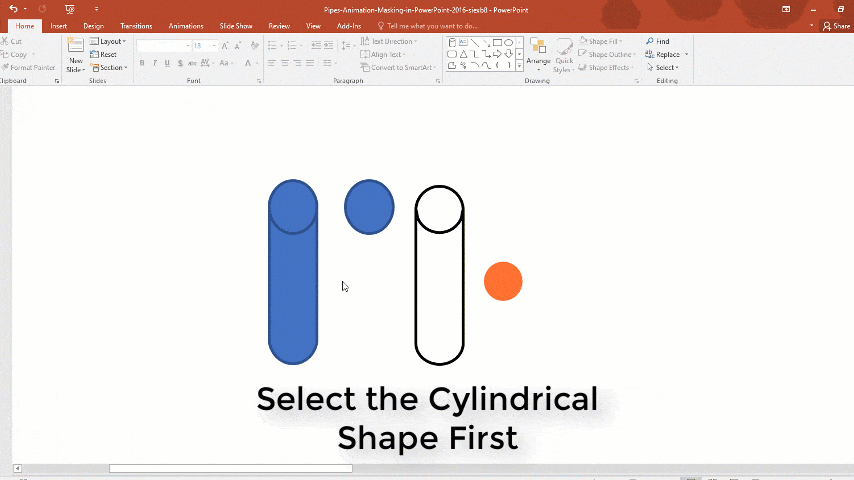
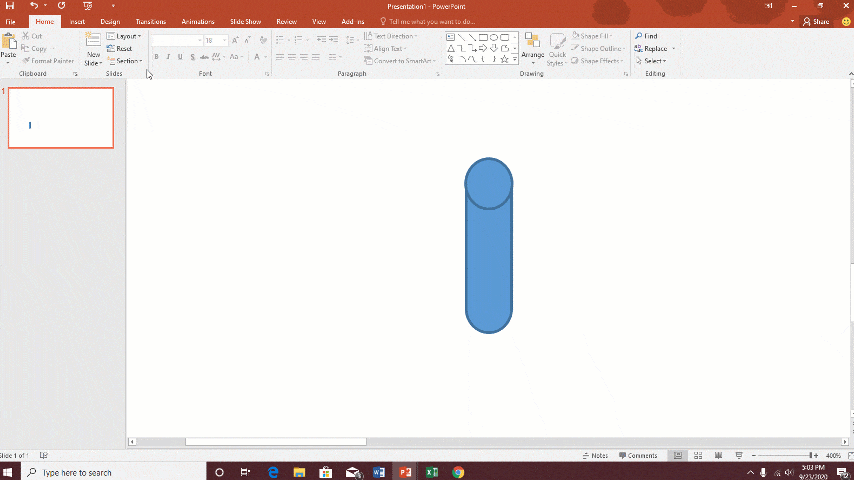
Duplicating Oval Shapes
- Make a duplicate of the same oval and place it sideways. You can select the Oval and then can press CTRL+D to make a duplicate. Now, select the Can/Cylinder Shape first and then select the Oval which is on top of the Cylinder shape by holding the SHIFT key. You can hold down the SHIFT key when you need to select more than one object in PowerPoint.
- Once, you selected both of the objects, go to the Format tab, click the Merge Shapes drop-down button, and then click Subtract command. See Figure 1.3:
Merge Shapes – Subtract Command in PowerPoint
- Now, place the duplicated oval on top of the cylinder shape to illustrate both of the objects as a single object.
See Figure 1.4:
- Draw another oval and apply a different Fill Color to it, change the Outline to No Outline. You can either send the middle oval behind the cylinder shape right now or you can do it later after applying the Motion Path effect to it. You can place oval the oval In-Front or Behind the Cylindrical Shape by clicking on Send To Back / Bring To Front commands from the Format tab. Later, you have to bring the Cylinder Shape on top of the other 2 shapes. See Figure 1.5:
Apply Motion Paths Animation Effects
Now we only need to apply the Motion Path Animation Effect to the oval in the middle that we want to move up and down and that way we will have one complete Pipe with 3 objects in total and one of them is animating by moving up/down in the path.
As our middle oval that we want to move up/down is now behind the subtracted Can/Cylinder shape, we need to use the Selection Pane to hide/unhide specific objects that we want to work with.
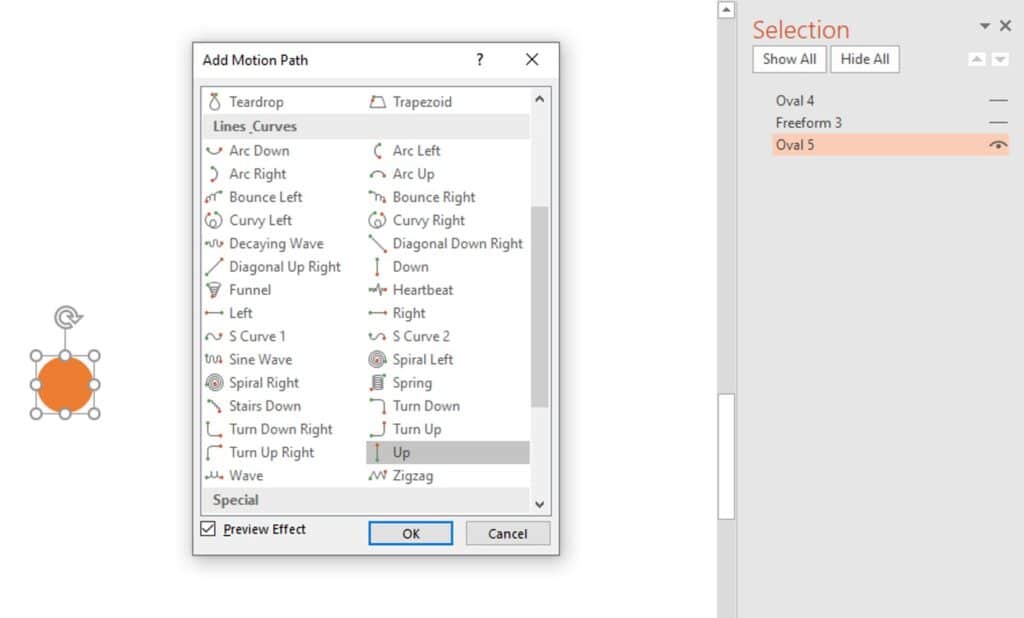
- You can bring the Selection Pane from the Home Tab – Select the drop-down menu and then click Selection Pane and you will see 3 different objects. As we subtracted the Can/Cylinder shape, it will be displayed as a Freeform shape in the Selection Pane. As we want to apply the Motion Path effect to the middle oval, which is Oval 5 in our case, so I will hide the rest of the objects by clicking the Eye-button next to them. See Figure 1.6:
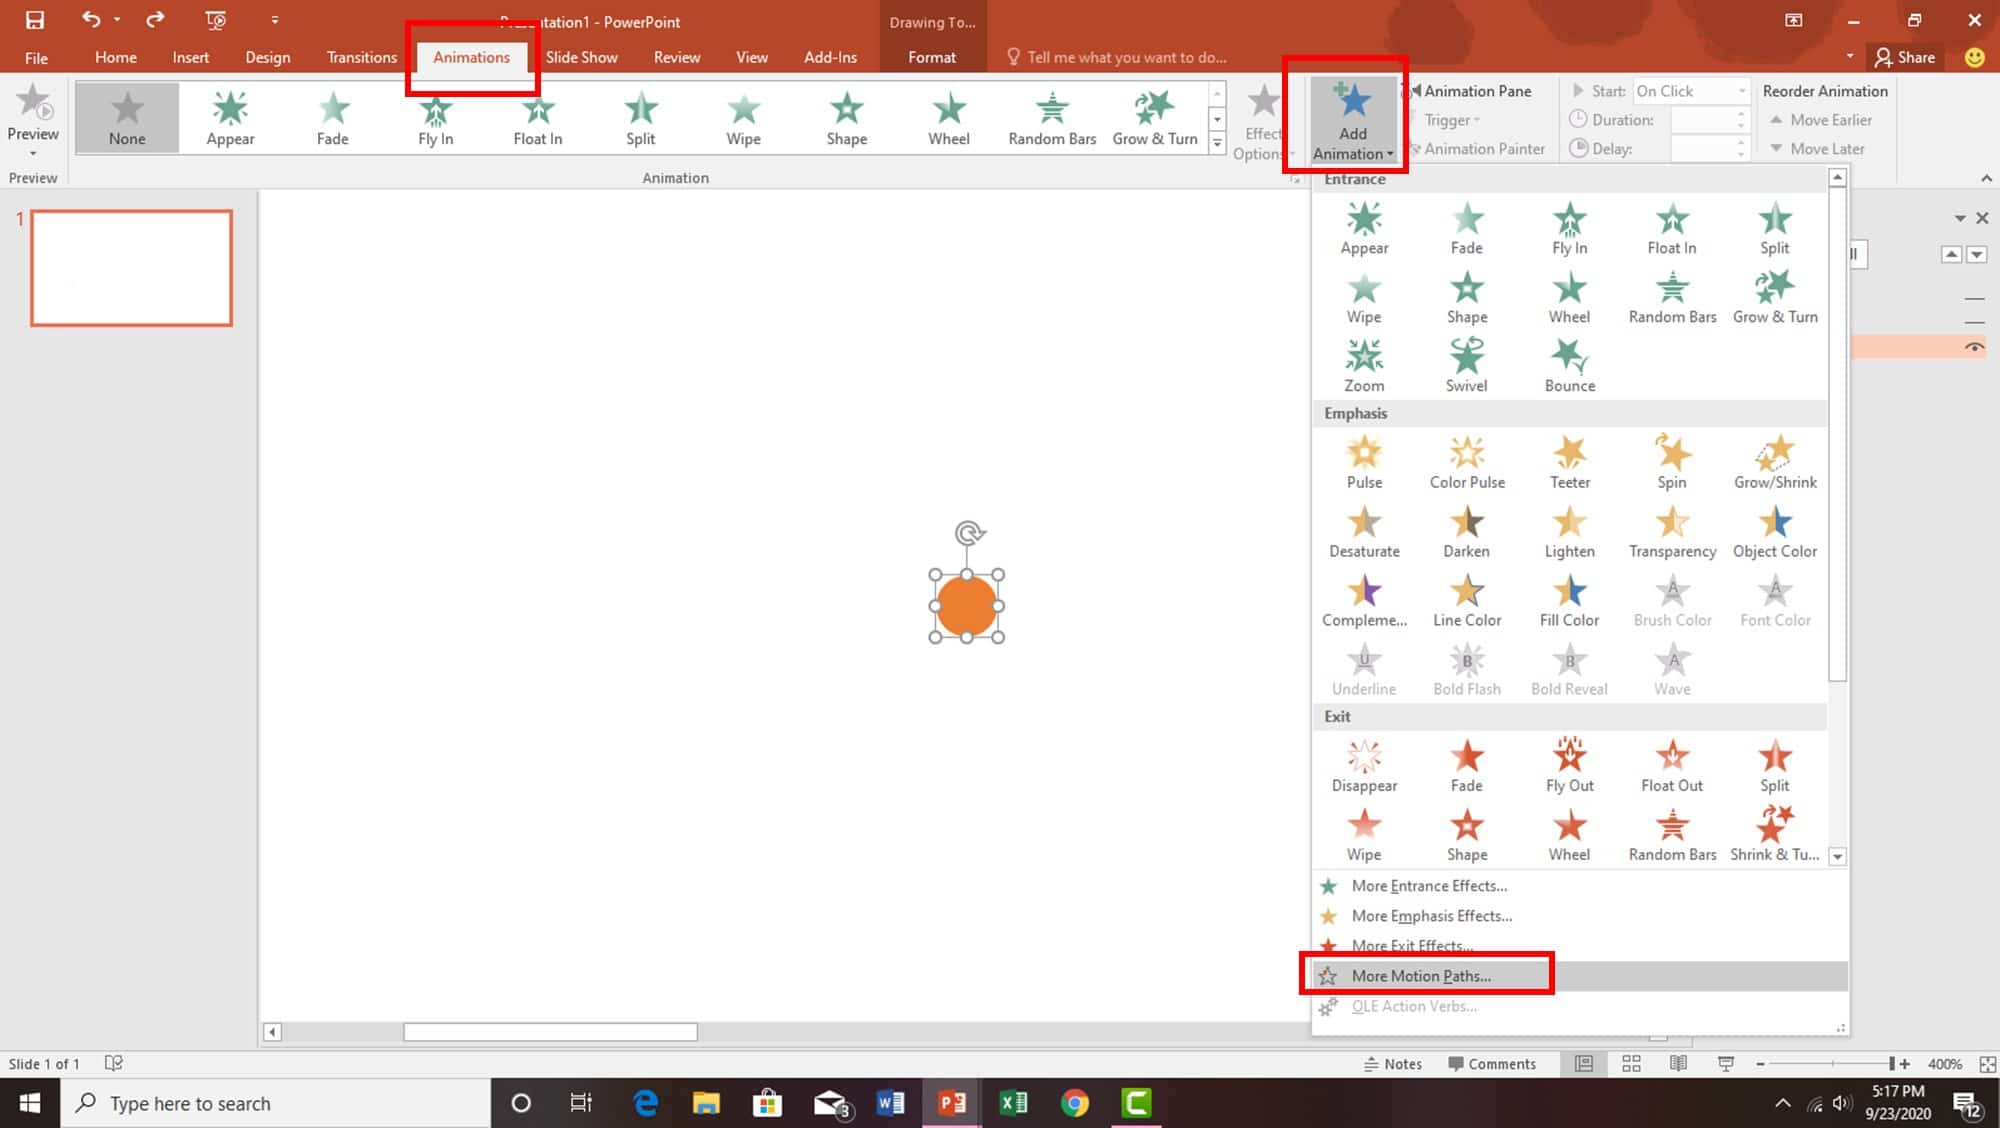
- Select the middle oval and then go to the Animations tab – click the Add Animation drop-down button and then click on More Motion Paths and then apply the Up Motion Path. See Figure 1.7 and Figure 1.8:

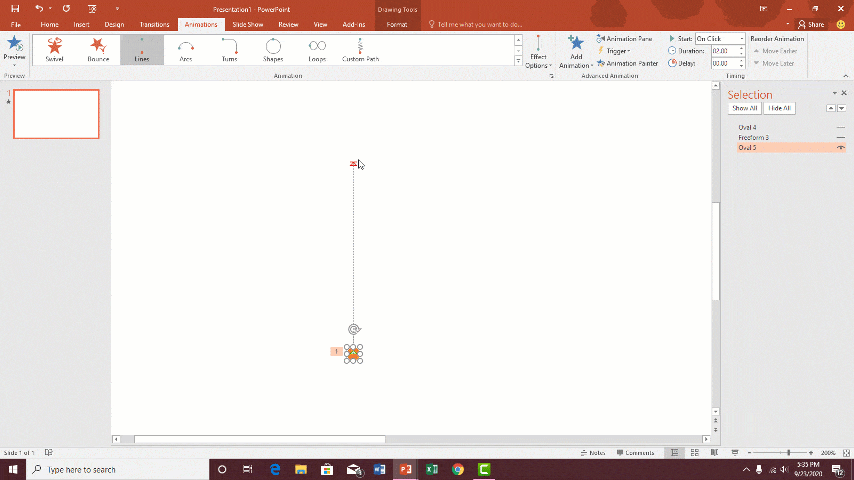
That will apply a default length Up Motion Path of 2″ inches (around 1.86″ exactly) to the oval. You can adjust the length of the Motion Path as required. Then you need to configure the Effect Options by double-clicking the effect from the Animation Pane. See Figure 1.9:
I will right the rest of the steps soon. Meanwhile, you can watch our video tutorial for the rest.

Watch Pipes Animation in PowerPoint Tutorial Video

The article also applies to the following versions:
- PowerPoint 2010
- PowerPoint 2013
- PowerPoint 2016
- PowerPoint 2019
- PowerPoint 2021
- Microsoft PowerPoint 365
Download Pipes Animation PowerPoint PPT
PPT Info.
PowerPoint Template
Youtube Intro
File Type: PPT / PPTX
File Size: 69KB
Number of Slides: 2
Download PIPES ANIMATION POWERPOINT TEMPLATE
DON’T FORGET TO LEAVE A RESPONSE.