I just thought of writing this article on How To Use Morph Transition in PowerPoint while working on my next project Seal Animation. I do have a list of at least 30 things that can be considered for improvement in the next version of PowerPoint but for the sake of Happy Accomplishment of my next projects, you should read the following about Morph Transition.
Even if you have an older version of PowerPoint than 2013 then you can download the presentation above and just try changing the objects from the slides and see the Slideshow. Hurray! You can use this presentation as a Morph Replicator.
Morph On Grouped / Ungrouped Objects
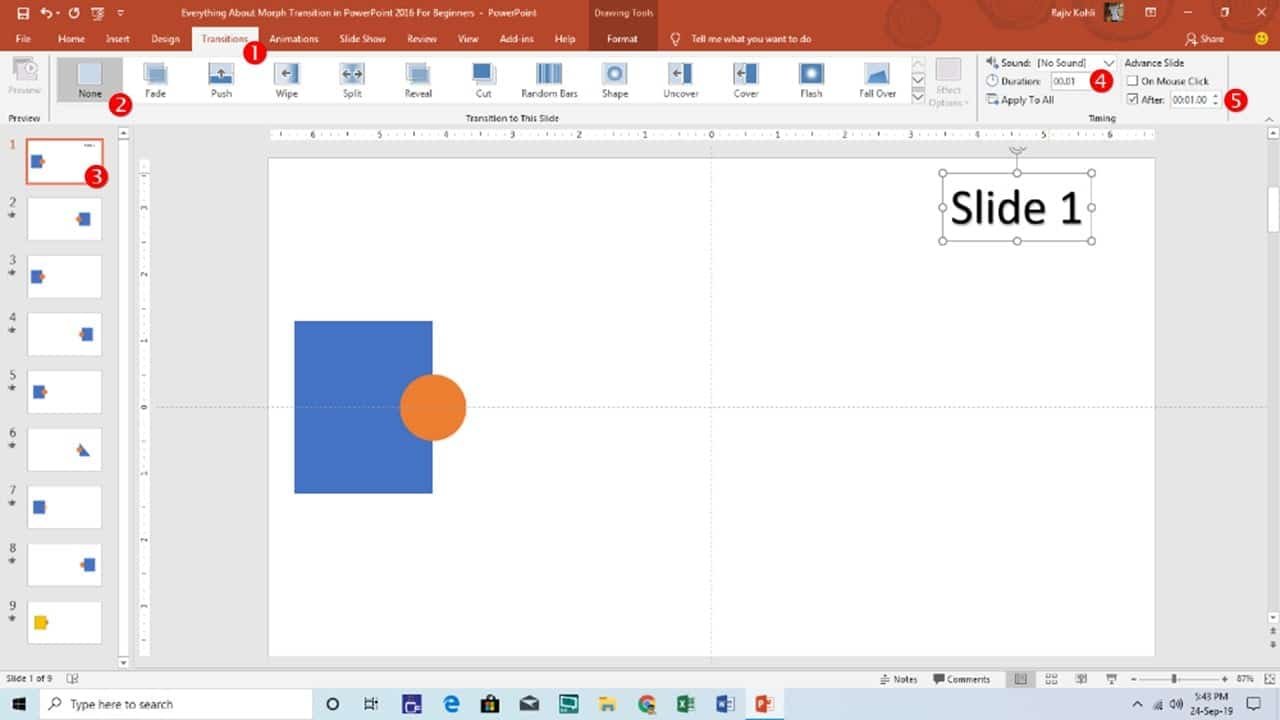
Slide 1 has no Morph Transition
I haven’t found applying Morph on the very first slide much more important as it will behave like a Fade In transition. To remind you, Beginners, the default timing for Morph is 2 Seconds and the Advanced Slide option in the Transition tab is default set to “On Mouse Click”. Figure 1.1 indicates that No Transition has been applied on the first slide and the next slide will begin automatically after 1 second. There are two objects on the slide; 1 Rectangle and 1 Oval on top, which are Grouped objects.
In this presentation, we should start looking from the 2nd slide on which Morph has been applied and where the position of the Grouped Objects has been changed. See Figure 1.2:
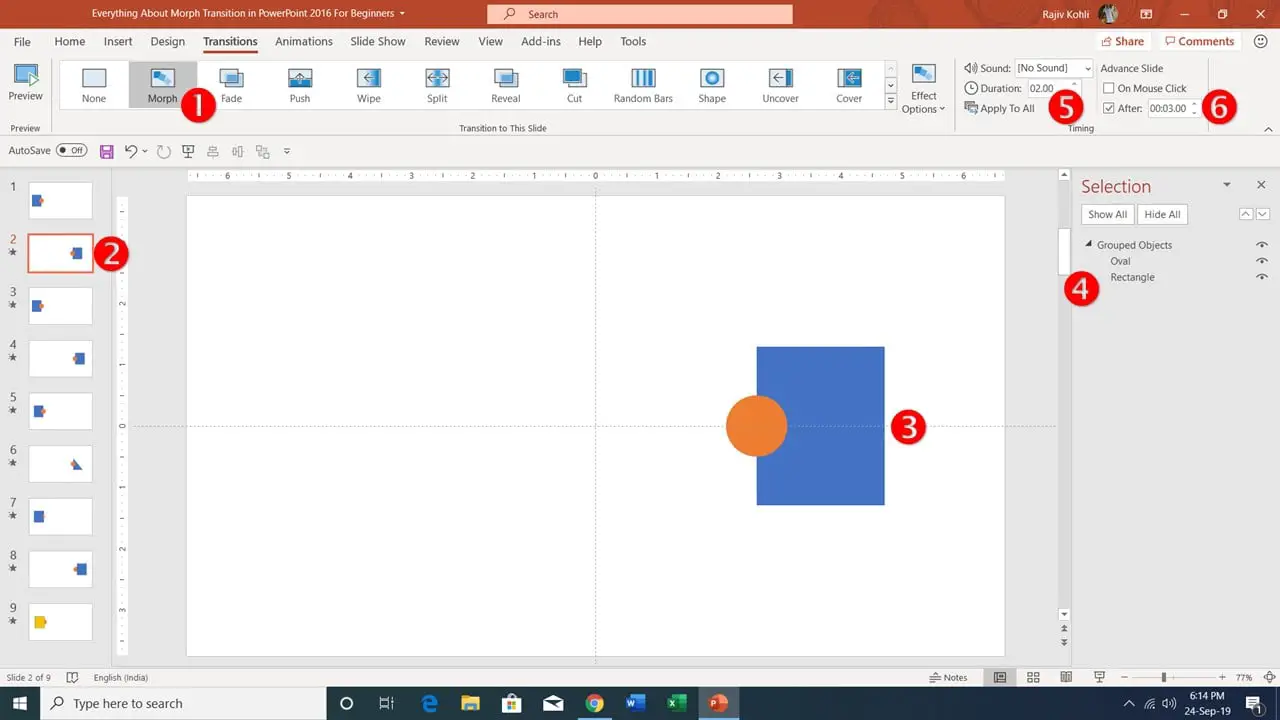
Slide No. 2 with Morph Transition
During the Slideshow, Slide 2 will be shown after 1 Second and here the Morph Transition will happen for 2 seconds. As we have shifted the Grouped Objects from left to right and also changed the Oval position within the group. So, when you will see the slideshow, it will look like Oval is fading out from one place and fading in at another.
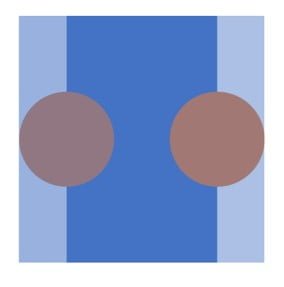
Slideshow from 1st to 2nd Slide
Maybe that is not what you would like to show to the audience. So, it indicates that Morph Transition in PowerPoint doesn’t behave properly on Grouped objects. What does that exactly mean? Imagine, working on a presentation having hundreds of objects, which are divided into several groups and subgroups and you want to animate them using Morph then Forget it!
Let’s talk about our 3rd slide. On that slide, we moved the Grouped Objects to the left again and then ungrouped them as you can see in the Selection Pane in Figure 1.4:
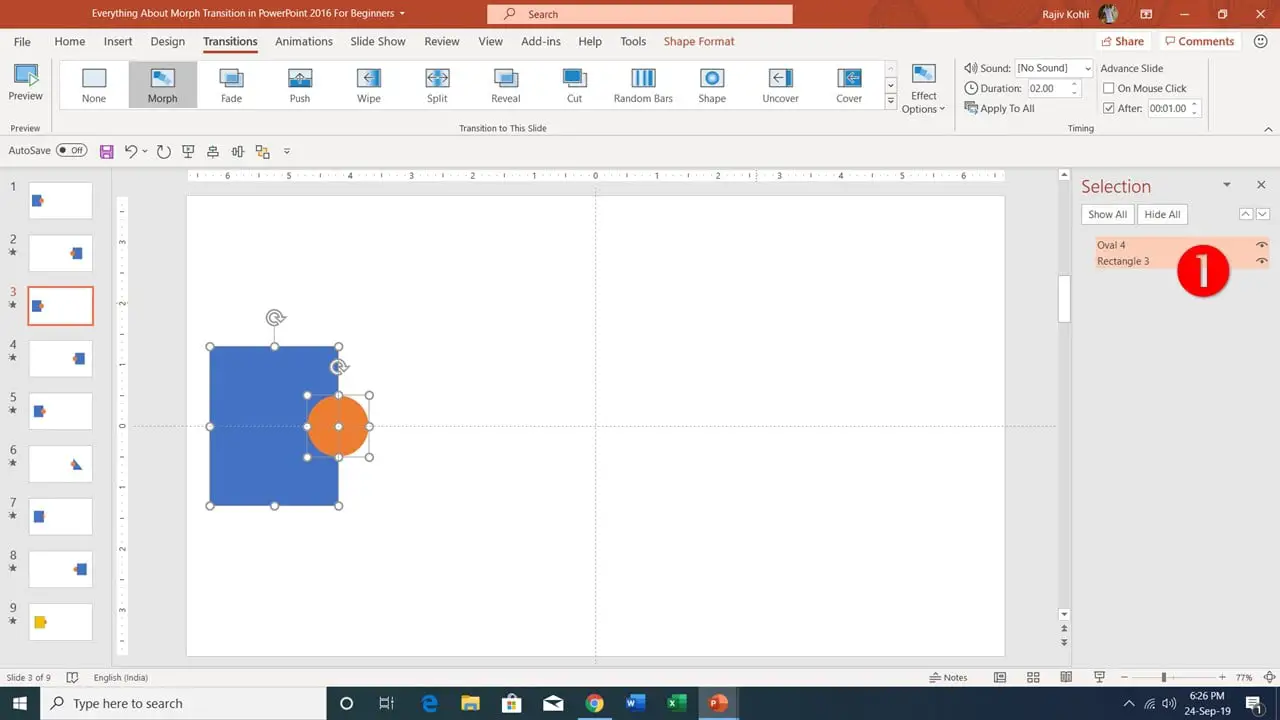
Shows both objects have been separated
But what you will see during the advancement of the slideshow from the 2nd to the 3rd slide is the Transportation of both of these objects from right to left. You might like to use this kind of effect in some presentations but that can also be accomplished in other ways without using the Morph transition in PowerPoint.
The exact behavior of Morph can be found between the transition of the 3rd and 4th slides. On Slide No. 4, we moved both of the ungrouped objects to the right side again and also changed the position of the oval to the right. See Figure 1.5 for the exact Morph transition in PowerPoint:
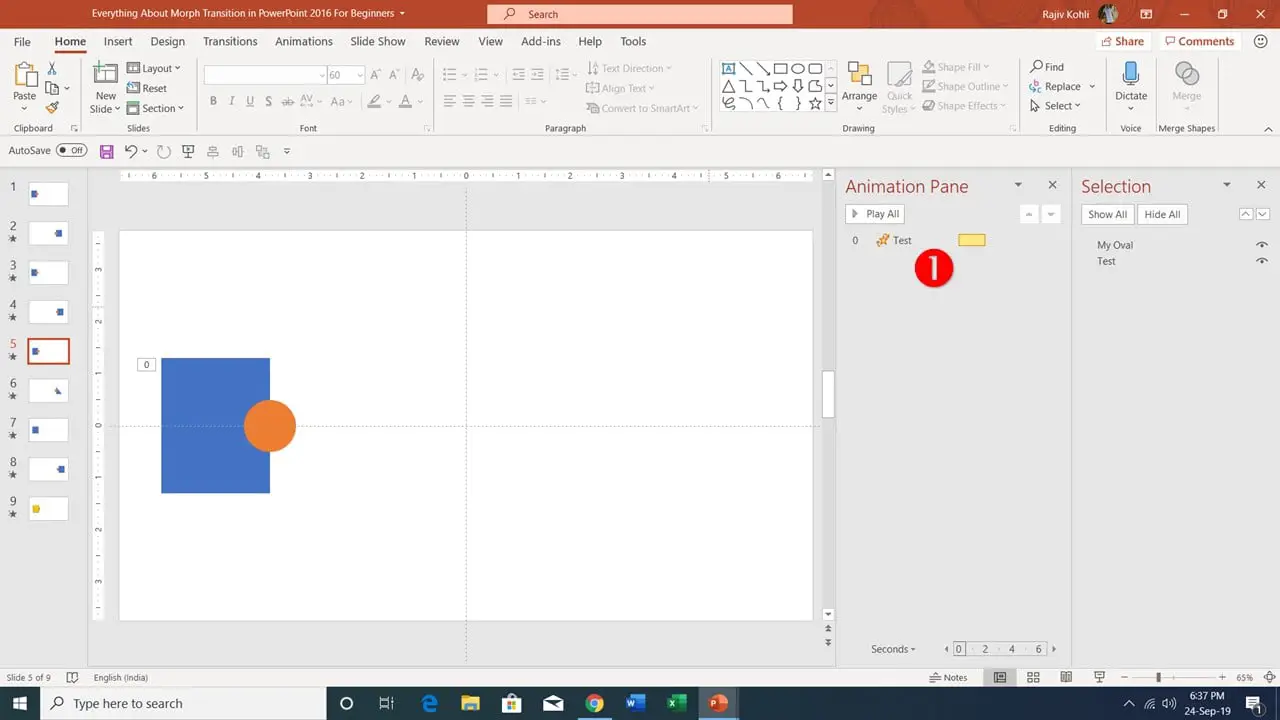
Spin animation has been applied on Rectangle
Slide No. 5 has been added just to illustrate that the Spin animation on Rectangle will take effect after the Morph Transition will end. So, you should keep in mind that all the animations will start playing after the transitions end in PowerPoint. Don’t expect the animations to start playing along with the Morph effect.
On Slide No. 6, we again moved the objects to the right but this time also removed a Point from the Rectangle using the Edit Shapes – Edit Points command by right-clicking on one of the Points and then choosing Delete Point from the context menu.
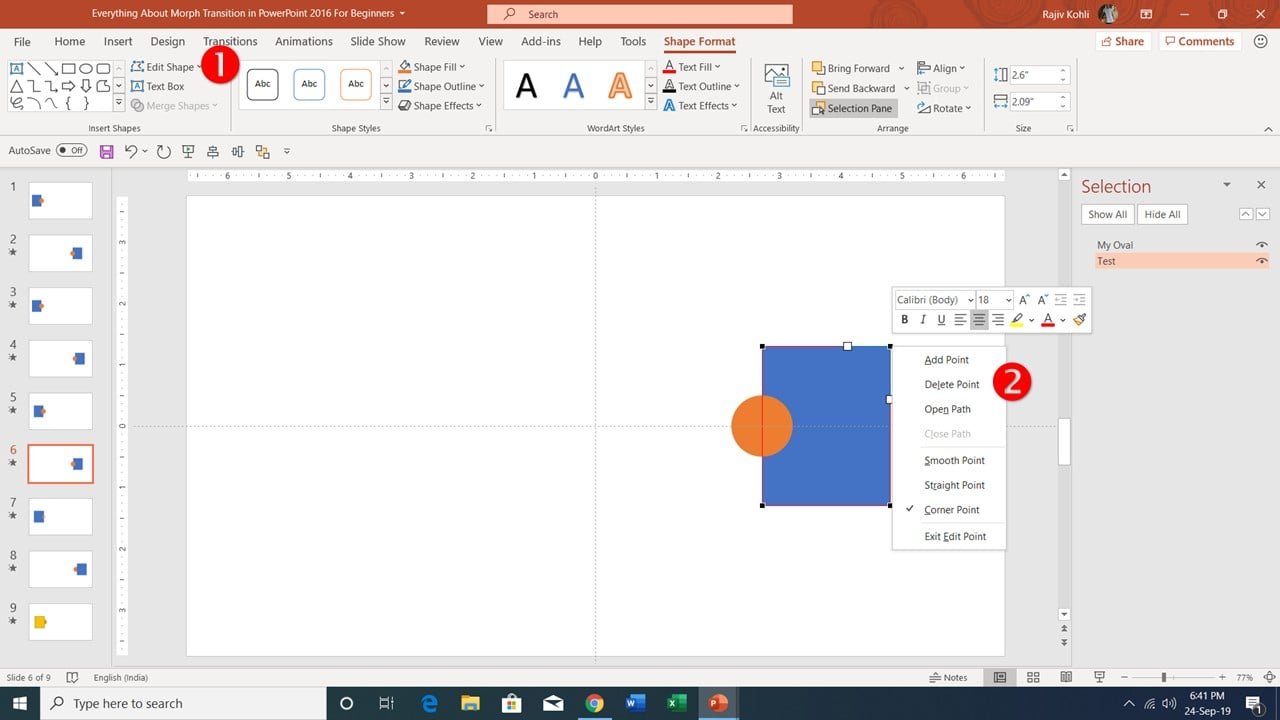
Edit Points is not effective with Morph
That was just to illustrate that if you are planning to change the shape using Edit Points then how the effect will appear during the slideshow is not what you will like to show the viewers. The oval will move properly but the Rectangle (which is now a Triangle) will again have a Transportation effect. So, the conclusion is that you can’t even use Edit Points with the Morph Transition and I think that the most important feature it lacks and the next one corresponding to the same category.
On Slide 7, just to demonstrate to you that you even can’t use Change Shape from Edit Shape. On this slide, we moved both objects back to the left and changed their shape using the Change Shape command from the Shape Format tab as shown in Figure 1.7 but again you will see a Transportation effect during a slideshow.
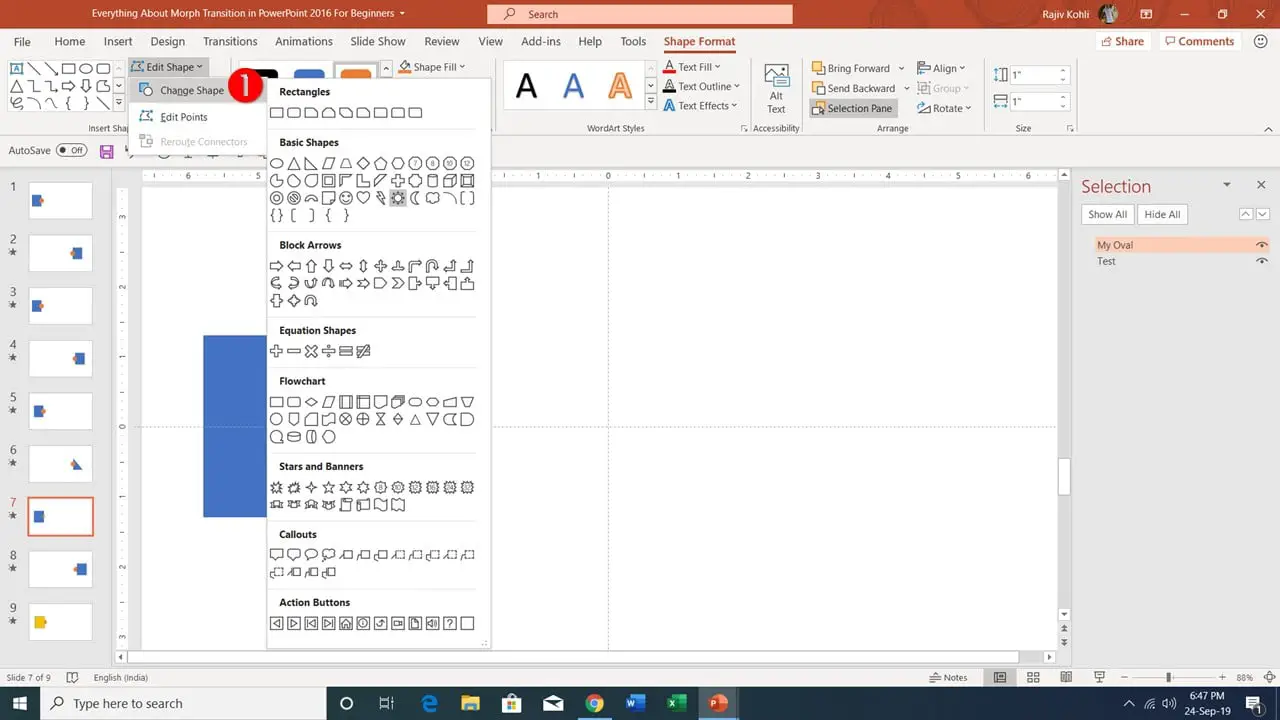
Using the Change Shape command
Many great effects can be achieved in PowerPoint if Morph lets you use the Edit Points and Change Shape options while showing them in the same manner as we saw the real Morph Transition on Slide No. 4. For instance, imagine creating an effect like a Rectangle moving from left to right from Slide 1 to 2 but you also changed the Rectangle to an Oval using Change Shape and want to see the Rectangle into an Oval during the Motion. But unfortunately; Transportation again!
On Slide No. 8, we tested the Send To Back and Bring To Front options over the Morph Transition. If you are sending back or bringing some objects forward from one slide to another then they do not create a nice animation. They just appear on top or get behind immediately without any animation and if you are also using Change Shape along with then again the transportation effect.
The last thing we tested on Slide No. 9 was changing the Fill Color, Line Color, Line Style, and Line Width to see the effect and it worked great! You see the change in Colors and Line Style during the Morph effect in motion.
I hope you got The Teacher Point.
Watch How To Download Morph Transition in PowerPoint Video Tutorial
The article How To Use Morph Transition also applies to the following versions:
- PowerPoint 2013
- PowerPoint 2016
- PowerPoint 2019
- Office 365
When someone writes an post he/she keeps the thought of a user in his/her mind that how a user can know it. So that’s why this post is great. Thanks!|
I always spent my half an hour to read this website’s posts daily along with a mug of coffee.|
constantly i used to read smaller articles or reviews which also clear their motive, and that is also happening with this paragraph which I am reading here.|
Paragraph writing is also a fun, if you know then you can write or else it is complicated to write.