
Frankly speaking that there is nothing much to do. Exact picture placements with Grow/Shrink and Motion Paths are used for How to create 3D Movement From A Still Photo in PowerPoint Tutorial and you can create this effect even in earlier versions of PowerPoint.
As always, showcasing some screenshots of the Presentation with Animation Pane and Selection Pane and I’m sure that you will easily guess what PowerPoint Tricks I used to accomplish the task.
About the Presentation
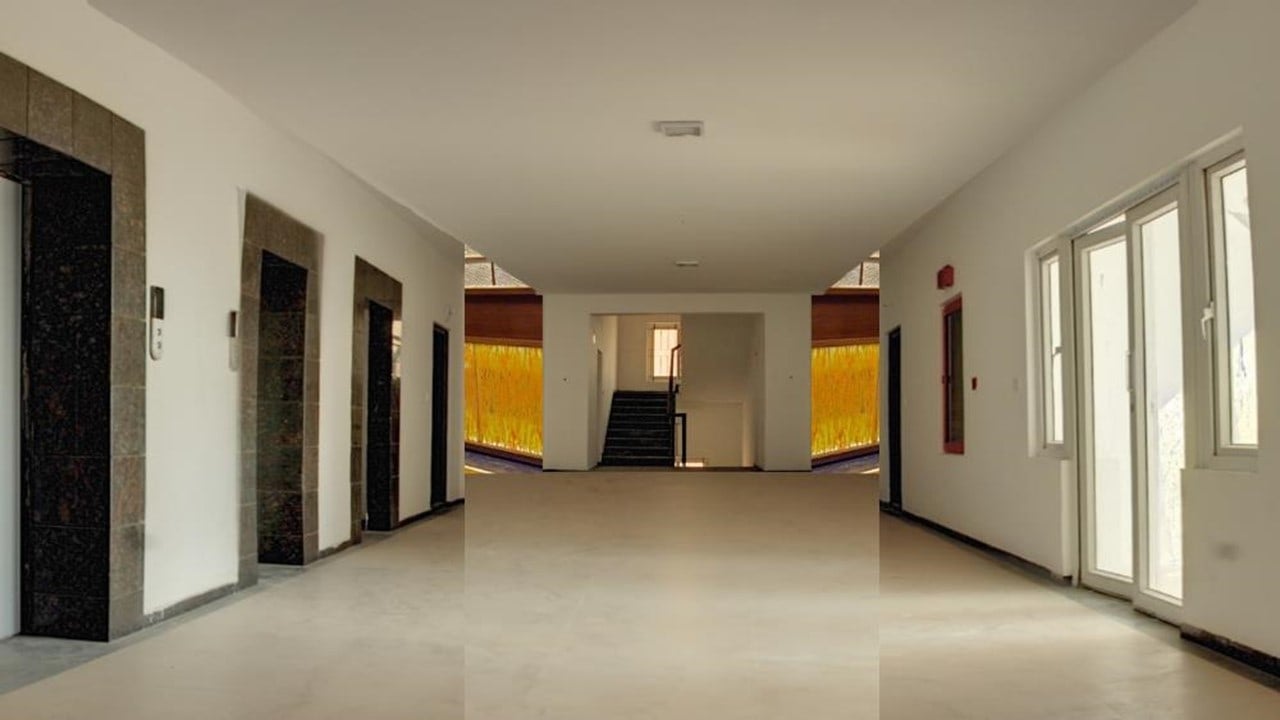
- Figure 1.1 shows all the Pictures placed at specific positions on the slide. A total of 7 Pictures have been used out of which 5 are a replication of the same picture; duplicated and cropped into 5 different pictures. Their object names are from Picture 1 (1) Roof, Picture 1 (2), Picture 1 (3), Picture 1 (4), and Picture 1 (5).
- The rest of the 2 pictures; Picture 2 Pathway 1 and Picture 3 Pathway 2; have been used to show what comes after the Corridors and before the Stairs.
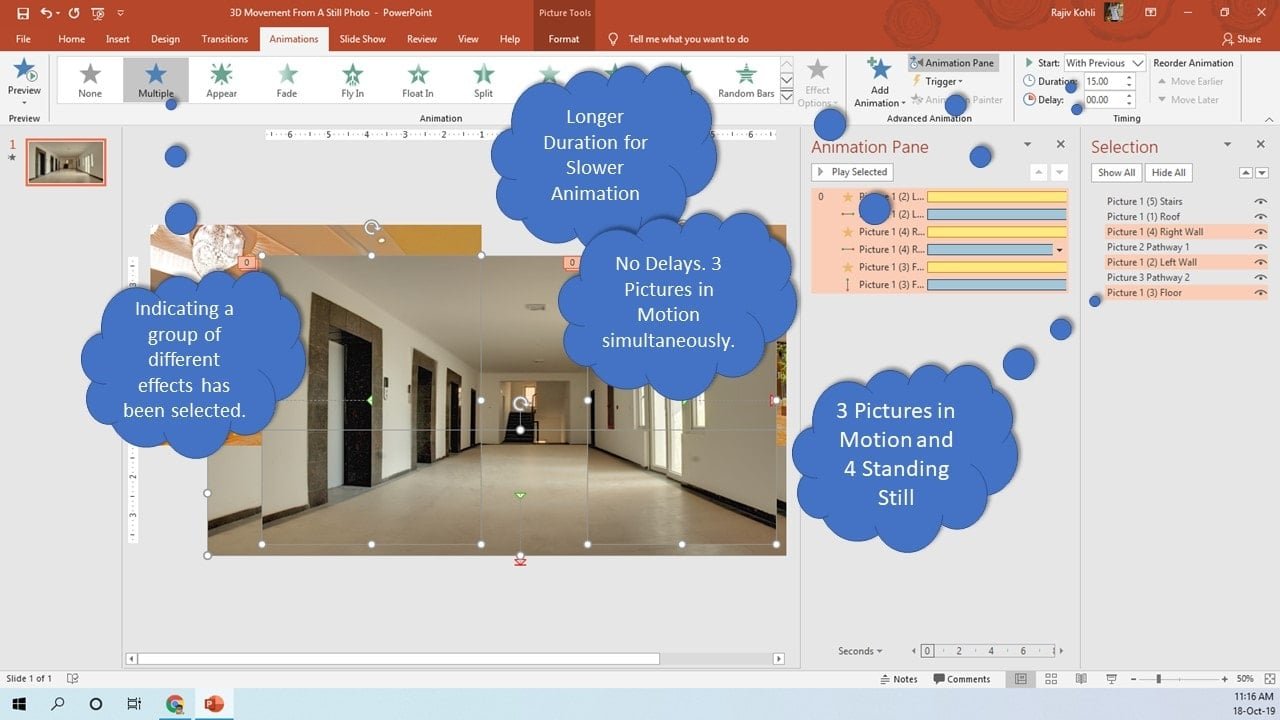
Figure 1.1
Animation Effects
- Picture 1 (1) – Roof, Picture 1 (5) Stairs, Picture 2 Pathway 1, and Picture 3 Pathway 2 are standing still as we have not applied any animation to them.
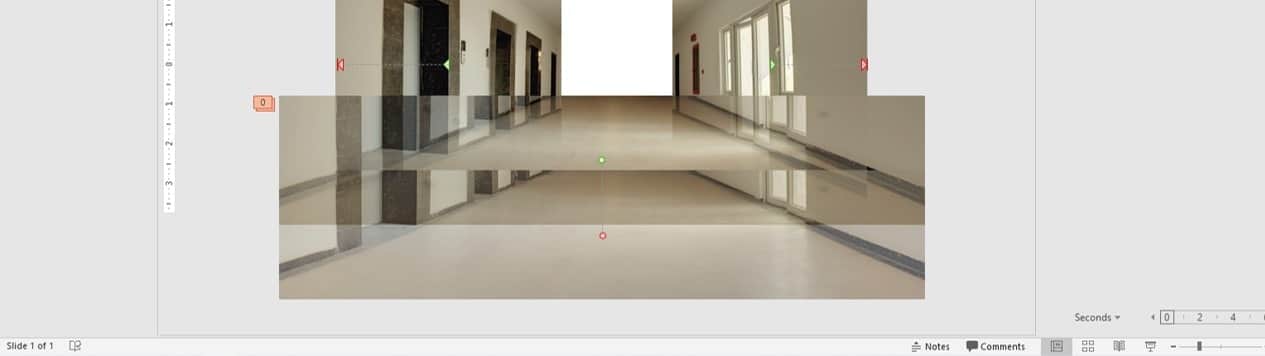
- Picture 1 (2) Left Wall, Picture 1 (4) Right Wall, and Picture 1 (3) Floor are in motion. Grow/Shrink and Motion Paths have been applied.
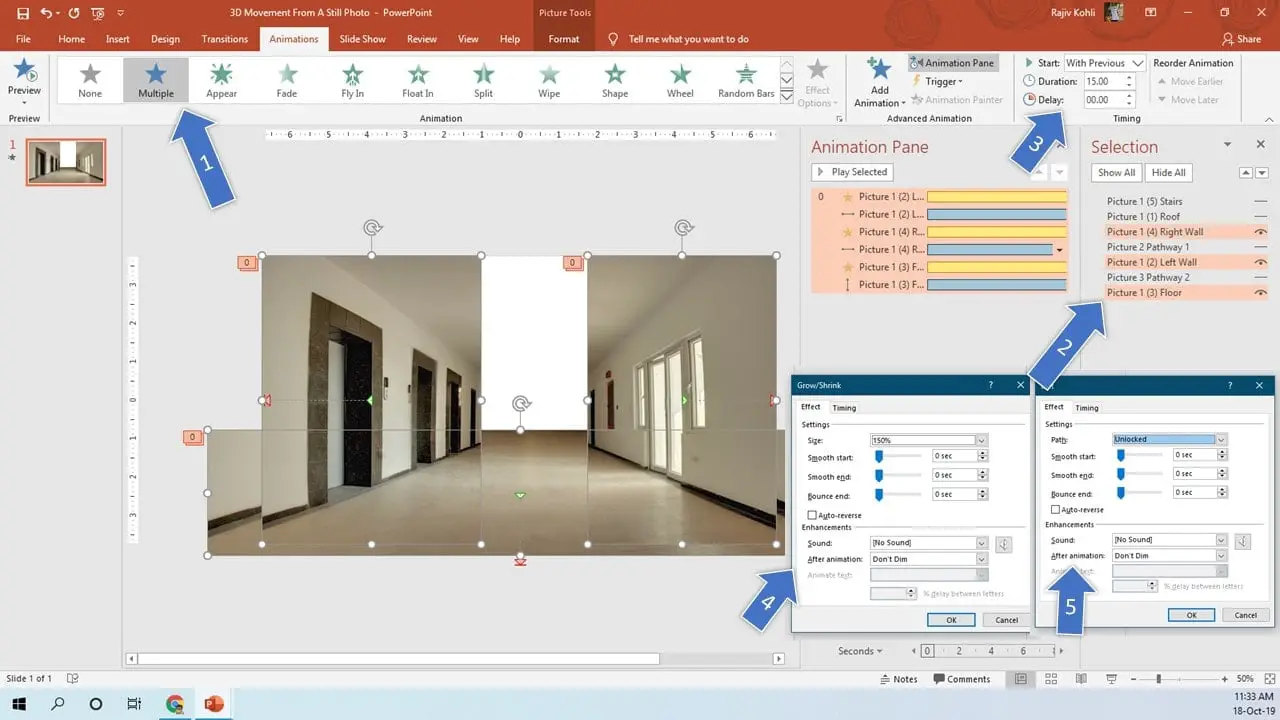
Figure 1.2 showcases pictures that are in motion and see how a single picture has been duplicated and cropped. Download the presentation and note down the placement of each picture and how they have been placed on top of each other.
- The animations Tab shows Multiple; as multiple objects have been selected in the Animation Pane.
- Selection Pane displaying that only 3 pictures are visible.
- All the Animation Effects have the same Duration of 15 Seconds for slower movement of all the pictures. No Delay Timings as all the pictures are moving together.
- 150% Grow/Shrink rate without Smoothness and No Auto Reverse.
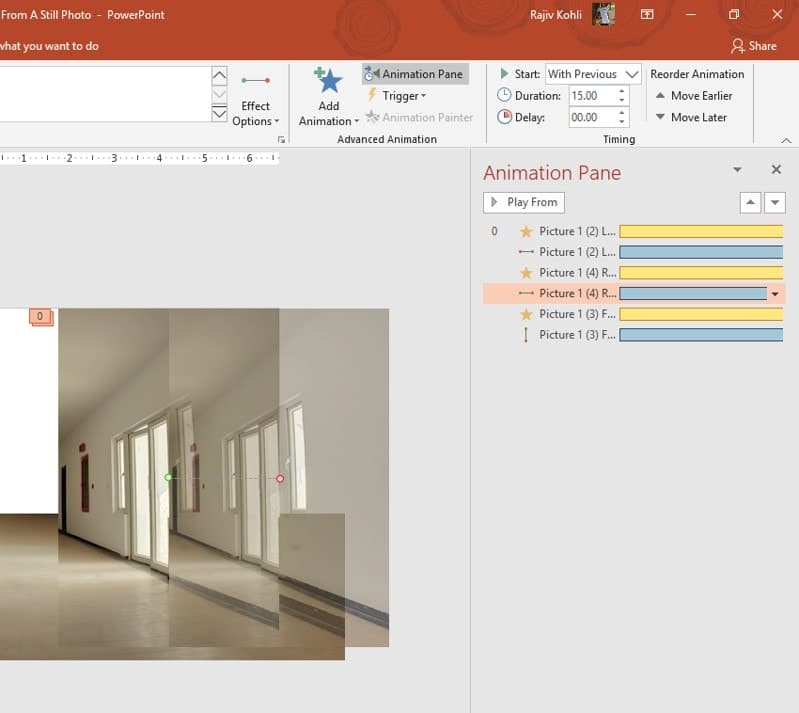
- Motion Paths; See Figures 1.3, 1.4, and 1.5 for the path length. (Ignore the 0 Duration showing in the 4th and 5th points)
In Figure 1.2, all motion paths are in a straight line but during the slideshow, it feels as if the camera is moving toward the stairs. Picture selection plays an important part. So, choose pictures logically!
Thanks to “After Effects Tutorial: Create a 3D Room From a Still Photograph” for their tutorial. I did my best to replicate this animation in PowerPoint.
Walls, Floor, Roof, and Front Wall must be cropped and placed in perfect manners.

The last step is to know how I cropped each picture. See Figure 1.6:

- Download the presentation from the link below and then Select a Picture. From the Format tab – click Crop and you can note down the cropped area. Repeat the same steps to see each picture’s cropped area.
Slideshow Animation Preview
I hope you got The Teacher Point!
Watch How To Create 3D Movement From A Still Photo in PowerPoint Tutorial
The article How To 3D Movement From Still Photos also applies to the following versions:
- PowerPoint 2007
- PowerPoint 2010
- PowerPoint 2013
- PowerPoint 2016
- PowerPoint 2019
Download Create 3D Movement From A Still Photo (PPT)
PPT Info
PowerPoint Presentation
File Type: PPT / PPTX
File Size: 2.21KB
Number of Slides: 1
3D Movement From Still Images
PowerPoint Template