
I’m here to teach you how to work with grouped shapes in Microsoft PowerPoint. Grouping objects is a fundamental skill that can help you create more complex and organized presentations. In this tutorial, we’ll explore the ins and outs of working inside a grouped object, why it’s important, and how you can benefit from it. Additionally, I’ll provide insights into using the Selection Pane, which is a powerful tool for managing grouped objects.
Grouping in Microsoft PowerPoint
Grouping objects in PowerPoint involves combining multiple shapes or pictures into a single, unified entity. This can be incredibly useful when you want to treat multiple elements as one. Here’s why it’s important:
Benefits of Grouping
- Simplify Editing: When objects are grouped, you can make changes to the entire group as if it were a single object. This is particularly handy when dealing with complex designs that involve many shapes.
- Precise Control: Grouping allows you to precisely position, resize, or format multiple elements in unison.
- Layer Organization: Grouping helps keep your slides organized, especially when working with intricate designs or animations.
- Efficient Animation: Grouping enables you to animate multiple elements together smoothly.
The Selection Pane
Before we dive into working with grouped objects, let’s talk about the Selection Pane, a powerful feature in PowerPoint that helps you manage and manipulate objects easily.
Using the Selection Pane
- Visibility Control: The Selection Pane allows you to hide or show specific shape layers by using the eye icon. This is invaluable when working with a multitude of shapes, as it allows you to focus on the elements you need.
- Identifying Groups: In the Selection Pane, grouped objects are indicated by an arrow icon. This helps you quickly identify which layers are part of a group.
- Nested Groups: Groups can contain subgroups. You can expand and collapse these subgroups in the Selection Pane.
- Locking Layers: If you don’t want to accidentally move, resize, or make changes to specific layers while working with others, you can lock them using the “Lock” command.
- Selecting Objects Within Groups: The Selection Pane allows you to select individual shapes within a group simply by clicking on them. You can also select multiple items by holding down the Ctrl key. (Please note that inside the Selection Pane, you can only use the Ctrl key for this purpose.)
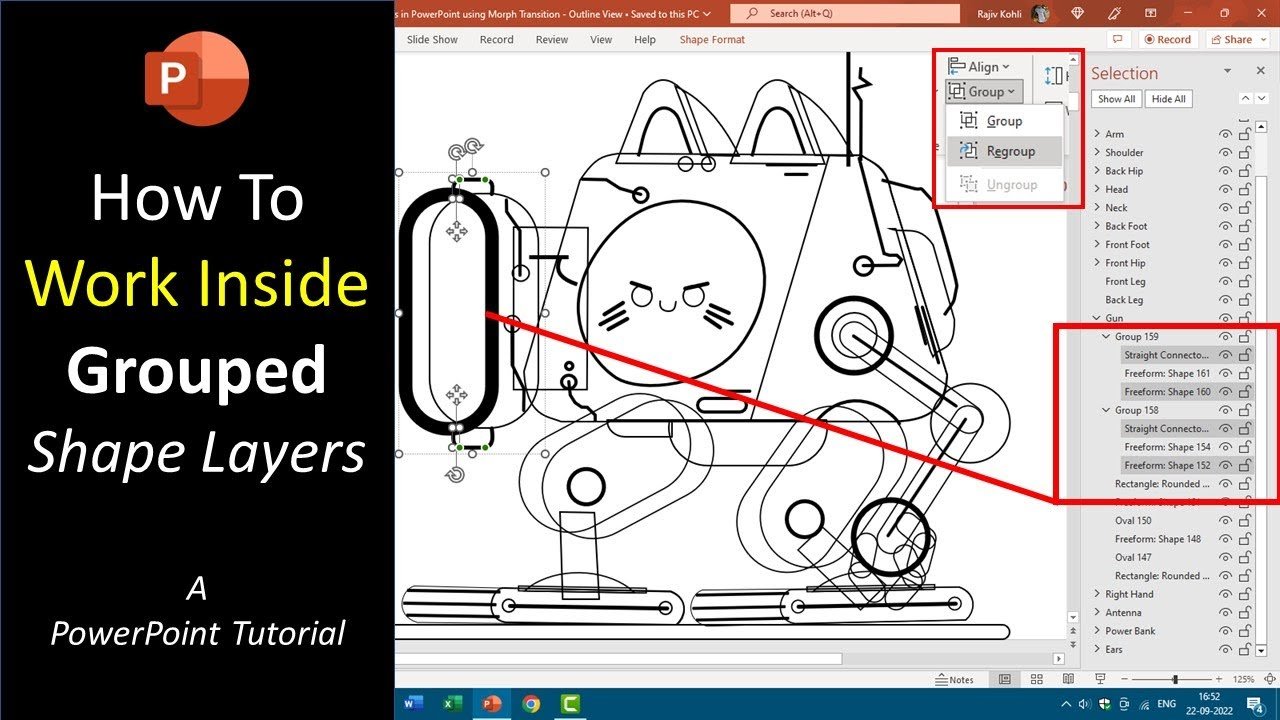
Regrouping Objects
Sometimes, you may need to temporarily ungroup objects to make changes, but then you want to group them again without going through the entire grouping process. In such cases, the “Regroup” command under the “Group” dropdown button on the Shape Format tab can save you time.
This command recognizes the previous group structure, making it easy to reassemble objects after making necessary adjustments.
Working with Grouped Objects
To effectively work within grouped objects:
- Click within a group to select a specific shape or subgroup.
- Use the keyboard shortcuts Tab and Shift + Tab to navigate through the layers within a group. This is particularly useful for selecting specific objects within a group.
- You can select multiple objects within a group using either the Ctrl or Shift key. However, it’s recommended to use the Shift key to avoid accidental duplication.
Conclusion
Understanding how to work with grouped objects and effectively using the Selection Pane in Microsoft PowerPoint can significantly enhance your presentation design capabilities. Whether you’re creating complex designs or animations, mastering this skill will save you time and allow for greater precision in your work.
Stay tuned for our next tutorial, where we’ll delve into working inside grouped objects to create an animated scene in PowerPoint. If you found this tutorial helpful, show your support by liking, sharing, and leaving a comment. Don’t forget to subscribe to our channel for more upcoming tutorial videos.
Thank you for watching, and have a fantastic weekend!
[Insert Screenshots Here]
[Music]
That’s it for today’s tutorial on working with grouped objects in Microsoft PowerPoint. We hope you found it informative and practical for your presentation needs. If you have any questions or would like further clarification, please leave a comment below, and we’ll be happy to assist you.