
In this blog post, we’re about to demystify the art of printing in Excel and introduce you to two powerful tools: Page Break Preview and Scaling. Are you tired of printing Excel spreadsheets only to find that your carefully crafted documents end up looking like a chaotic jumble on paper? We’ve all been there, but fear not!
But don’t just take our word for it; we’ve also created a comprehensive video tutorial that will walk you through every step. You can watch the tutorial at the end of this post for a more visual representation of the concepts discussed here.
The Power of Page Break Preview
Excel’s Page Break Preview is your gateway to ensuring your content fits perfectly on the printed page. It’s your backstage pass to previewing and adjusting your worksheets before hitting that print button.
In the video tutorial, you’ll learn how to access Page Break Preview from the Status Bar’s lower right-hand corner. This tool gives you an instant glimpse of what your worksheet will look like when printed, complete with watermarked page numbers to show you which content goes where. No more guessing or trial and error!
The key takeaway here is that it’s vital not to rush into printing your worksheet if the content doesn’t fit as intended. Page Break Preview is your first step towards printing perfection, and the video will show you precisely how to use it.
Watch the Tutorial for Hands-On Guidance
To truly grasp the concepts discussed in this blog post and witness them in action, we highly recommend watching our video tutorial. The visual representation will help you understand these Excel features better and make implementing them a breeze.
Understanding Page Breaks: Scaling and Print Area
The video tutorial also delves into the concept of page breaks within Page Break Preview. It explains that Page Break Preview divides your worksheet into two sections: one marked by a dotted blue line (Scaling) and the other with a solid blue line (Print Area).
You’ll discover how to use the solid blue line to set your print area and exclude specific columns from printing. The video demonstrates how Excel automatically adjusts the print area when you move the solid blue line, making it a breeze to tailor your printouts to your exact needs.
The Magic of Dotted Blue Line (Scaling)
Manually adjusting fonts and column widths to fit content on a page can be a nightmare. The video tutorial will show you how the dotted blue line (Scaling) can come to your rescue. It dynamically reduces the font size and adjusts column widths automatically to make sure everything fits neatly. Say goodbye to the tedious manual adjustments!
The video will also make it clear why using Scaling is far more convenient than trying to scale down everything yourself. It ensures your content won’t look distorted after printing.
Auto Scaling for a Perfect Fit
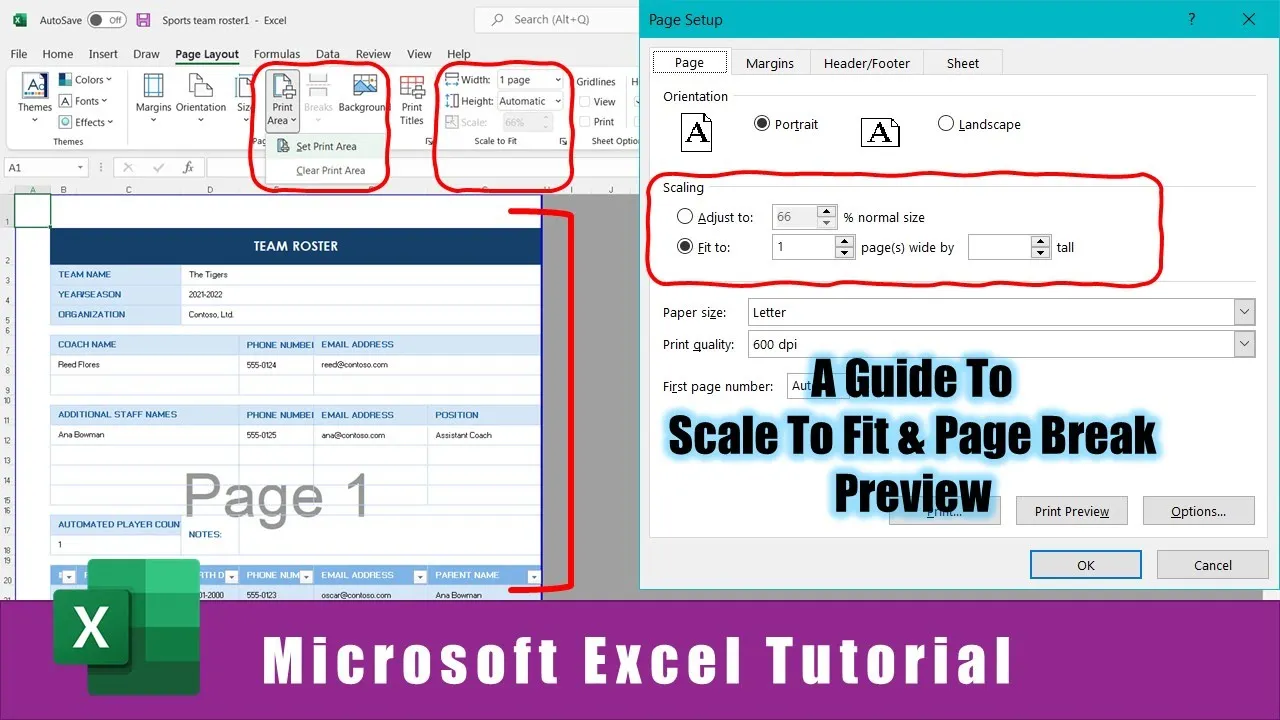
Excel even lets you automate the scaling process. You can instruct Excel to automatically adjust scaling to fit the contents to one page width or height, ensuring your printouts are consistently flawless.
In the video tutorial, you’ll see how to use the “1 Page” option in the Width and Height sections of the Page Layout tab to achieve this. It’s a fantastic way to quickly adjust your content for optimal printing.
Conclusion
In summary, understanding Page Break Preview and Scaling in Excel is the key to achieving perfect prints every time. It’s a game-changer for anyone who works with Excel regularly, whether for personal or professional use.
So, don’t hesitate—watch the video tutorial, and take your Excel printing skills to the next level. Once you’ve mastered these tools, you’ll never have to worry about misaligned, chaotic prints again. Your documents will look polished and professional, just as you intended.
We hope you find this tutorial valuable, and if you do, please don’t forget to like, share, and subscribe to our channel for more helpful tips and tutorials. Thanks for reading, and here’s to perfect Excel prints!