
With this post, I will try to describe How To Make Particles Text Effect in PowerPoint in 10 Easy Steps but first let me give Credit to Morocco Tutorials for the Background Particles Text effect video that he created in After Effects.
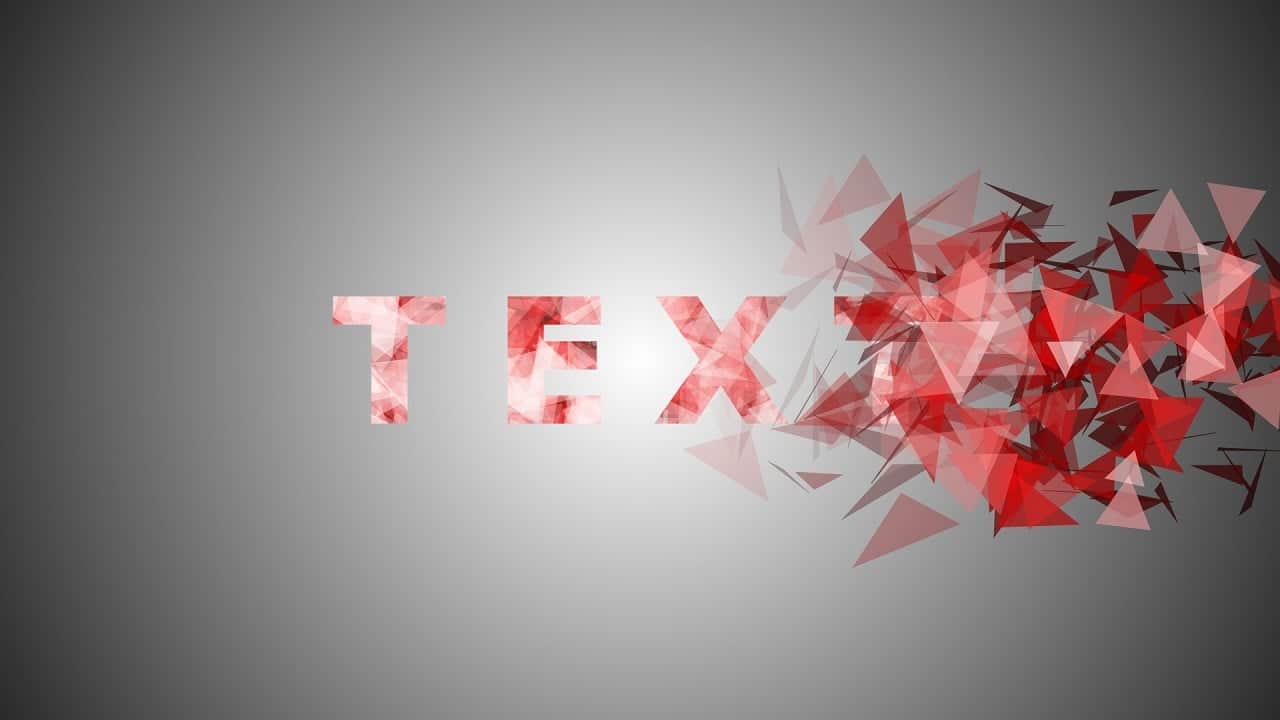
Introduction to Particles Effect
As you can see, in the first few frames, Particles are moving off the screen and when they reach the middle of the screen, the text starts appearing with one letter in time, which creates an illusion that the particles are dropping one character behind. Moreover, in this post, I am going to tell you about the basic concept used in this presentation and I think that is the most important part of learning instead of just following the step-by-step instructions.
The animation is entirely simple to replicate in PowerPoint. Once you know how to create this, it will seem easy. Make sure to check the version of PowerPoint installed on your system before you start following the steps. This effect is almost impossible to create in PowerPoint 2007 and earlier versions because they don’t have the Merge / Combine Shapes Tool. But Hey! If you are desperate to create the same effect in 2007 then watch my video on How to Use Subtract – Merge Shapes command in PowerPoint 2007 and see if you can then accomplish the same effect.
If you have PowerPoint 2010, then you might need to watch this video that How to enable Merge / Combine Shapes in PowerPoint 2010 because Merge Shapes might not appear by default in PowerPoint 2010. This effect can easily be done in PowerPoint 2013 / 2016.
Before I begin, let me make it very clear to you that the steps I am going to describe will guide you through the concept of the animation and you must be an intermediate user of PowerPoint to get things done.
Smoke Text Effect in PowerPoint is a similar video using almost the same tricks. You can learn a few more PowerPoint tricks in the Smoke Text article.
Basic Concept of Particles Text Effect
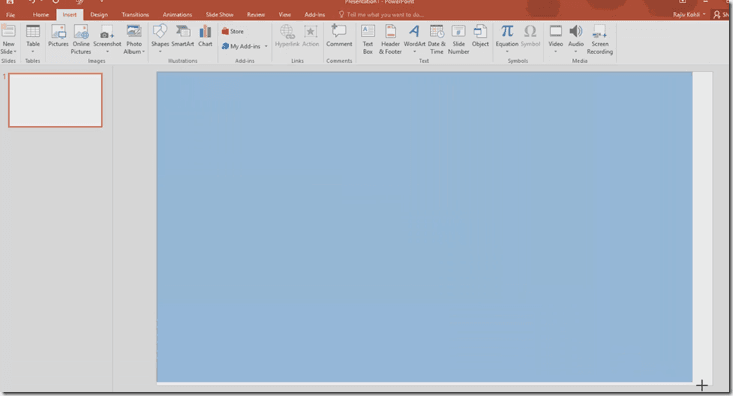
Step 1: First we draw a full Slide Size Rectangle by clicking on the Insert tab – Shapes drop-down menu and choosing Rectangle shape.
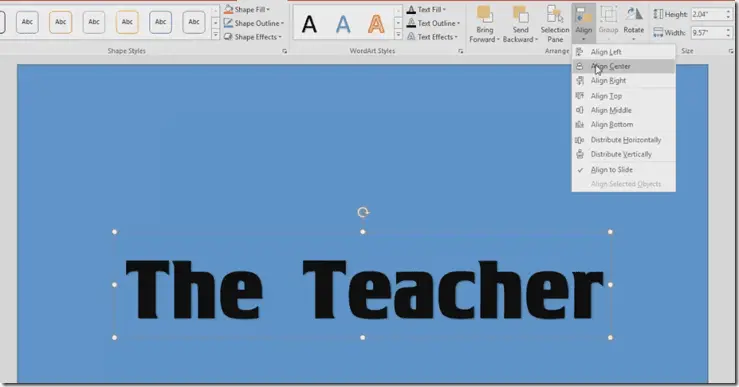
Step 2: Then, we type our Text using WordArt from the Insert menu. After formatting the text, make sure to Align the text in the Center and Middle of the slide using Align options from the Format menu.
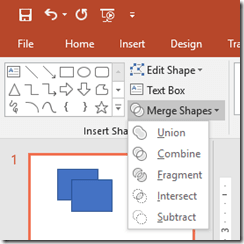
Step 3: We need to combine the Rectangle with our text using Combine / Merge Shape Tools. For that, select the Rectangle first, hold down the SHIFT key, and then select the WordArt Text Box. From the Home tab, open the Merge Shapes drop-down button and then click on Subtract.
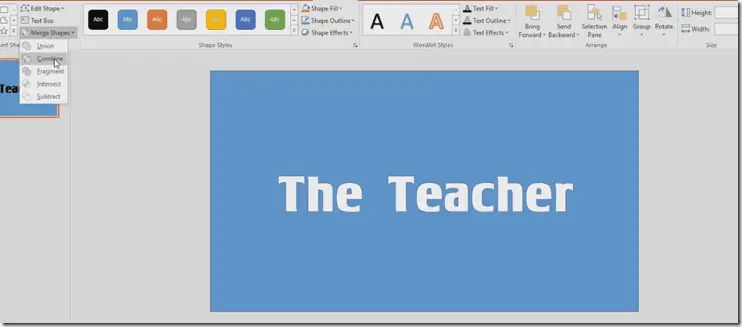
you can see the background color of the slide
As you can notice in the above picture that PowerPoint wiped out the text within the Rectangle and the slide background is clearly visible. That is what the Subtract command does. Actually, it subtracts the part of the Rectangle with the overlapped text.
Step 4: Type the text again using the same Formatting style (or you can make a duplicate of the text in the second step) but this time you need to have each letter in a separate Text Box. I mean, you have to type each letter separately using WordArt in the separate text boxes. All the letters like “T”, “h”, and “e” should have their own corresponding text boxes and for that, you have to type each letter individually or you can take the help of Copy / Paste command by typing a letter and then make a duplicate (after selecting a Text Box, you can also press CTRL+D to create a duplicate), and then replacing the characters.
You can watch the video to know how I did that. I am using the Smart Cut n Paste command (hold down the CTRL key while dragging and dropping text boxes) to quickly create duplicates and that is what you can see in the following tutorial video.
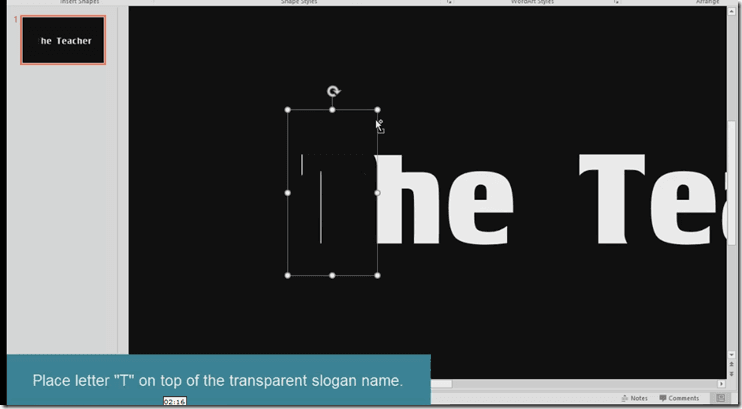
(Placing the letter “T” text box on the top of combined shapes to hide the white part. The rectangle and text color should be the same, which in my case is Black, to hide everything on the slide and do take care of the Line Color)

You can also take the help of the Selection Pane (from the Home / Format Tab) to easily manage objects on the slide. Like, you can select, hide, rename, and move objects, right from the Selection Pane. You can watch our video tutorial on Work With Multiple Objects using Selection Pane for more information.
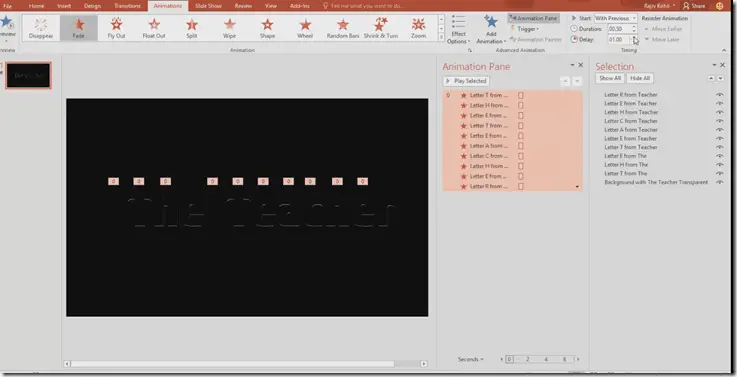
Step 5: Select all the letters/text boxes (either select the first letter, hold down the SHIFT key, and then start selecting the other boxes or use Selection Pane. In Selection Pane, select the first letter, hold down the Shift key, and then click on the last one. That’s an easy way when you have a lot of hidden objects on your slide.
After selecting all the letters, go to the Animations tab, hit the Add Animations drop-down button, and then apply to Fade Out from the Exit effect list for the Start option, set all of them to Start – With Previous and add a Delay of 1 Second. That will apply the Exit Fade Out effect to all the letters/text boxes at once, hiding all of the letters at once in the slideshow. But, we want each letter to fade out with a little delay.
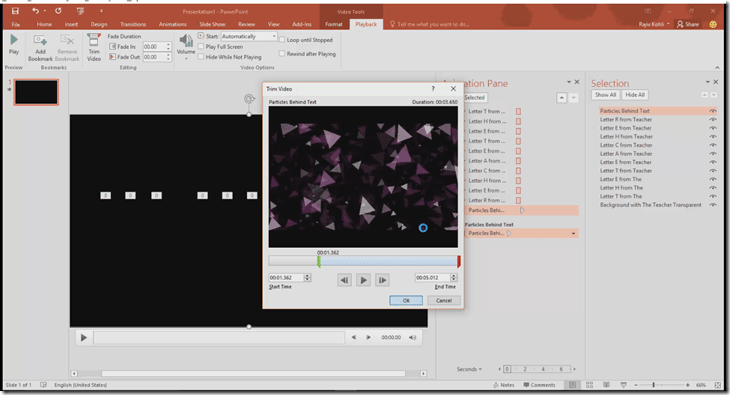
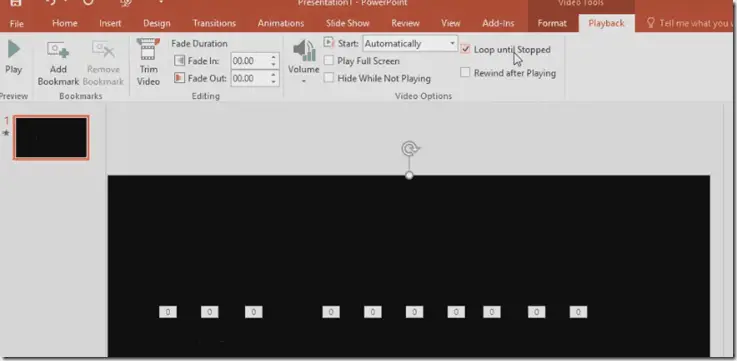
Step 6: Download and Insert the Particles Behind Text video. We want a lot of particles to appear behind the combined shape (The Teacher), so we will Trim the video to about 1.5 seconds from the beginning from the Playback menu, to have a lot of particles on the screen. From the Playback menu, set the video to Start – Automatically, and also from the Animation pane, set it to Start – With Previous and move the video to the top of the animation list by dragging and dropping. Select the video and send it behind the other objects using Send To Back command from the Format menu.
After completing the first 6 steps, all the letters will get disappear at once and you will see Particles running behind the combined rectangle, and that will create an illusion as all the letters are filled with the Particles.

All the duplicated letters will Fade Out in the beginning
Step 7: From the Playback menu, make sure to check the “Loop Until Stopped” option, so the particles continue to scroll behind until the end of the animation.
Step 8: Download and Insert the Particles in Front of the Text video. Set it to Play Automatically from the Playback and also set Start – With Previous from the Animation tab and move the video to the top of the Animation list by dragging and dropping it from the Animation Pane.
This video will remain on top of all the other objects on the slide, so when you will see the Slideshow, it will hide all the other objects behind it. Even the original video has a transparent background because Alpha Channel feature in After Effects but video transparency is not available in PowerPoint. So, what we are going to do now is to apply the Transparency Emphasis Effect to the Particle video on top.
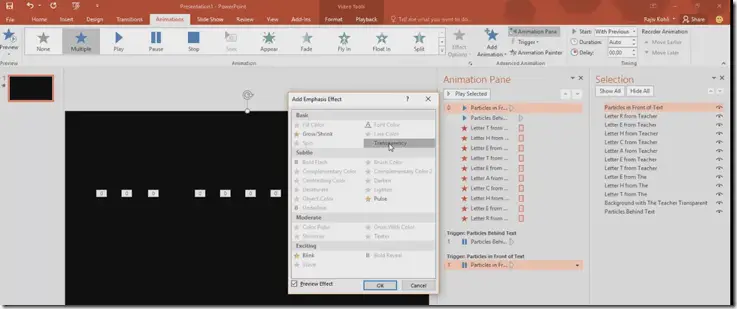
Step 9: Move the Transparency effect to second place in the Animations list. When you will see the Slide Show, the Particles in Front of Text video will play and at the same time the Transparency effect will start working and you will start seeing the objects behind the Particles video.

Step 10: The final step is to add a delay between all the Fade Out effects for letters, so they must not appear all at once. Instead, each letter should appear with a little delay as the Particles are leaving behind their trail in the form of letters, and for that, you need to add a delay between each Fade Out exit effect.

You can go with 0.25 Seconds delay between each letter or you can set your own timings depending on the letters you want to appear on the screen at the exact time. Finally, Insert the Background Audio and impress your Teacher / Friends with your impressive PowerPoint Presentation. BTW, you can also use this presentation as your Youtube Intro.
I hope you got The Teacher Point.
Watch Particles Text Effect in PowerPoint Tutorial Video
The article How To Make Particles Text Effect in PowerPoint also applies to the following versions:
- PowerPoint 2007 (Watch our video on How To Use Subtract Command in PowerPoint 2007)
- PowerPoint 2010
- PowerPoint 2013
- PowerPoint 2016
- PowerPoint 2019
Download Particles Text Effect PowerPoint Presentation (PPT)
PPT Info:
PowerPoint Presentation
File Type: ZIP includes PPT+MP4+MP3
File Size: 18MB
Number of Slides: 4
Scene: Animated Particles Text Effect