
Once a guy commented on this Smoke Text Effect video that “You did nothing. Just displaying text in front of a video.” and in one way, he was absolutely right. He also called it a ClickBait Title. That could also be true but my intentions were always clear. Educate, that’s it. Surely, both of these videos helped and encouraged me to build my career as a Youtube Insider but I tried my best in all my tutorials. But if you are interested in learning this animation then keep reading this out-of-syllabus story.
Let me first tell you the Lifetime Youtube Analytics (since uploaded) of this video Titled “Smoke Text Effect in Microsoft PowerPoint 2016 Tutorial” with an attractive Thumbnail displaying very attractive smoke behind the text. If you Youtube about the “Smoke Text Effect” then surprisingly (or maybe; not sure as different results could appear according to so many factors) this video is on top of the chart but if you scroll down then you will find a video from Morocco Tutorials Titled “After Effects Tutorial: Smoke Text Effects“. That is the original video from which the idea sparked in my mind. I would personally like to thank him for providing the Project & Items in his video description.
Those Project Files were in MOV format because he created them in After Effects with a Transparent Background. You need to fulfill these requirements to try this animation effect in PowerPoint:
- Quick Time Player
- Microsoft Office 2010 or Later Version (32 Bit).
You can not Insert a MOV file into PowerPoint unless you should have Quick Time Player installed on your system and this only works with 32 Bit Version of Microsoft Office. But that was not easy for beginners to fulfill these requirements just to create one animation in PowerPoint.
Recently, I converted those videos into MP4 format and updated the links in the video description and that is why you are here: To read more about this smoke effect and download the project files.
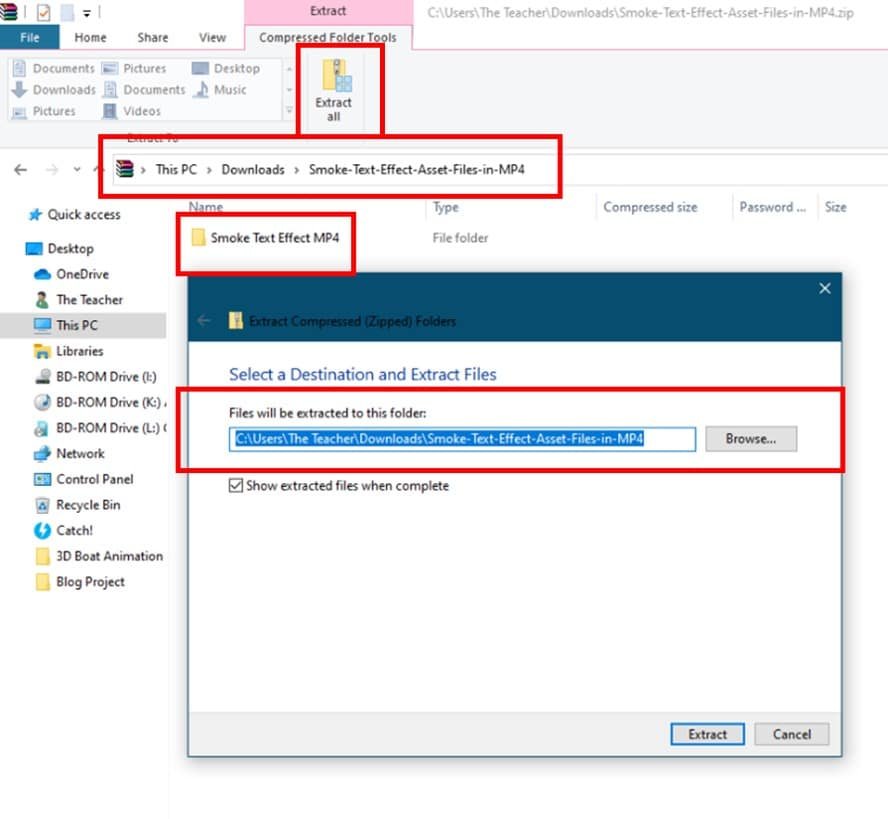
Total 5 Files in ZIP Format (Download and then right-click Extract All)
The ZIP file contains 5 Files: Background Music New.MP3, Background.PNG, Flare.PNG, Flare.MP4, and Trailing Particles.MP4
I have both PowerPoint 2016 and Office 365 Business on my Desktop and Laptop respectively. I was facing a problem where videos were not playing during the slideshow even though all the settings were correct. If you are facing such a problem then you can watch our video on Embedded Videos Don’t Play in PowerPoint 2016 Tutorial or follow these instructions:
- Click the File menu – Options – choose Advanced from the Left Side pane – scroll down and try enabling/disabling both of the following options:
- Disable hardware graphics acceleration
- Disable Slide Show hardware graphics acceleration
Generally, disabling them always works.
#ListenMicrosoft – Whereas I think, it doesn’t matter if you have a high-end graphics card installed with Intel Core i7 – 8th Generation Processor; PowerPoint never support them. So much lag when you have a lot of objects having tons of animations applied. Glitches when you export those Presentations as MP4 videos.
Leave a comment if you feel the same
Smoke Text Effect Youtube Analytics as of 5th October 2009
- 1.3M Views
- 3.5 Million Watch Time
- +6.7K Subscribers – you lovely people!
- 7.2K Likes / 359 Dislikes
- 2.3K Views in 48 Hours.
Youtube Analytics is from 18th November 2016 to 3rd October 2019. The highest views were 3.7K in a day.
Then I created another video on the same theme titled “Particles Text Effect in Microsoft PowerPoint 2016 Tutorial | The Teacher”. Youtube for “particle text effects” and you will again find the Morocco Tutorials video on 3rd Rank (these rankings rapidly change) and mine on 8th Rank.
Then I started creating more and more animation videos on my Youtube Channel. Before that, I tried to convince people about the animation #possibilitieswithpowerpoint by creating 10 Youtube Intro Templates in PowerPoint. But after a lot of hard work, all templates failed to get people’s attention. Then I created a composition of all the templates and titled it “Top 10 Best Free 2D Youtube Intro Templates | PowerPoint 2016 Animation”.
This video is also one of my top trending videos and all of your love encouraged me to explore more animation possibilities in PowerPoint. That was the time when I started to replicate animations from After Effects Tutorials on Youtube (Many Channels – always tried to give Credits in the video description), GIF Files, Google Searches, CodePen.IO, Dribbble.com, Pinterest, and many more. I started using these keywords in my uploads: “Motion Graphics in PowerPoint”
Then I put all my energy to make more animation videos in PowerPoint. You might have noticed that a lot of previously published videos are about PowerPoint animations. Even though I have a lot more to teach you like How To Build A Career on Youtube? Today, posted a poll on my channel. If you have time then please vote and thanks to all of you for your great support!
Concept of Smoke Text Effect
The idea behind replicating this animation in PowerPoint is simple. The Text is appearing just at the right movement when the Smoke trail passes by. The video tutorial only has subtitles but no voice. So, hope you will find this article useful. Here are the steps to make the job done!
- Download and Extract the ZIP File from the link below. (Open With – Windows Explorer also works)
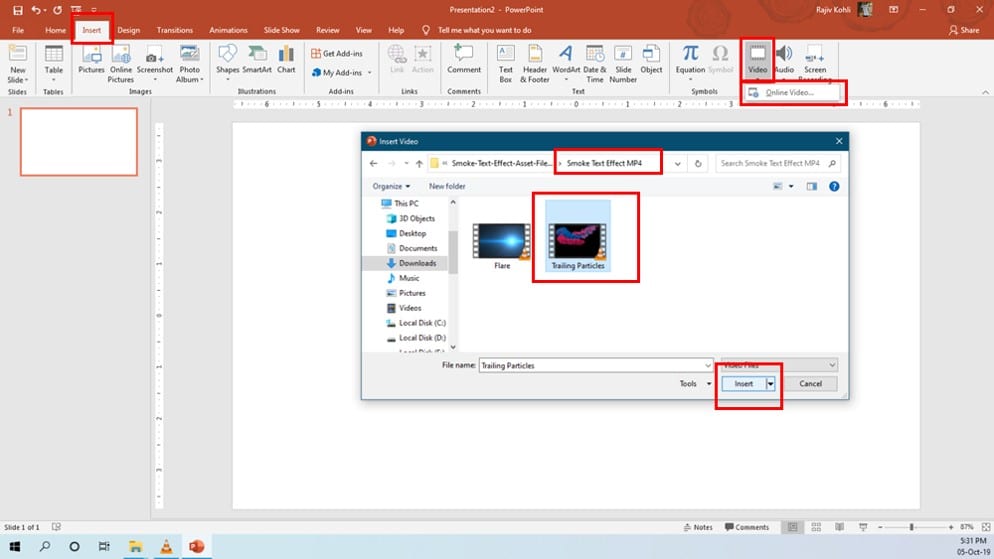
- Insert the Smoke Trailing Particles video by clicking on the Insert tab – Video and then choose Video on My PC
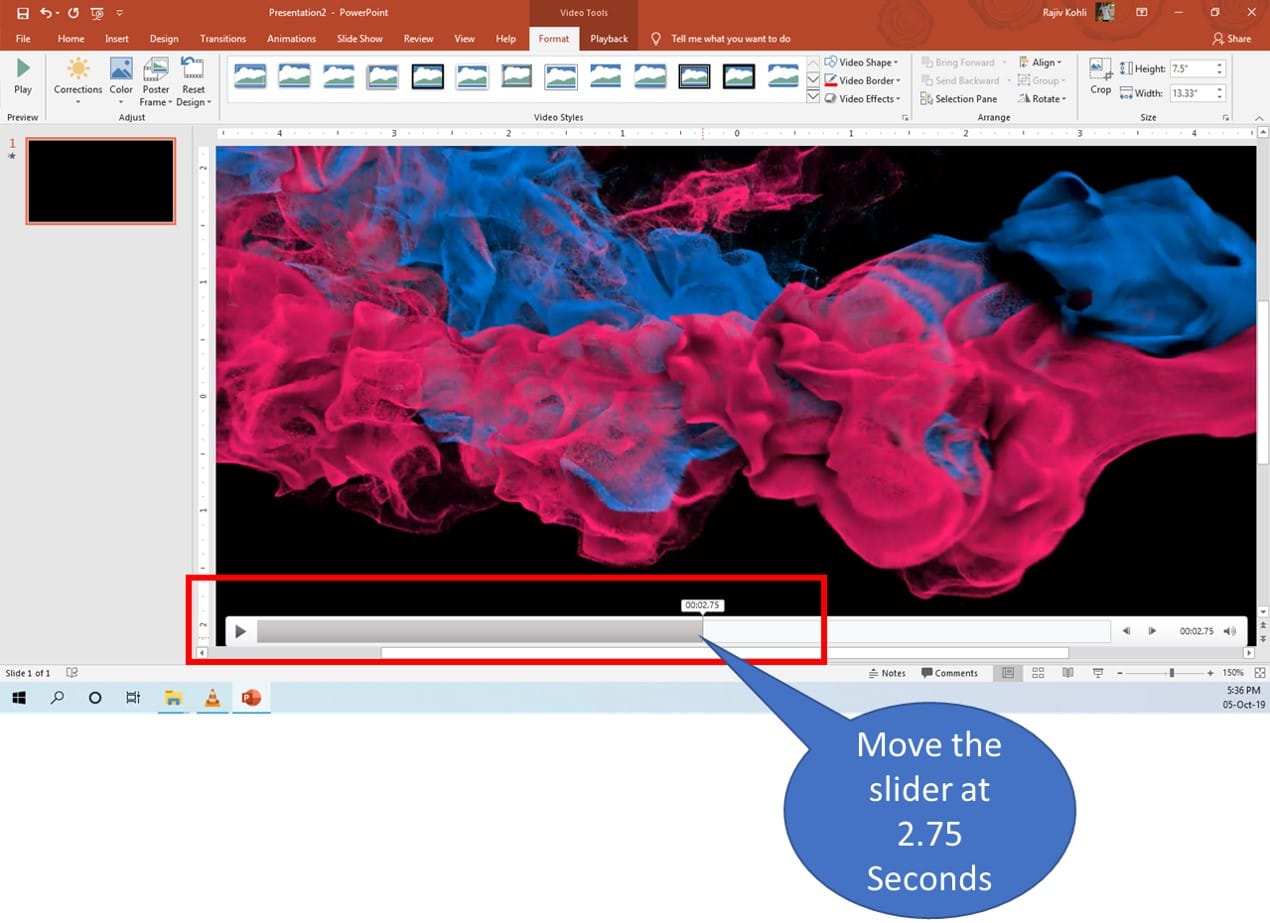
- Play the inserted video and pause it when you see most of the Smoke Particles (at 2.75)
- Press the PrintScreen key to take the screenshot.
- Insert a new slide and click the Paste button to get the screenshot from Clipboard.
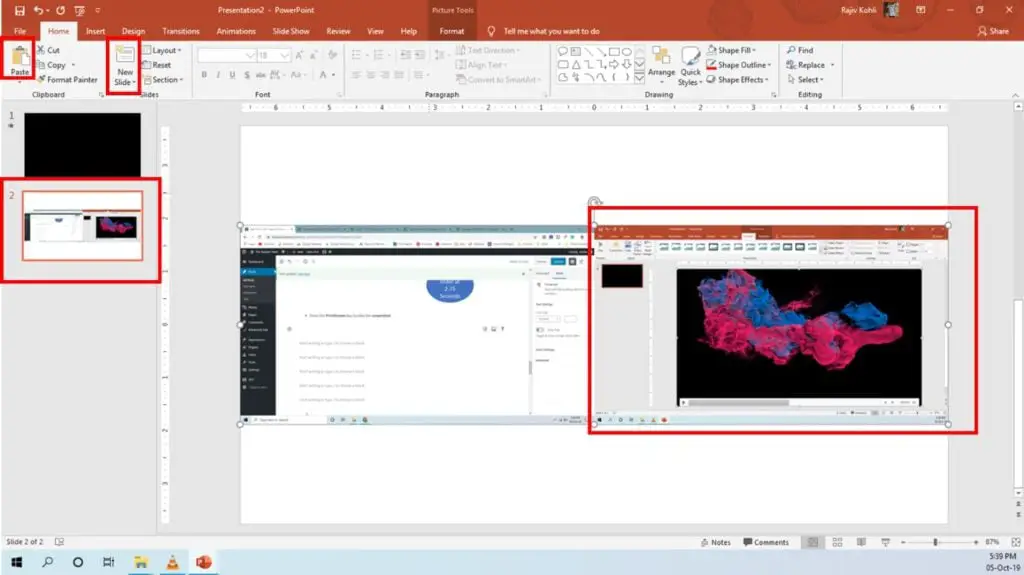
- Crop the unnecessary part of the particles screenshot by clicking on the Crop button from the Format tab.
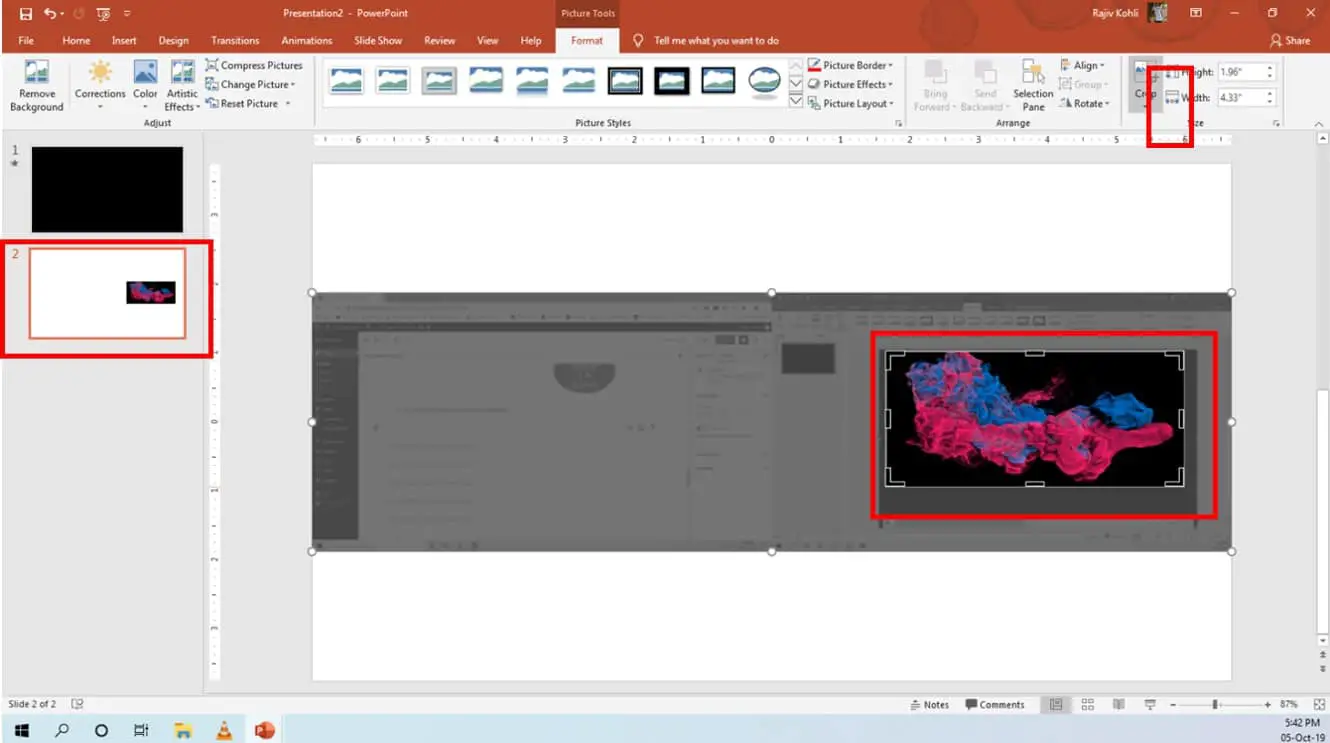
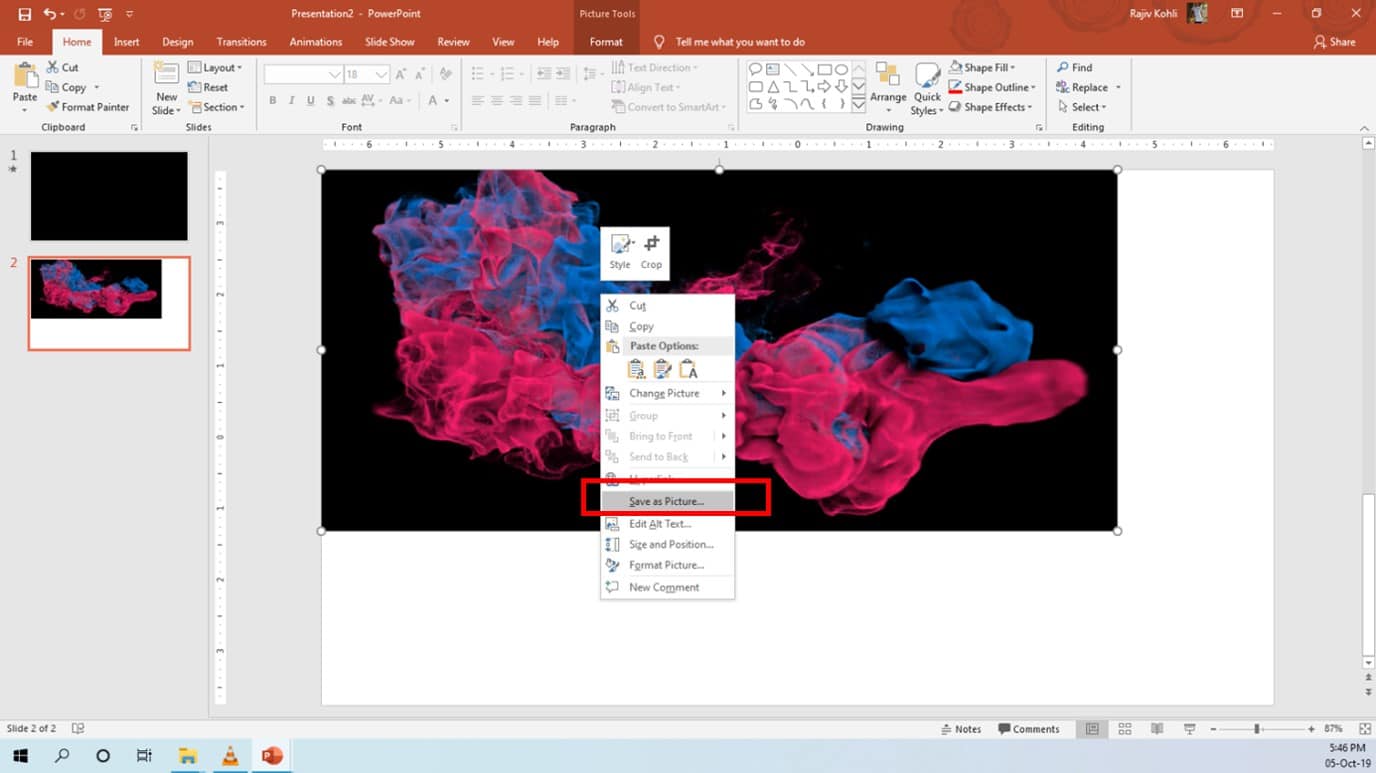
- Increase the picture size and then right-click on the picture and choose Save as Picture. Give a name to the file and save it for later use.
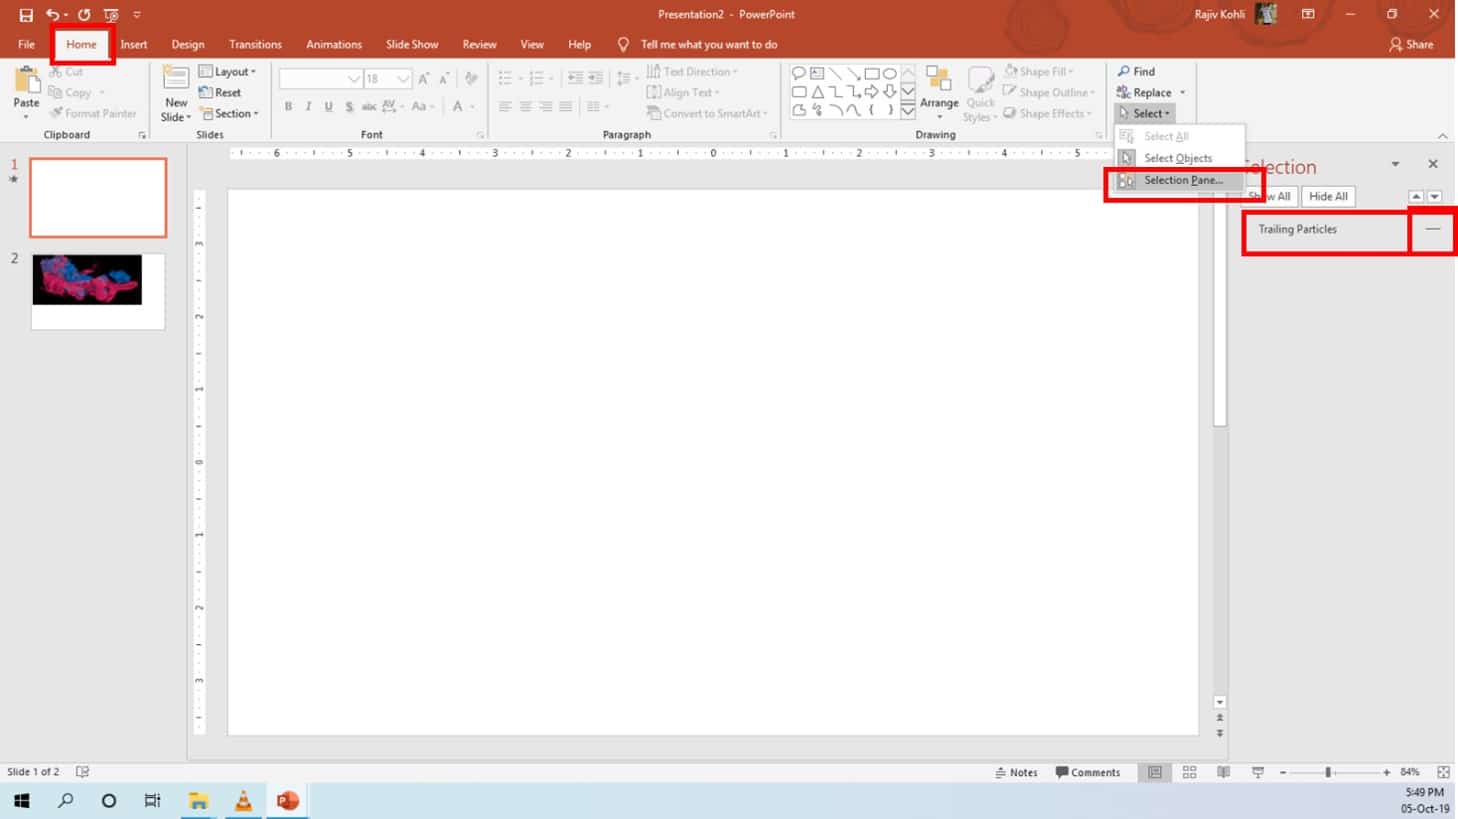
- We need to work on the Text that will appear on top of the video. So, you can move to the first slide and then open the Selection Pane from the Home tab – click the Select drop-down button and then hide the Trailing Particles video by clicking on the Eye Icon. So, now you can easily work with the text.
- Type your Text by clicking on the Insert tab – WordArt and choose the style you want. Set the desired font and font size you like to use. We are using Tobago Poster.
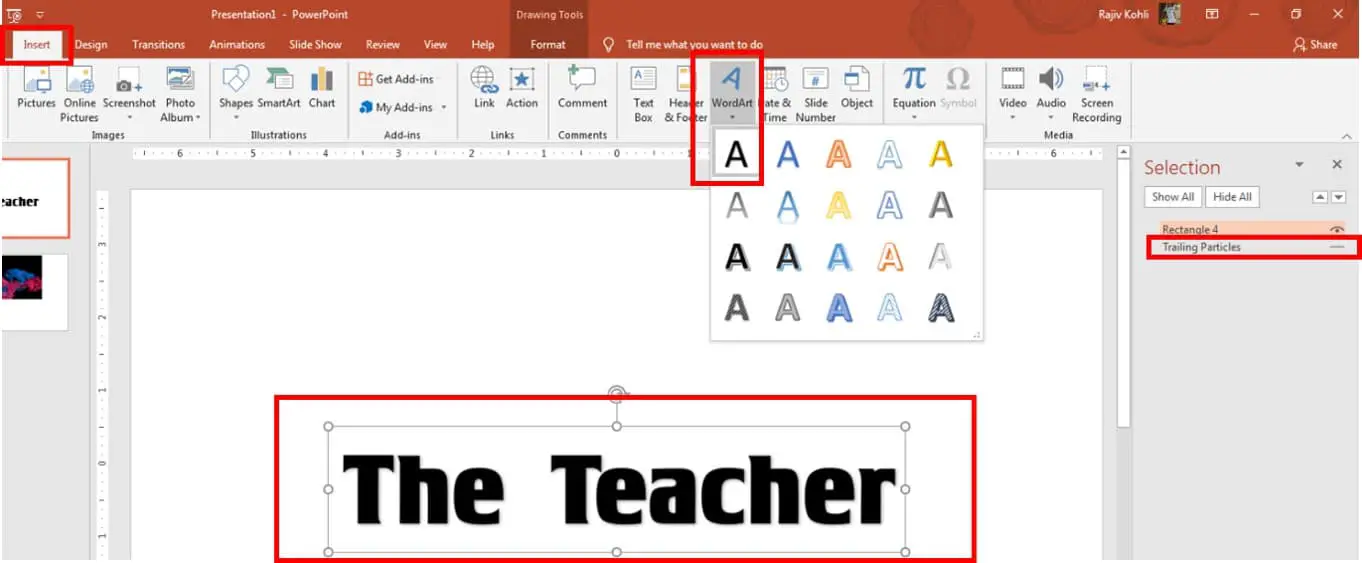
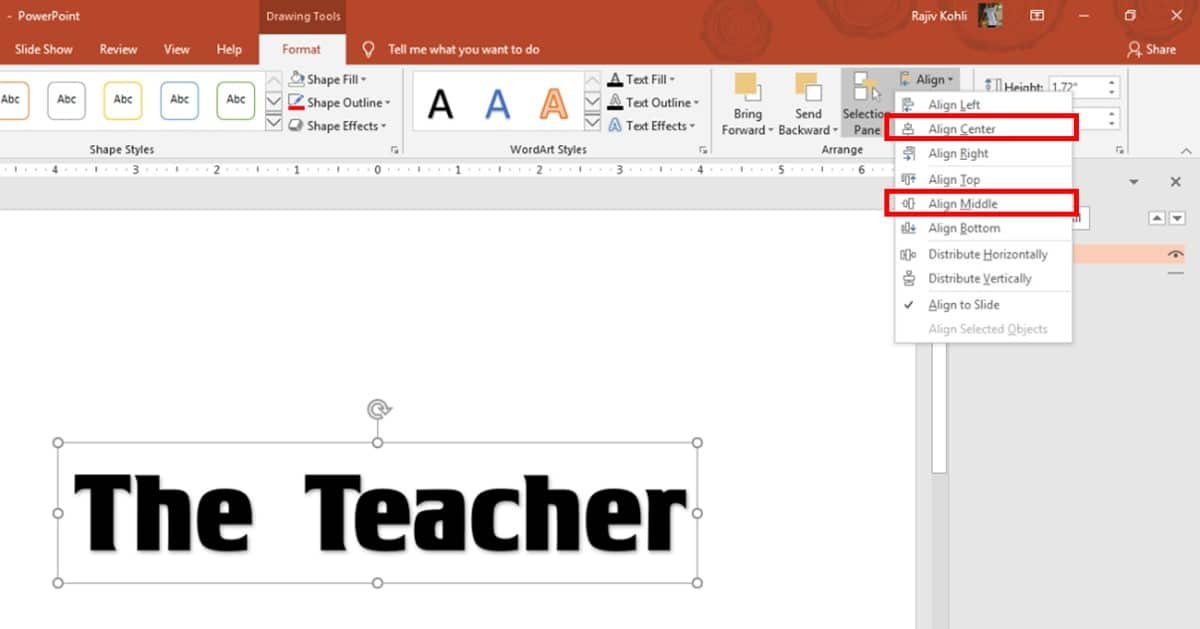
- Align the text in the Middle and Center of the slide by clicking on the Align drop-down button from the Format tab keeping the text selected.
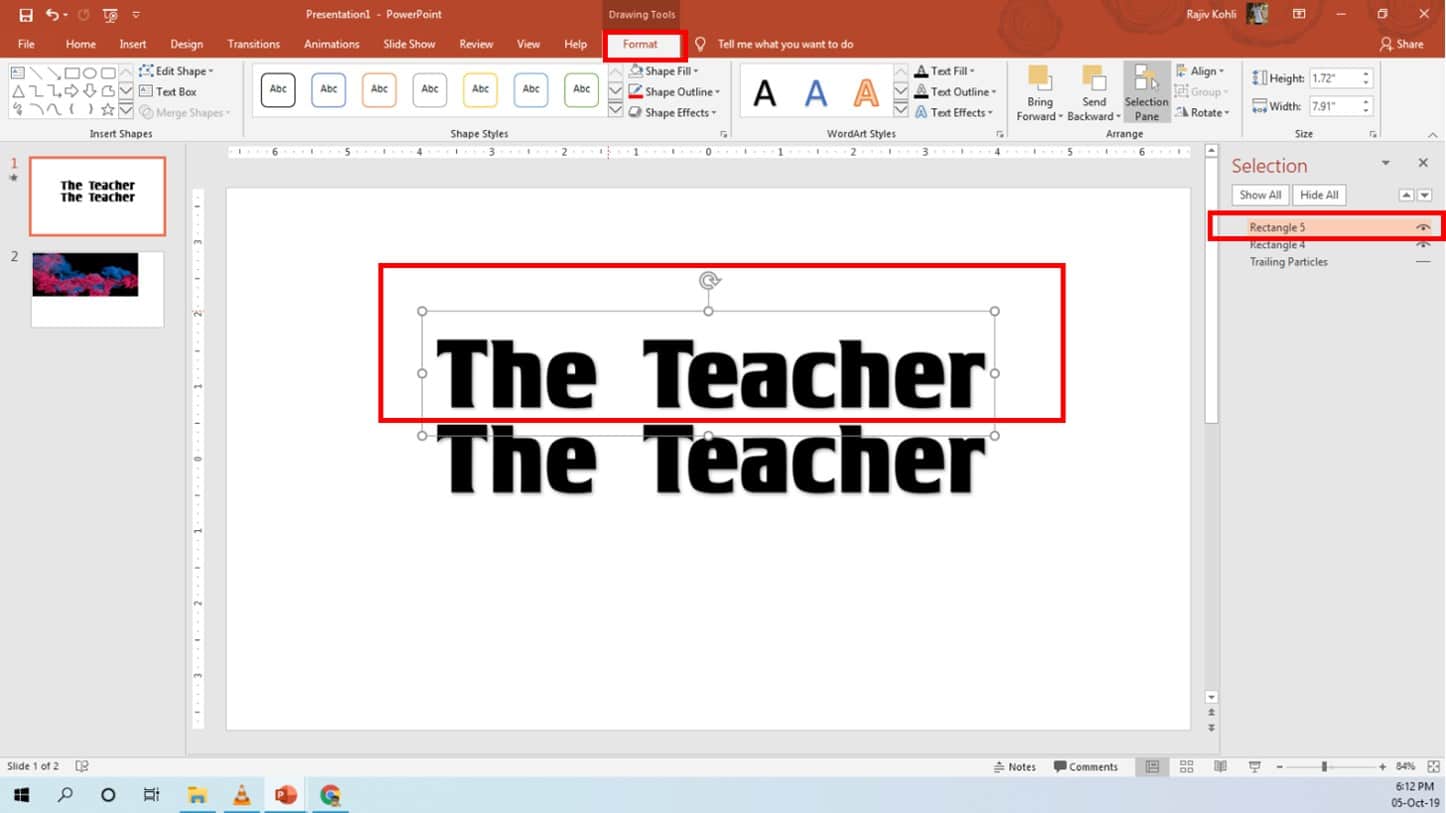
- We will use this Text as a placeholder for the actual letters that will appear one by one when the Smoke Trailing Particles will pass through. Select the Text and press Ctrl+D to make a duplicate or use Copy and Paste commands and then place the second text on top of the previous.
- Keep only one letter from the duplicated text and erase the rest of the letters. As an example, we will keep the letter “T” alone. You can set No Text Fill from the Format tab for Rectangle 4 (our previous text) and set the Text Outline Color to Black.
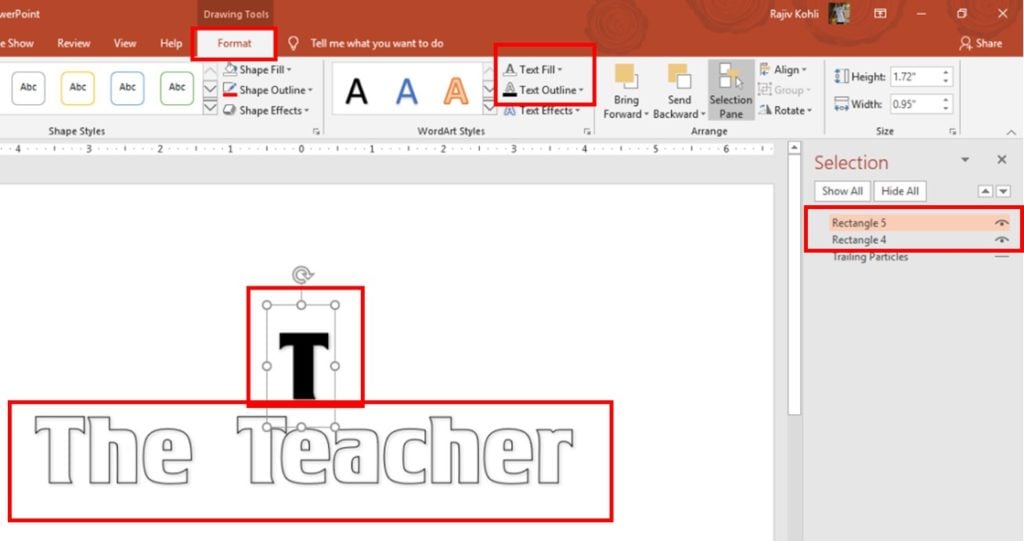
- Now, place the Letter “T” on top Outlined Letter “T” of “The Teacher” text. Placement should be accurate. You can use the SHIFT or ALT Keys while dragging and dropping the text.
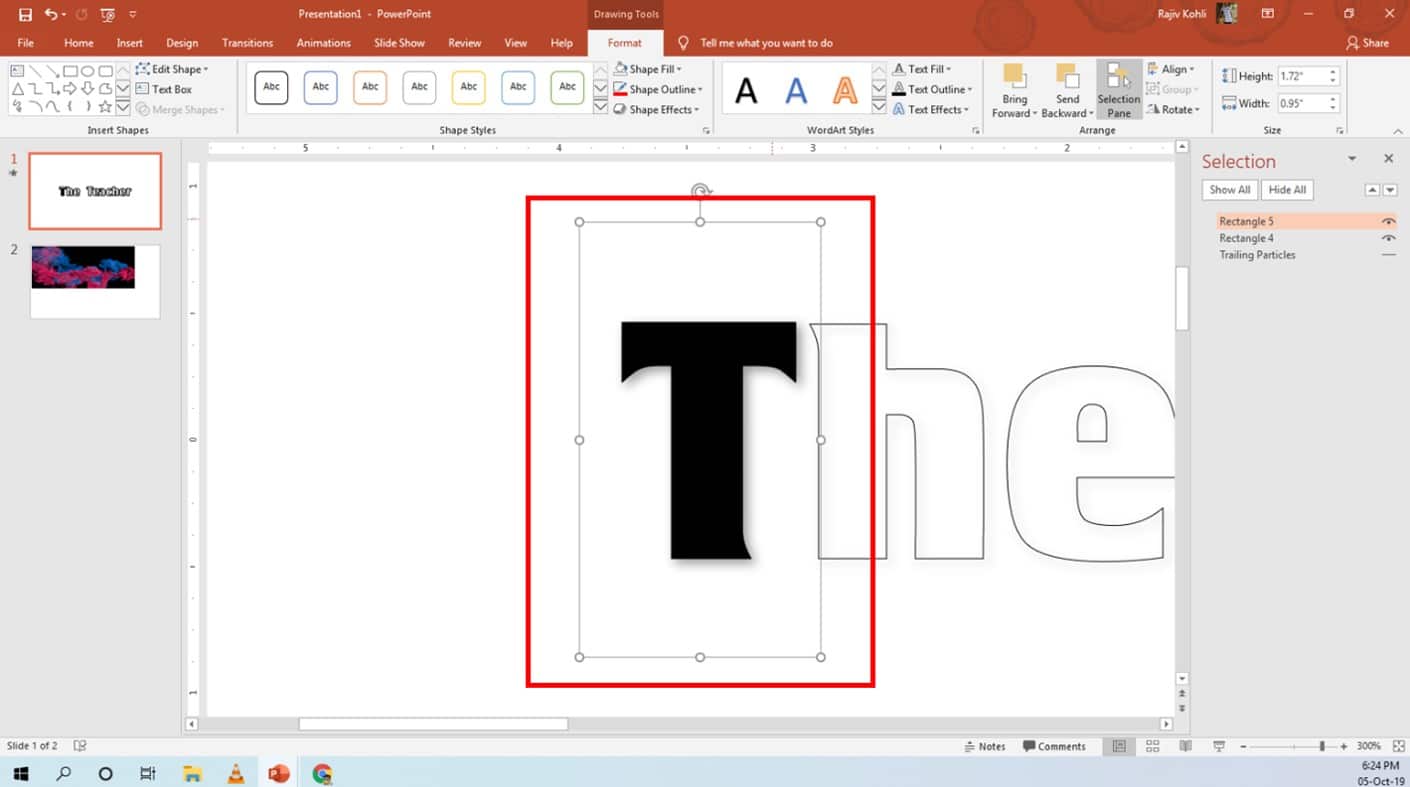
- Fill the top text with Smoke Particles picture that we saved in previous steps by clicking the Text Fill drop-down button from the Format tab and then choosing Picture. Choose From a File and browse for the location where you saved the screenshot as a Picture and then click Insert.
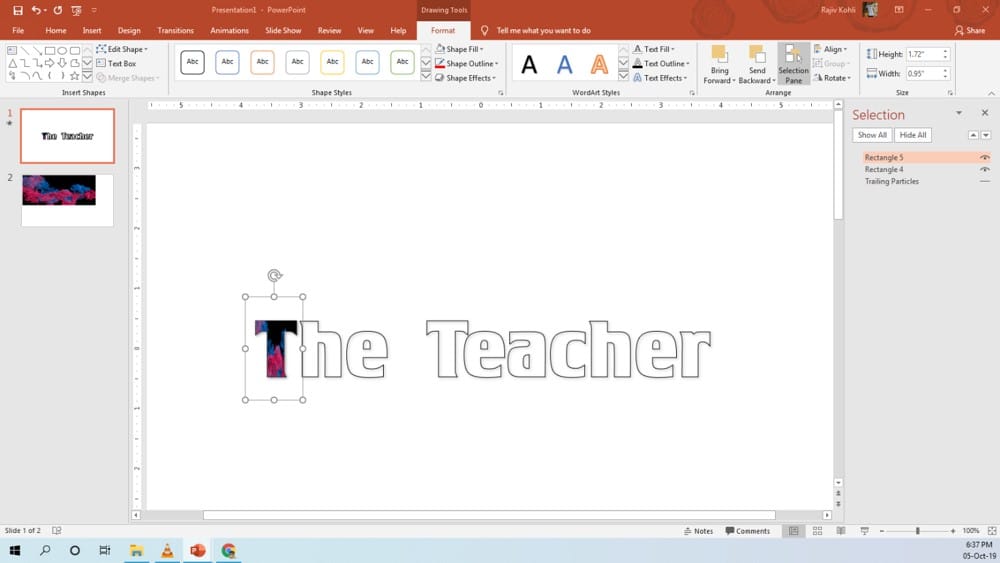
- Make another replication of Rectangle 5 (which is our black-filled color letter “T”). Change the text to the letter “H” and then place it on top of the previous “H” and repeat the same steps to cover all the letters.
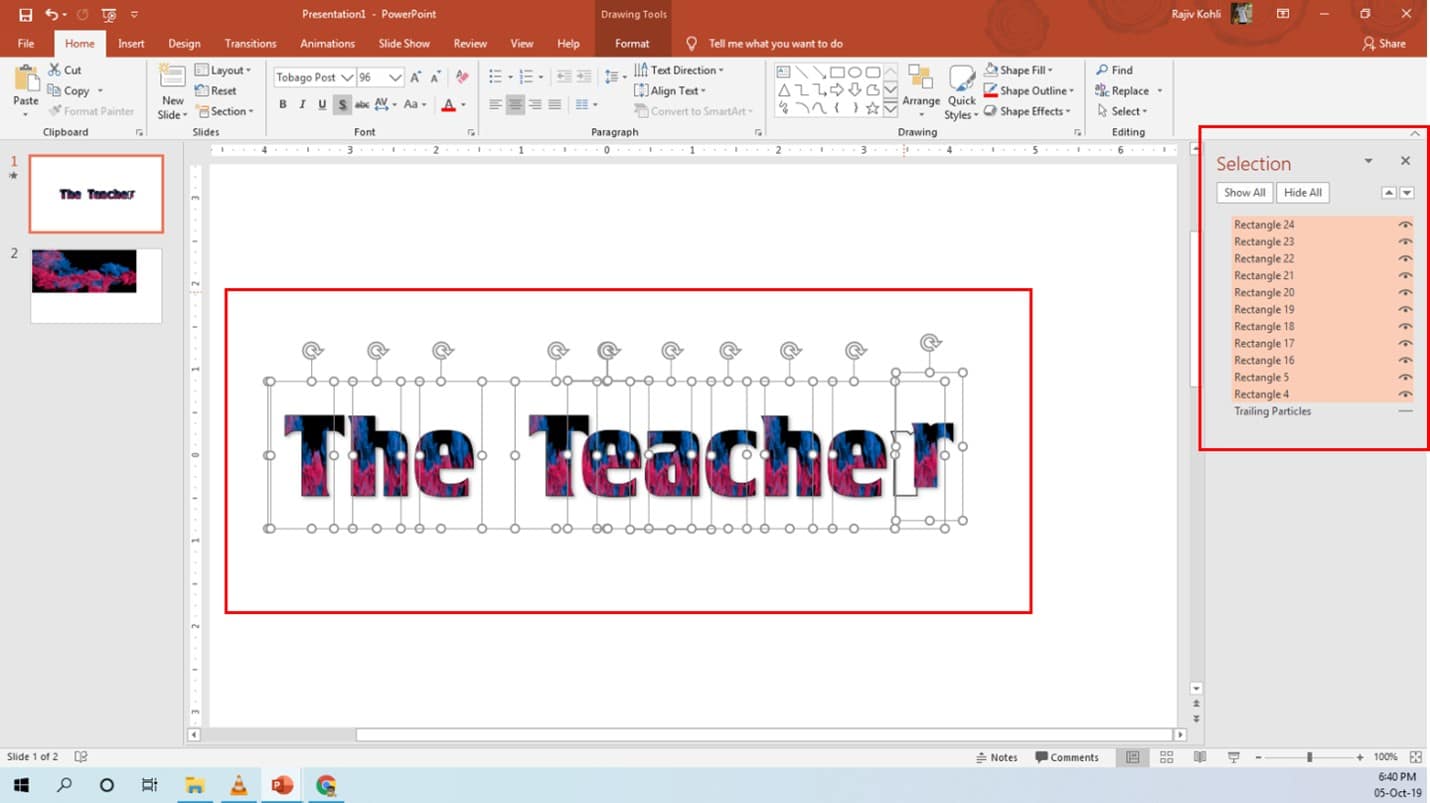
- As you can see in Figure 2.4 that each letter is behaving like a separate object in the Selection Pane because all the letters are in their individual Text box.
- Show the Trailing Particles video from the Selection Pane by clicking the Eye button.
Smoke Text Animation Effects
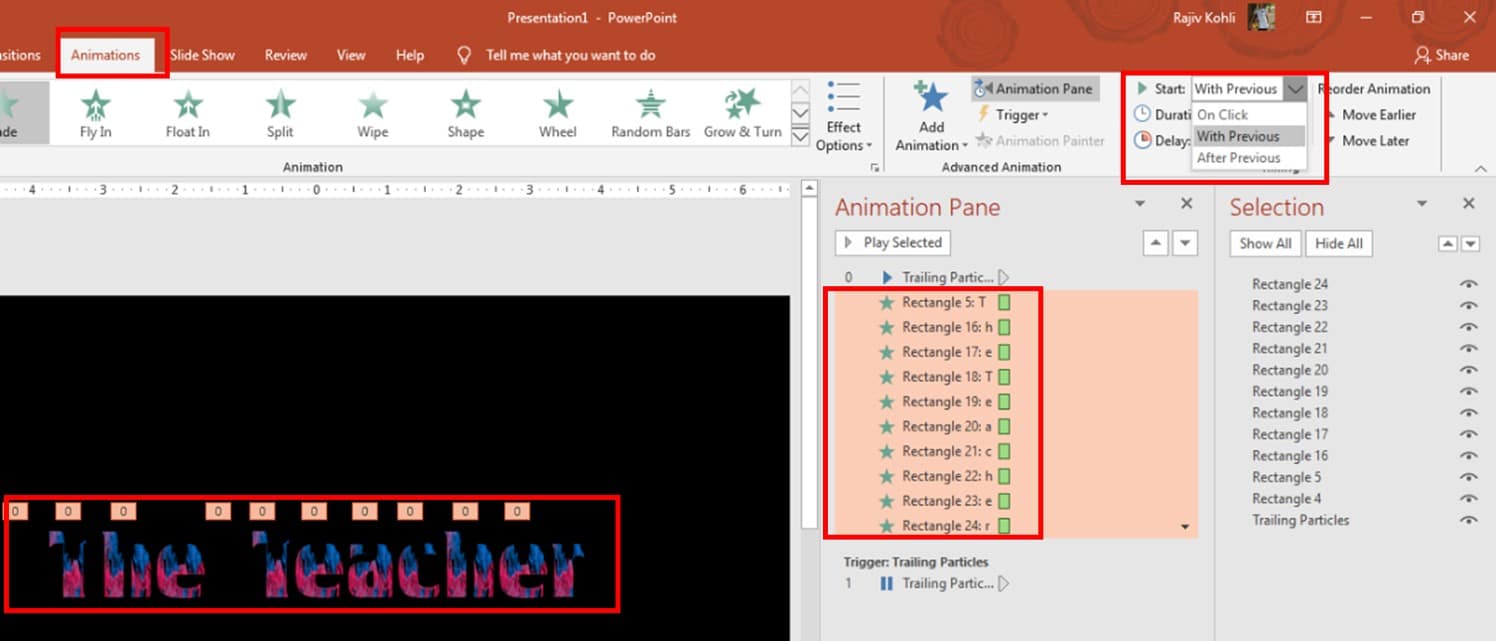
- As these are 10 different text objects as you can see in the Selection Pane; we need to apply the Fade Entrance effect on all these letters. Select all of them except the first object Rectangle 4 and click the Add Animation drop-down button from the Animations tab and apply the Fade Entrance effect.
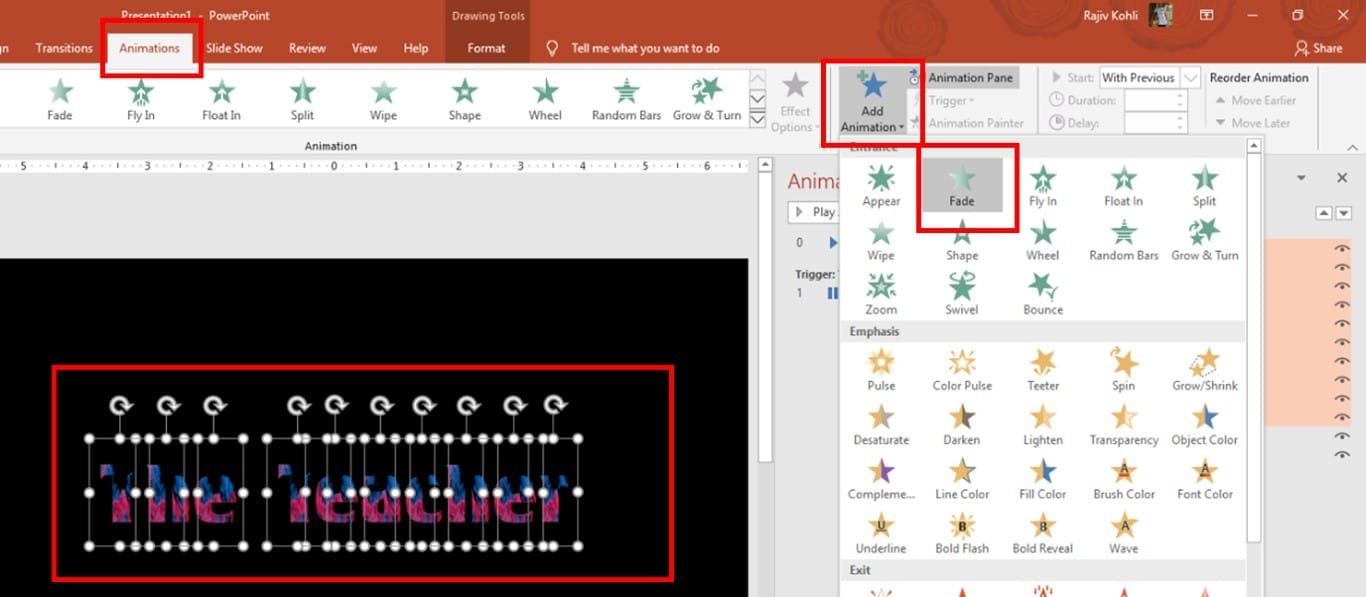
- Set all of them to Start – With Previous from the Animations tab.
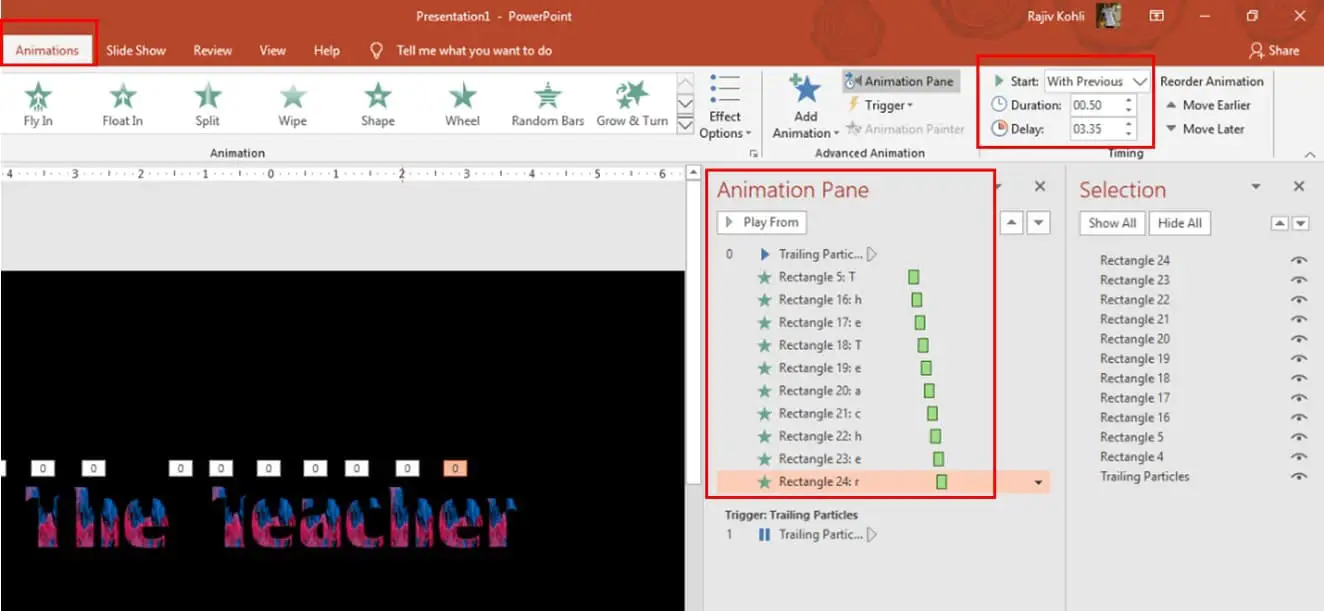
- The Smoke Trail will pass by at the text location at around 2 Seconds. So, set the Duration Timings to 0.50 Seconds and the Delay Timing of Letter “T” to 2:00 Seconds and then start adding a further delay of 0.15 to each next letter like for letter “H” Delay Timing will be 2.15, for letter “E” 2.30 and so on. The ending Delay Timing for the last letter will be 3.35 Seconds.
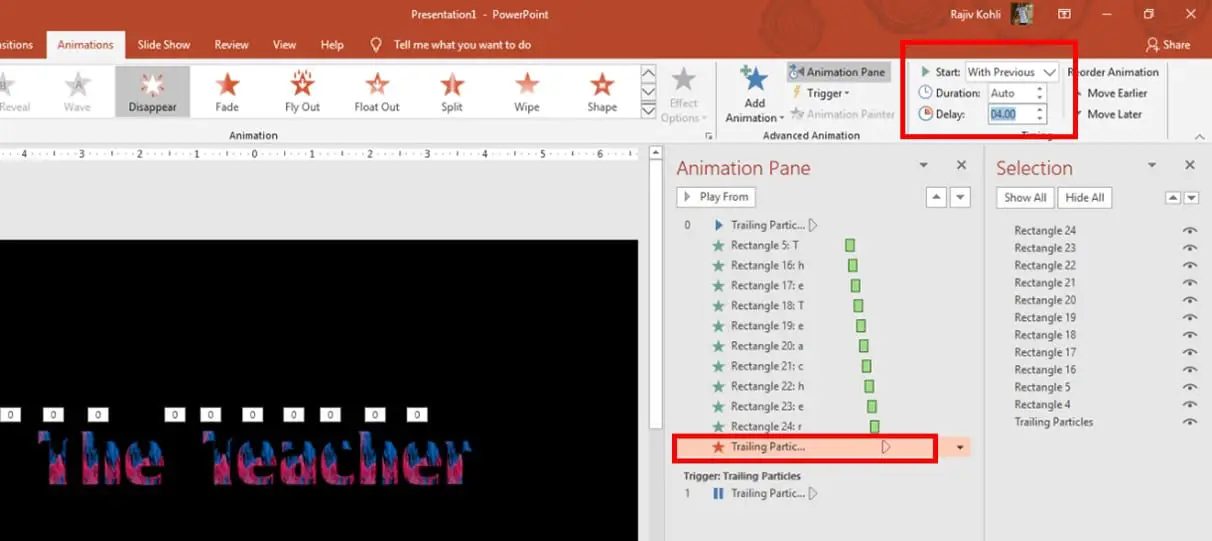
- Now, we will hide the Smoke Trailing Particles video so we may show the next Flare video. Otherwise, Trailing Particles will be on top and Flare will get behind it. Apply Disappear Animation effect to the Trailing Particles. Set it to Start With Previous with Delay Timings of 4 Seconds.
You can adjust the Duration and Delay Timings of any of the objects according to when you want them to appear/disappear from the screen.
In video a few adjustments in Delay Timings has been applied in the end.
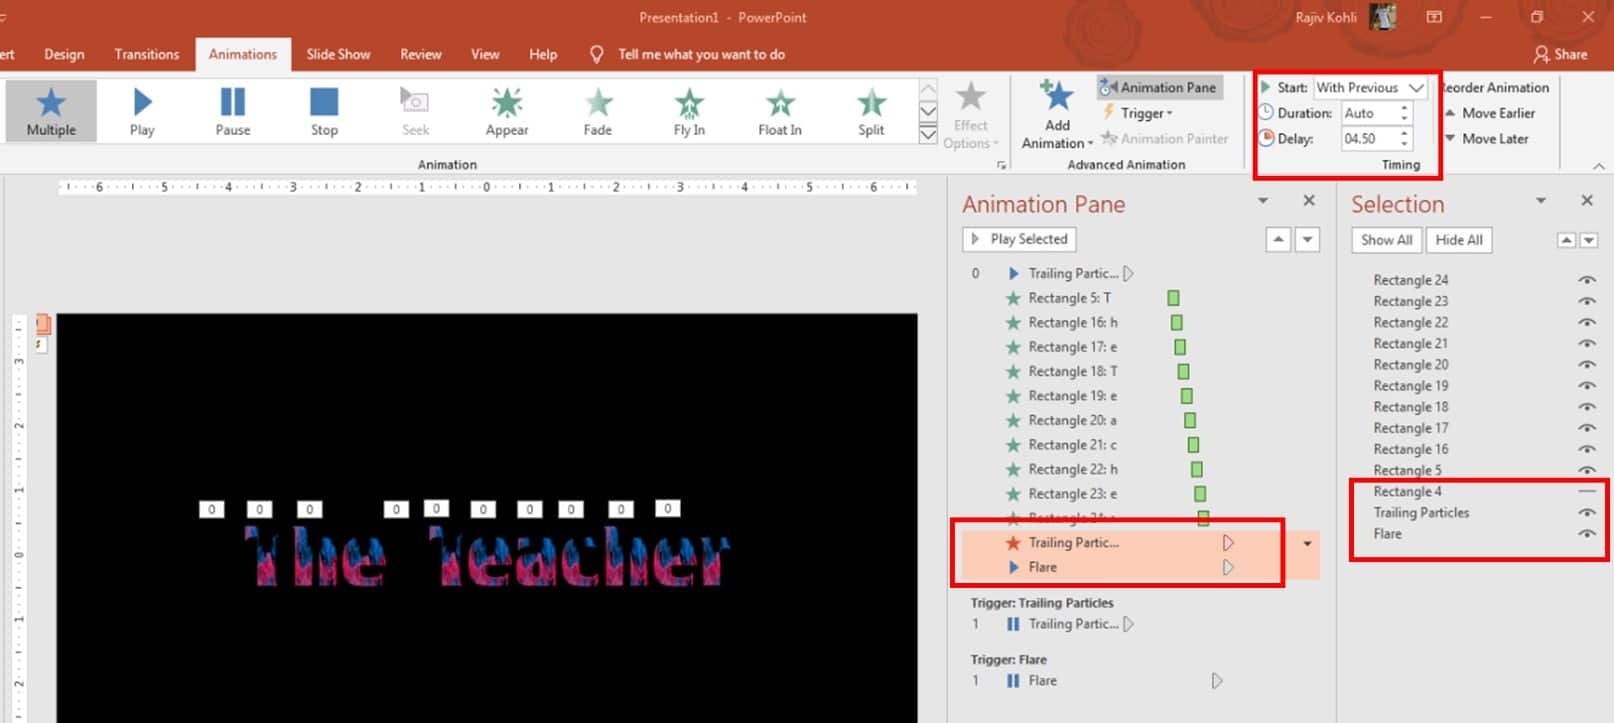
Finally, insert the Flare video from the Insert tab – Video – From File / Video on My PC. Set to Start With the Previous with Delay Timings of 4:00 Seconds (or 4:30 as you like). Make sure to send the Flare video behind all the other objects. Also, hide Rectangle 4 from the Selection Pane as we no longer need it.
In our Smoke Text Video Tutorial embedded below, we also added Glowing Text Layers when the Flare video flashes. You can skip that or you can use the Flash Once animation effect instead of applying Appear / Disappear effect to each layer at specific times.
I hope you got The Teacher Point!
Watch Smoke Text Effect Animation in PowerPoint Tutorial
The article How To Make Smoke Text Animation also applies to the following versions:
- PowerPoint 2007 (watch our video on How To Use Subtract Command in PowerPoint 2007)
- PowerPoint 2010
- PowerPoint 2013
- PowerPoint 2016
- PowerPoint 2019
Download Smoke Text Effect Animation in PowerPoint Presentation PPT
Download Smoke Text Effect Animation Asset Files (ZIP / MP4)
PPT Info
PowerPoint Presentation
File Type: PPT / ZIP
No. of Files: 2
File Size: 10MB PPT / 10MB ZIP+MP4
Number of Slides: 1 + MP4 Videos For Background
Scene: Animated Smoke Text Effect


Simply desire to say your article is as amazing. The clarity in your post is just great and i could assume you are an expert on this subject. Well with your permission let me to grab your RSS feed to keep up to date with forthcoming post. Thanks a million and please keep up the gratifying work.|
This page certainly has all of the info I needed concerning this subject and didn’t know who to ask. |
hello if I use this for my Youtube channel will I get copyrighted
No, Not at all.