
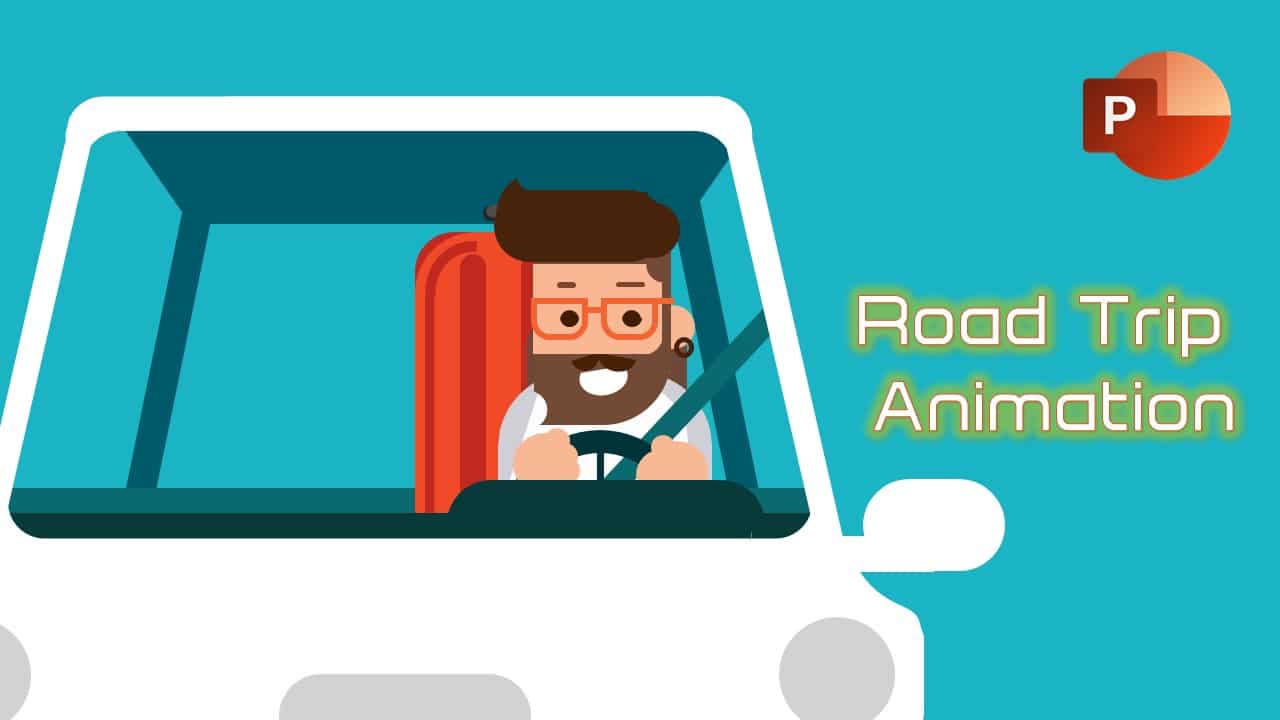
Introduction to Road Trip Animation
First I would like to mention the original Road Trip Animation by Bjorn Peters and of course, we just tried to replicate the same animation in PowerPoint to showcase animation #possibilitieswithpowerpoint. This is my 2nd collaborated project and the entire project is designed and animated by Creative Wolf. I just changed it a bit to match up with the original. Both presentations are available for download and the download link is given at the end of this article.
So, let’s dig into the tutorial and learn how we can create short animated scenes in PowerPoint. Don’t forget that you must have a good understanding of How To Use Shape Tools and Formatting Options to draw this kind of animation scene. As I always said that applying animation to objects is easier than drawing the objects in the first place, which surely takes a lot of time.
Road Trip Animation Scene Design
Take a look at Figure 1.1 for the Outline View of the Road Trip animation scene, where you can see all the different shape layers we used to draw the scene.
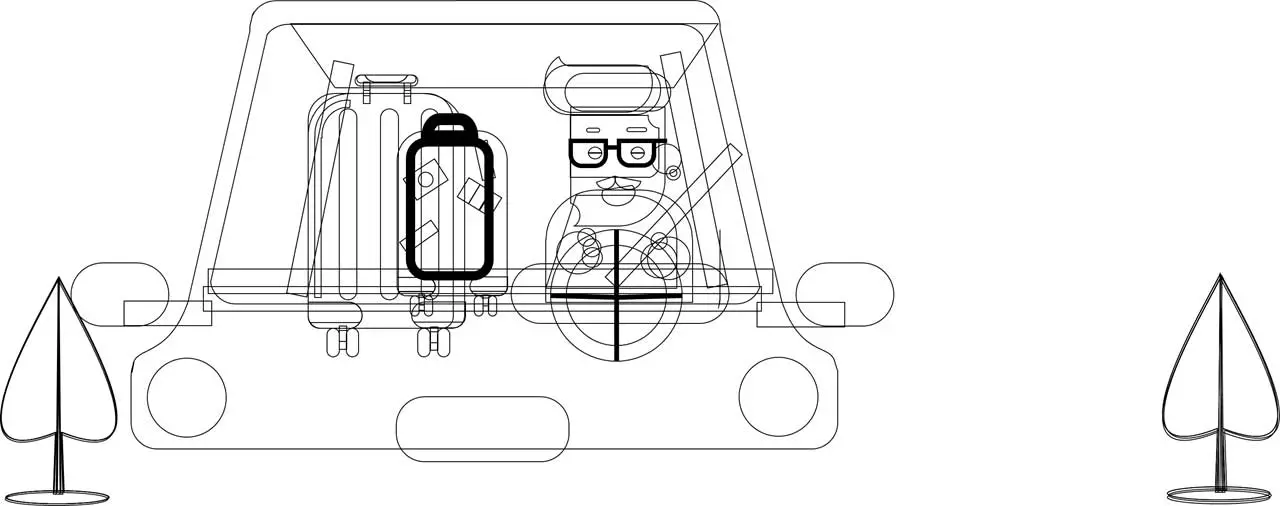
Figure 1.1
The Background and Trees Passing By Animation
As you might have already guessed that those are Trees that are moving by but not the Car. The Car is just moving left to right and vice-versa. We used two animation effects for trees: Grow/Shrink and Diagonal Up Right Motion Path. A total of 8 tree shape layers have been defined which you can see in the Selection Pane and have been placed on top of each other.
- Grow/Shrink size has been set to 0% without any Smoothness, the Duration is 4 seconds, and Repeating the animation Until End of Slide.
- For Diagonal Up Motion Path, we just moved them in a little bit, right behind the car with 4 Seconds Duration, Default Smoothness of 2 Seconds For Start and End, and Repeating Until End of Slide.

Figure 1.2
- The same animation effects have been applied to all 8 trees with a Delay Timing of 1 Second between each.
- You can either apply a Solid Fill Color or even can place a nice picture for the Background and there is the output in Figure 1.3:

Figure 1.3
All the rest of the layers have a single animation effect in common, which is Custom Motion Path. You can also use the Right Motion Path instead as we used them for Suitcase layers.
In Figure 1.4, you can see the Car Front, Dashboard, Car Steering, Seat Belt, Car Roof, and Back have a Custom Motion Path defined for them and the Right Motion Path to both of the Suitcases Layers. Man’s hands have been attached to the Car Steering and we also applied the Spin effect to it.
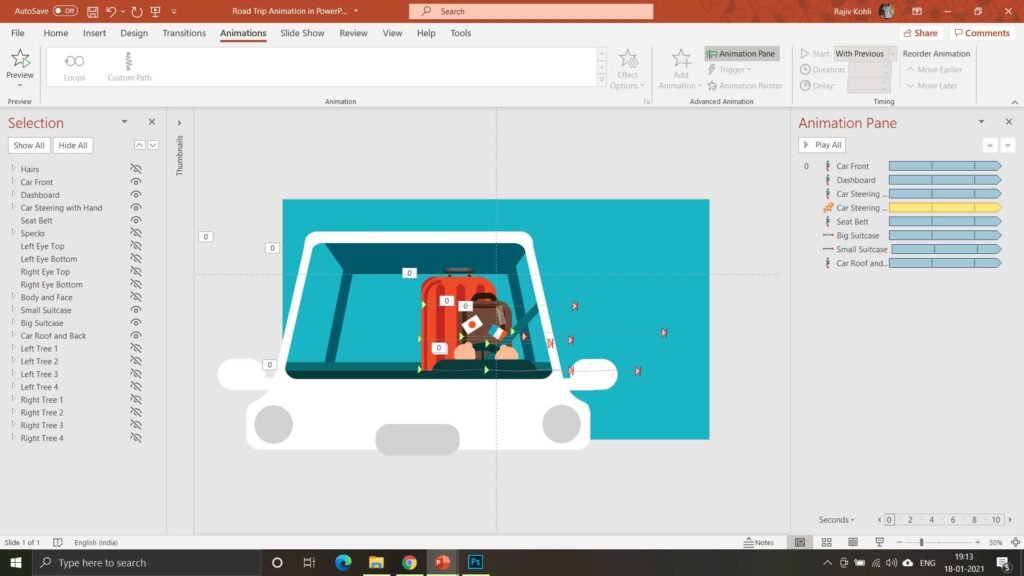
Figure 1.4
Understanding Car’s Shape Layers
A question arises here why do so many different shape layers for cars as all of them have the same Custom Motion Path of the exact same length? Why we haven’t grouped these layers into a single layer and then applied a single Custom Motion Path to it?
That’s because the Man is sitting between the Car Front, Dashboard, and Steering layers and he is also blinking his eyes. That is why we have to create separate shape layers and move them all together as you cannot apply different animation effects to a Grouped Object. Moreover, as the Hands has been attached to the Steering and has a 2nd Spin effect applied to it, so we have to separate it from other layers.
Motion Paths Animation Effect
- All Motion Path has the same Time Duration of 2 Seconds, With Default Smoothness of 1 Second Each for Start and End, with Auto Reverse enabled (the Total Duration of one loop will be 4 Seconds) and also repeating this animation Until End of Slide. See Figure 1.5:
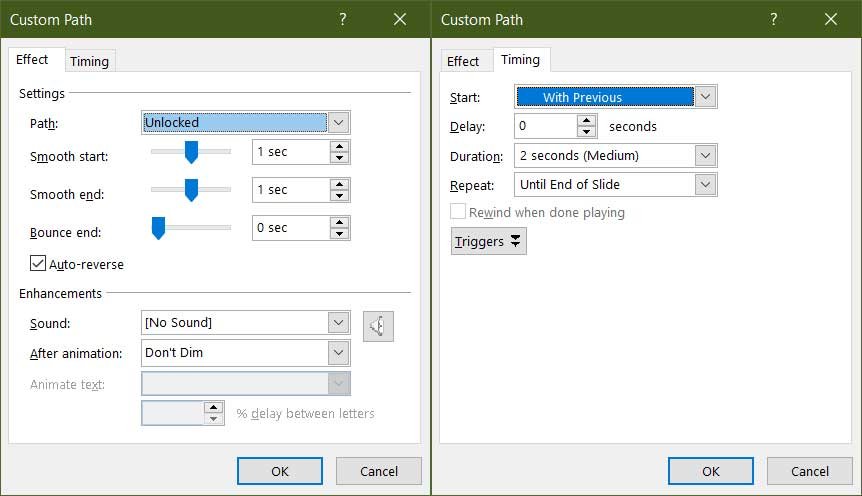
Figure 1.5
and here are the results in Figure 1.6:
Now, finally, let’s talk about the Car Driver. Specks are in front of the Eyes, so they have been drawn as a separate layer. You can notice no animations for Hair and Seat Belts whereas in the original animation, they have a bit of movement and that is to shorten the tutorial. You can read our Scooter Driver Animation in PowerPoint Tutorial article to learn more about adding realistic movements to the body parts.
Eye Blinking Animation
- As almost all the other layers have the same Motion Paths defined to them but we also used the Wipe Effect to create the Eye Blinking Effect on all 4 layers (Left Eye Top, Left Eye Bottom, Right Eye Top,, and Right Eye Bottom). So, if we add Steering with Hands and Seat Belt to it then what we get shown in Figure 1.7:
For the Bottom Part of An Eye, we used Wipe From Top and for the Top Part of An Eye, we used Wipe From the Bottom. You can check all the effect properties in the PPT attached below. You can watch our video tutorial embedded below to learn more about this animation.
I hope you got The Teacher Point and if you find this post useful then don’t forget to leave your valuable feedback below and do share it with your Friends! #HappyLearning