Introduction
After writing 70 dedicated articles on animations, I thought to write this article on How To Use Selection Pane in PowerPoint 2016 / 2019. However, this topic is not only limited to PowePoint but you can also use Selection Pane in other Microsoft Office applications like Microsoft Word and Microsoft Excel as well.
In the past so many years, I rarely used Selection Pane in other Office apps than PowerPoint. Mostly, I use PowerPoint for Animation purposes, where I need to draw and animate so many objects like Shapes, Pictures, WordArt, Symbols, and Tables and when I also need to apply animation effects, then a simple task of Selecting Objects can become very frustrating. The Selection Pane can then be a time-savior to help you Select, Hide / Unhide, Change Order, Rename, Group / Ungroup and Delete objects.
This article could be a little long but once you understand the Basics of using Selection Pane then it can save you a ton of time in all of your next PowerPoint presentations. So, let’s get started with How To Use Selection Pane in Microsoft Office applications?
How To Show / Hide Selection Pane in PowerPoint?
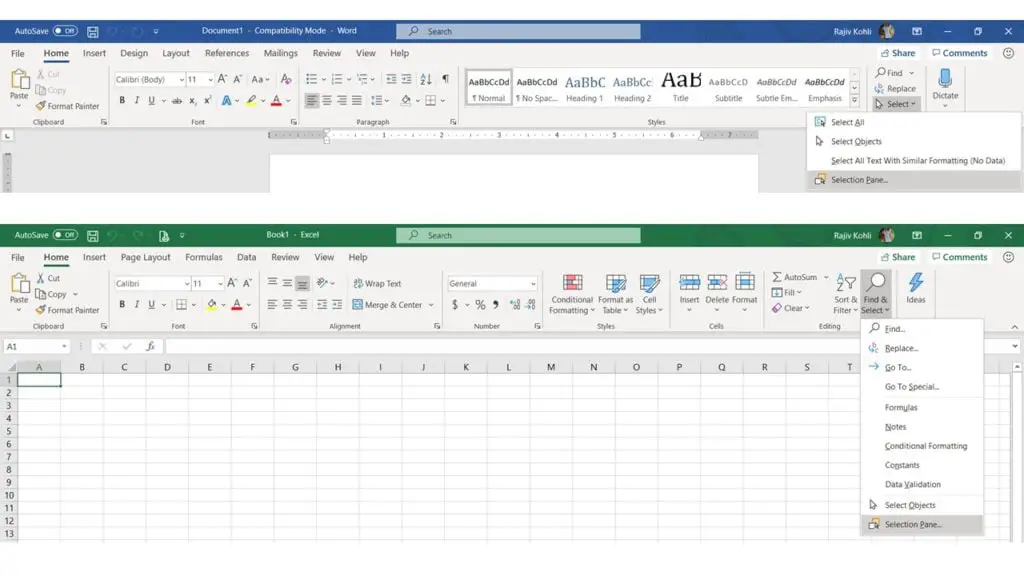
You can show or hide Selection Pane in PowerPoint using 2 methods. The first and most common is clicking the Select drop-down button from the Home tab and then clicking on Selection Pane. That applies to three major applications of Microsoft Office: Word, Excel, and PowerPoint. You can hide the Selection Pane by repeating the same steps. See Figure 1.1 and Figure 1.2.
- Click on the Home tab – click the Select drop-down button and then click on Selection Pane in PowerPoint, Excel, and Word.

Figure 1.2
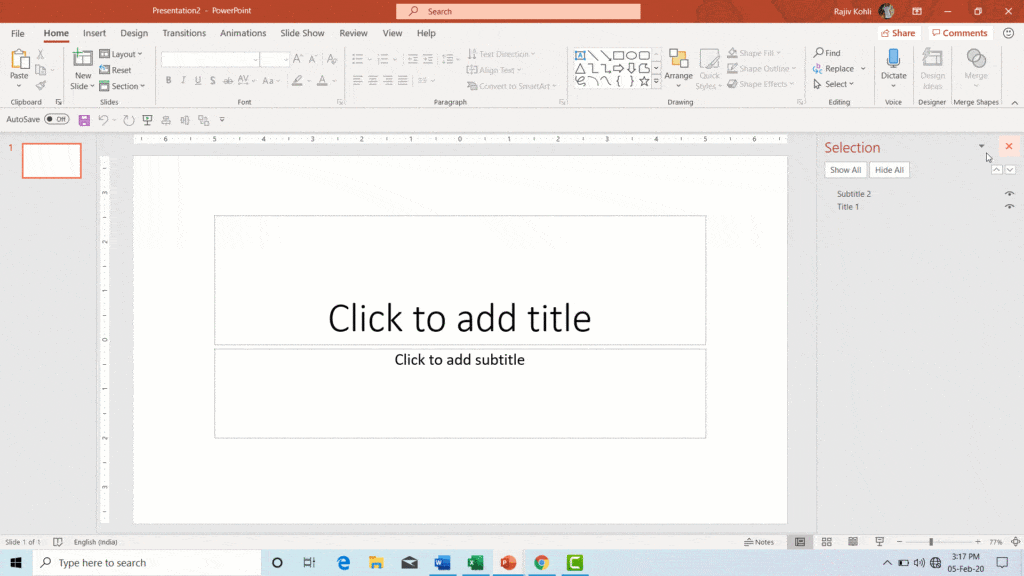
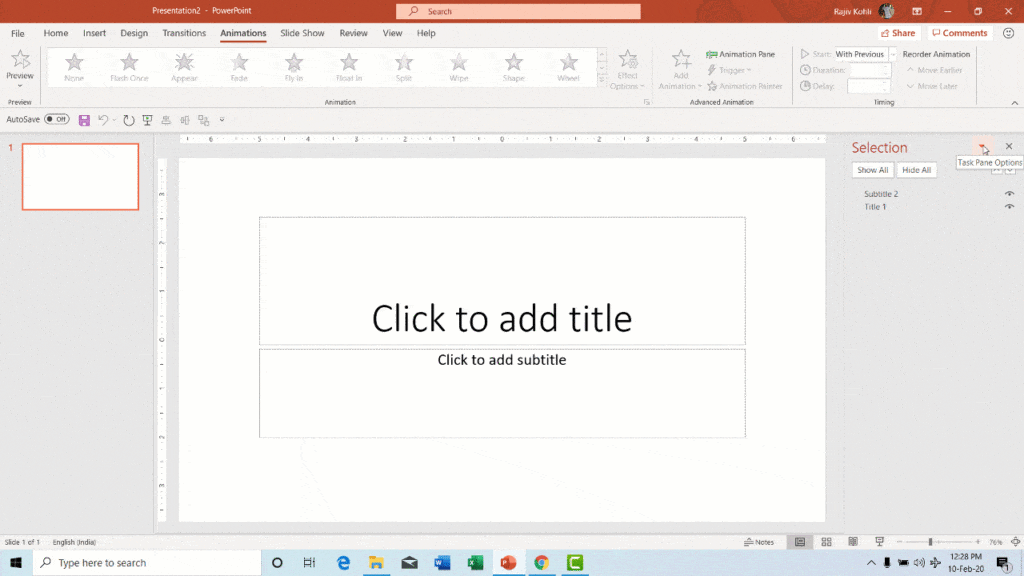
- So, if there are no contents inside your Document or Worksheet then you will see the Selection Pane with an empty list in Word or Excel but not in PowerPoint. That is if you are using a Blank Presentation with the Title Slide layout then you will find two objects: Subtitle 2 and Title 1 representing 2 text boxes available. See Figure 1.3 and Figure 1.4:
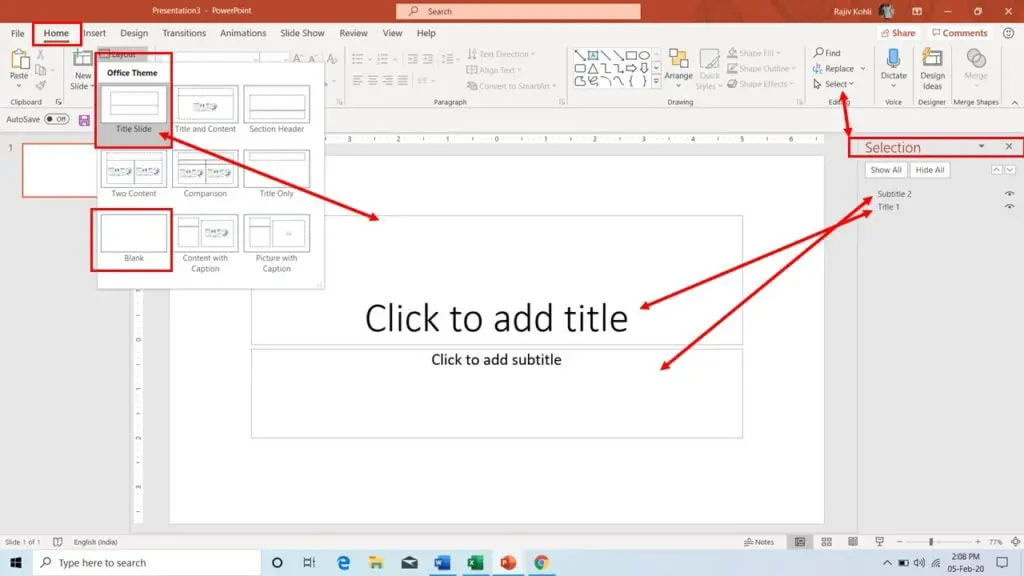
Figure 1.4
- The second method to open the Selection Pane is to use the Picture Format or Shape Format tabs after selecting the corresponding object. Like, if you have selected a shape then you can also bring the Selection Pane from the Shape Format tab as shown in Figure 1.5:
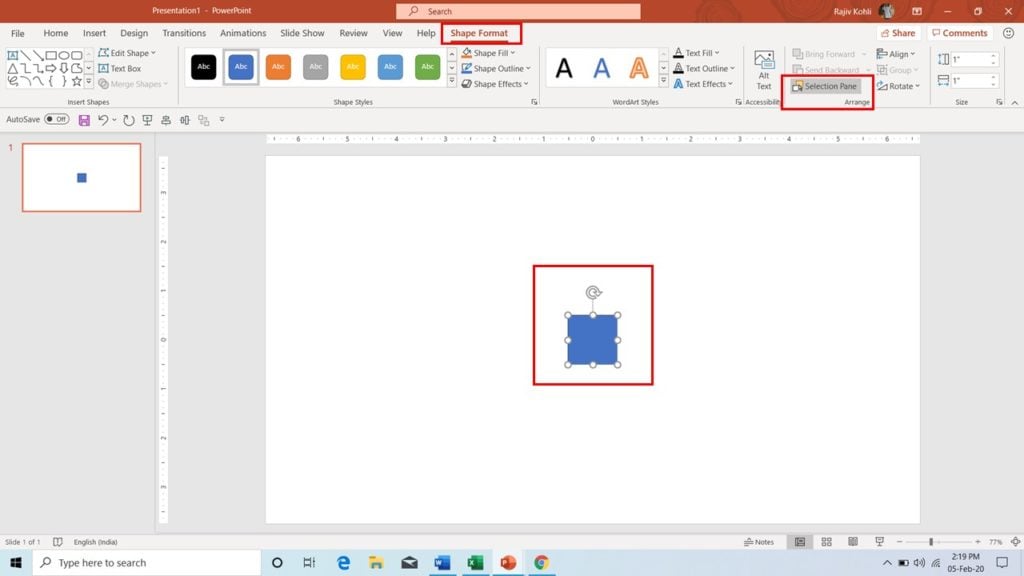
Figure 1.5
- You can also hide or disable Selection Pane by pressing the Close Button or by clicking on the Task Pane Options button from the Selection Pane and then clicking Close as shown in Figure 1.6:
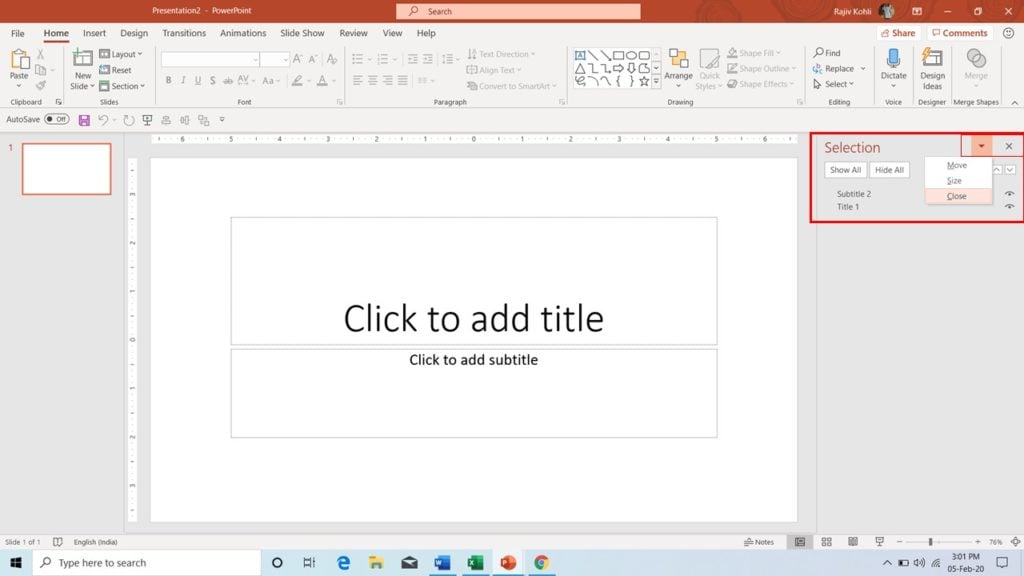
Figure 1.6
How To Move the Selection Pane?
- Almost all the panes in PowerPoint can be moved and placed in different locations. By default, the Selection Pane appears to the right of your slide.
- If you click the Task Pane Options button from the Selection Pane then you can Move, Resize, or Close the Selection Pane right from that menu.
- If you select Move from the menu and move your mouse to the left then Selection Pane will automatically start moving along with the mouse pointer.
- Upon reaching the left of the screen, the Selection Pane will automatically get attached to the left as shown in Figure 1.7.
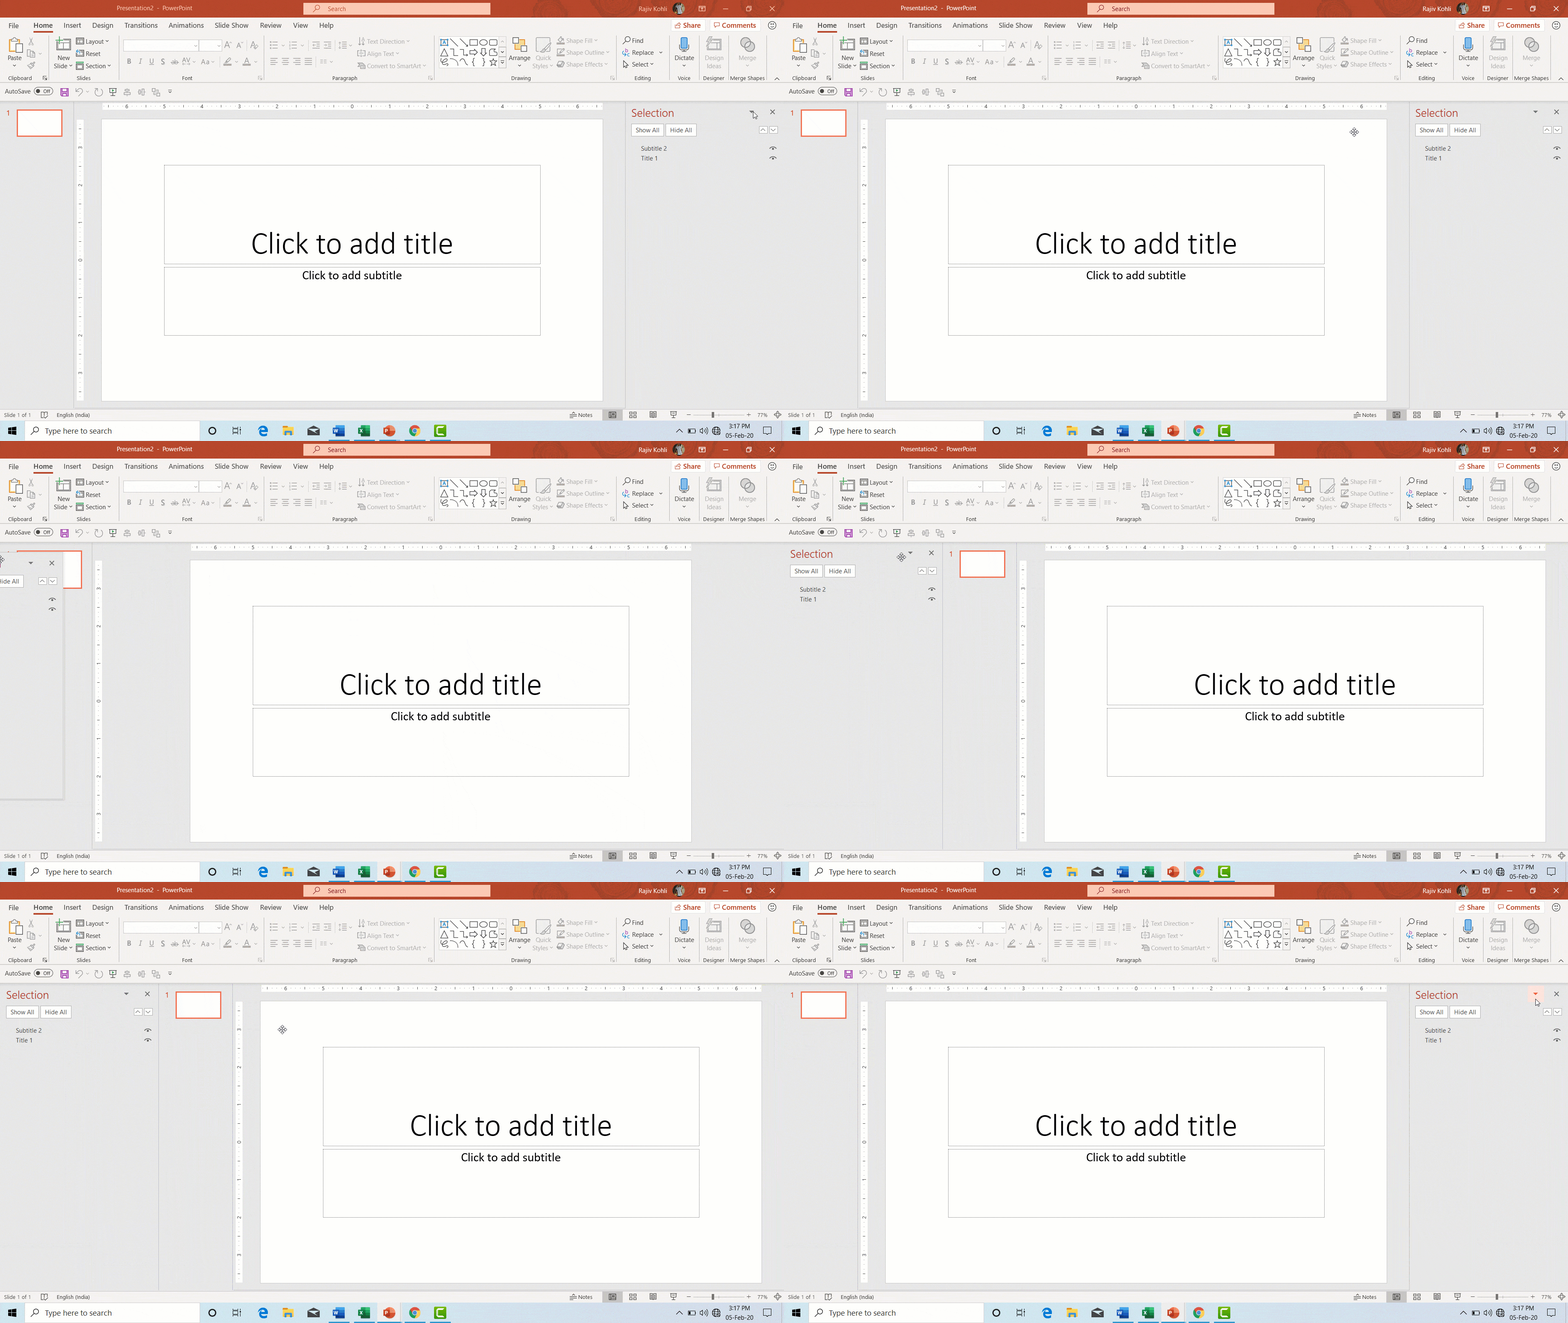
Figure 1.7
- You can also grab the Selection Pane from the Title Bar and detached the Selection Pane and can place it anywhere on the screen. See Figure 1.8:
How To Resize the Selection Pane?
- You can resize the Selection Pane either it is attached to the left or right side of the screen or has been detached using the above method as shown in Figure 1.8. In both cases, you just need to place the mouse pointer over the border and it will change to a double-sided arrow. You can also use the Task Pane Options drop-down button to resize the Selection Pane as shown in Figure 1.9:
How To Hide / Unhide Objects with Selection Pane?
When you insert an object inside your presentation whether it is a Shape, WordArt, Table, Picture, Audio, or Video, then its default name appears in the Selection Pane. If your presentation consists of many various kinds of objects then it becomes necessary to rename the objects and then you can easily identify and select the objects through the Selection Pane.
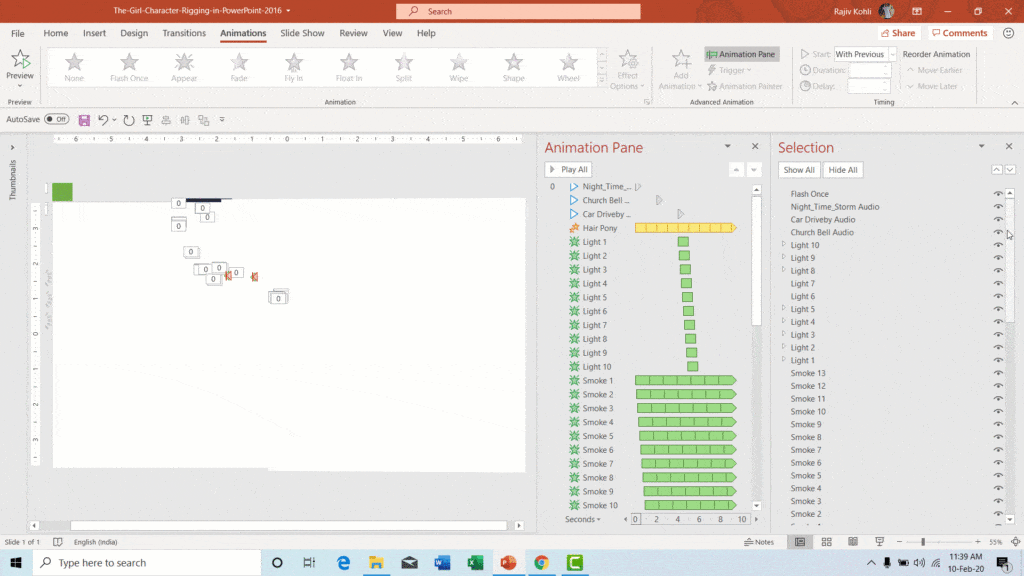
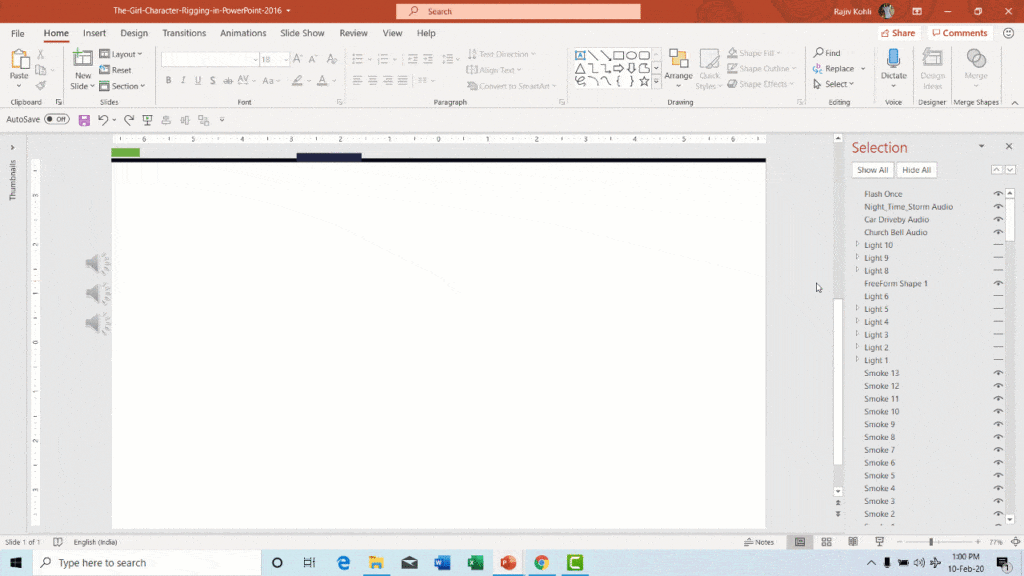
- Take a look at Figure 2, where a Girl Character has been drawn using different Shape Tools and a lot of animation effects have been applied to various objects in the presentation. Many of the objects in this presentation are on top of each other and it will become almost impossible to identify and select a particular object without the help of Selection Pane.
- You will not see the Girl Character unless you hide most of the Light objects by clicking on the Eye button.
- You can also hide/unhide all the objects at once by clicking on Show All or Hide All button on top of the Selection Pane.
- You can see an object that is under another object by hiding the top object temporarily by clicking on the Eye button once. Make the changes you like and then show the object on top by clicking the Eye button again.
Why and How To Rename Objects with Selection Pane?
So, if you are naming all the objects as you insert them, then later you can easily identify and select them through the selection pane or even you can work on a particular object by hiding the rest of them using the method described above. Naming objects can help you easily identify a particular object from a huge list of objects.
- To rename an object through the Selection Pane, select the object from the list and make another left-click with a short delay to rename it. Doesn’t matter if it is a single or a grouped object. You can also rename any item within a grouped object as well using the same method. See Figure 2.1
- Figure 2.1 shows that without hiding all the Light objects (Light 1 to Light 10) from the list, it will all most become impossible to work on the rest of the objects on the slide but you can only identify which object you want to hide/show if you have named the objects in the first place.
How To Arrange Objects with Selection Pane?
It is obvious that when working with so many objects then you also need to take care of the order of those objects. In Microsoft PowerPoint, you can change the order of objects from the Format tab using Send Backward, Send To Back, Bring Forward, and Bring To Front.
- Keep in mind that newly inserted objects in PowerPoint will always remain on the top and the first inserted object is at the bottom of the list in Selection Pane.
- You can also use the Selection Pane to arrange the objects on your slide either by dragging-n-dropping the object from the Selection Pane list or you can also use the Up Arrow (Bring Forward) or Down Arrow (Send Backward).
- The object that is inside a group can only be reordered within the group only.
I hope you got The Teacher Point.
Watch How To Use Selection Pane in PowerPoint, Word, and Excel Tutorial
The Selection Pane is only available in the following versions:
Excel for Office 365 Word for Office 365 PowerPoint for Office 365 PowerPoint for Office 365 for Mac Excel 2019 Word 2019 Excel 2016 PowerPoint 2019 for Mac Word 2016 PowerPoint 2016 Excel 2013 Word 2013 PowerPoint 2013 Excel 2010 Word 2010 PowerPoint 2010 Excel 2007 PowerPoint 2007 PowerPoint 2016 for Mac.
A Microsoft powerpoint tutorial


