
In this tutorial, we’ll explore the Stellar Data Recovery application and learn how to recover lost or deleted data from a mistakenly formatted and repartitioned hard disk drive. The Stellar Data Recovery Free Download edition allows you to scan and preview your entire hard drive for lost or deleted files and folders before deciding to invest in the Professional or Premium editions.
Watch How To Recover Lost or Deleted Data with Stellar Data Recovery Professional
Download Stellar Data Recovery Free
Real-World Scenario
In a real-world scenario, we have a customer’s hard disk drive that was accidentally formatted and repartitioned during the reinstallation of Windows. This drive contains crucial family pictures, videos, and other essential data. To increase the chances of successful data recovery, it is recommended to disconnect the affected hard drive and connect it to another working computer.
Identifying Drives Using Disk Management
When dealing with multiple hard drives connected to your computer, it’s wise to use Disk Management for a more accurate identification. Right-click on the Start Menu and choose Disk Management. Alternatively, you can right-click on the My Computer icon, select Manage, and then click Disk Management. Here, you’ll see a list of connected disk drives, their partitions, and other relevant information.
- Disk 0: Current operating system drive (C and D logical drives).
- Disk 1: External drive for saving recovered data (E and F logical drives).
- Disk 2: Problematic drive accidentally repartitioned and formatted (H and I drives).
Understanding Drive Properties
Checking the properties of the problematic drives (H and I) reveals crucial information. For example, H drive is 195GB in total, with 10GB used by Windows installation and 185GB free. Further exploration of the H drive shows the current Windows installation folders. The I drive is 275GB, with only 214MB of new files copied after formatting.
Using Stellar Data Recovery
Let’s dive into the Stellar Data Recovery application to recover lost and deleted data resulting from system crashes, formatting, accidental deletion, virus attacks, or partition/drive errors.
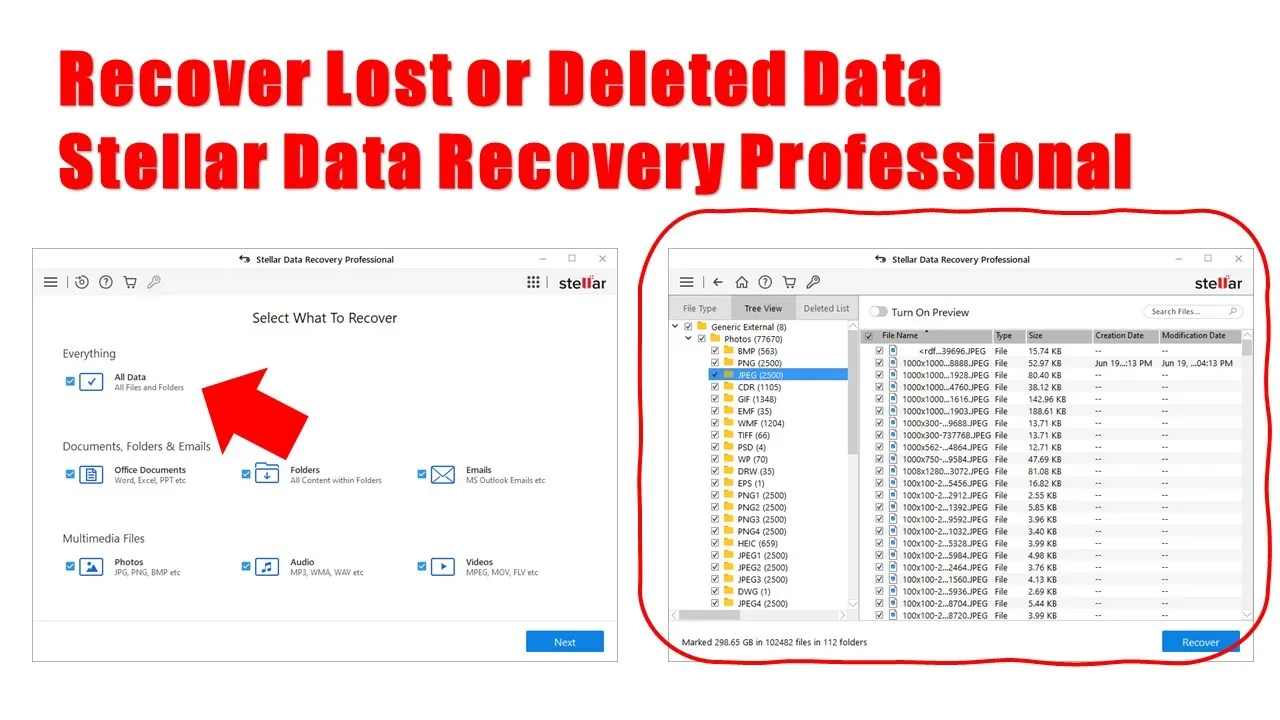
- Select What to be Recovered: Choose between recovering everything or specific file types such as Documents, Folders, Photos, Videos, and Emails.
- Recover From: Specify the drive or location from which you want to recover data. In this case, select the 3rd hard drive (465GB Generic External drive) and click Scan.
- Scanning Process: Monitor the scanning process in the right-side pane, displaying the status and a tree view of deleted files on the left. Note that the Free Edition only supports scanning and previewing. Professional or Premium versions are required for actual recovery.
- Saving Scanned Results: Stellar Data Recovery allows you to stop the scan and save the results for later use. This is especially useful for large drives or when scanning overnight.
- Recovery Process: Once the scan is complete, select the files or folders you wish to recover and click the Recover button. Choose a location to save the recovered data, ensuring it’s not the same drive you’re recovering from.
Conclusion
In conclusion, Stellar Data Recovery proves to be a powerful tool for retrieving lost and deleted data. The ability to preview scanned results, pause and resume scans, and recover specific file types makes it a valuable asset in data recovery scenarios.
If you found this tutorial informative, don’t forget to like, share, and comment. Subscribe for more tutorials, and take care of your data!


