
In this tutorial, we will talk about How To Use Sections in Microsoft PowerPoint. It’s a versatile tool for creating visually appealing and engaging presentations. However, as your presentations grow in complexity and length, it can become challenging to maintain an organized structure. This is where PowerPoint Sections come to the rescue. In this comprehensive guide, we’ll explore how to use PowerPoint Sections effectively to manage and organize your slides for maximum efficiency and productivity.
Why Use Sections in PowerPoint?
Sections in PowerPoint offer a simple yet powerful way to divide and conquer your presentations. They bring several benefits to the table:
1. Enhanced Organization
Divide your presentation into logical sections to create a clear structure. Whether it’s an introduction, multiple chapters, or various topics, sections help you keep your content well-organized.
2. Streamlined Navigation
Sections make it easier to navigate through your presentation, particularly when dealing with a large number of slides. You can expand or collapse sections to focus on the relevant content, simplifying the process.
3. Efficient Slide Management
Working with sections allows you to perform actions on specific groups of slides. This includes changing backgrounds, hiding or unhiding slides, altering layouts, and adding transitions – all with just a few clicks.
Creating and Managing Sections
Let’s dive into the practical aspects of creating and managing sections in PowerPoint:
Adding a New Section
- Open your PowerPoint presentation.
- Navigate to the “Home” tab.
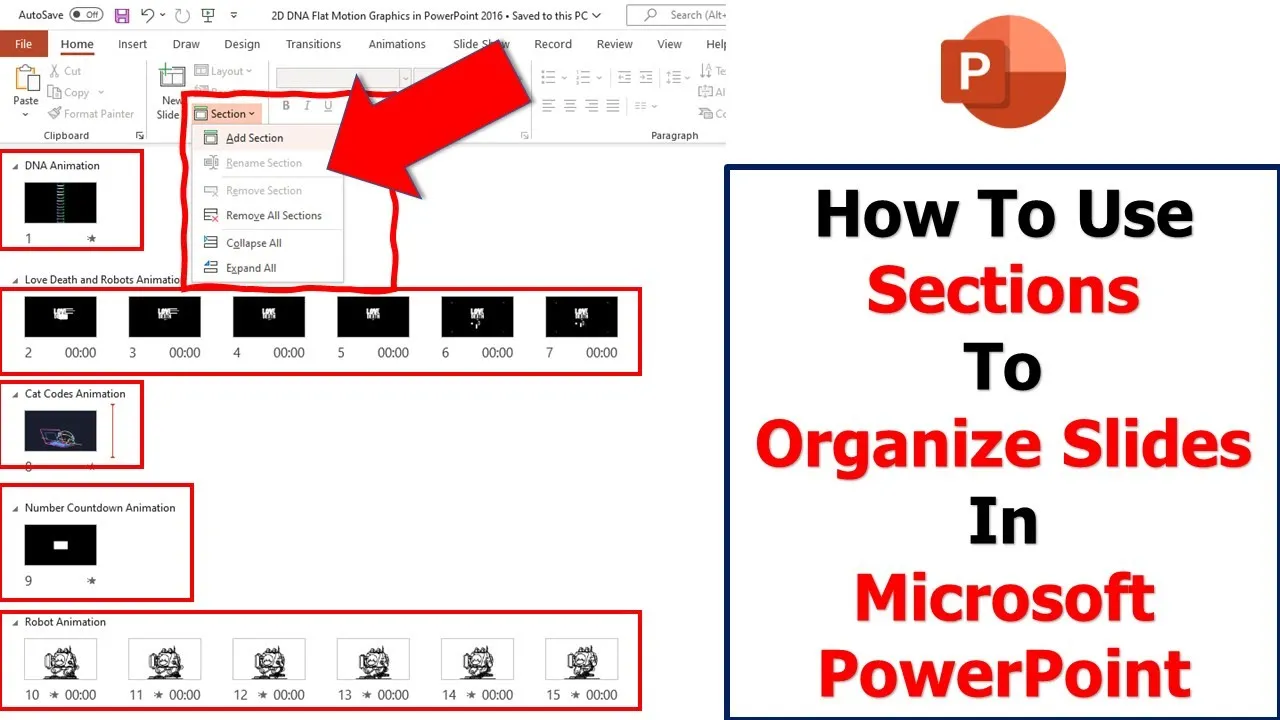
- In the “Slides” group, click on the “Section” dropdown.
- Select “Add Section” and give it a name.
Repeat this process for each section you want to create.
Renaming Sections
To rename a section, simply right-click on the section name and choose “Rename Section.” Give it a descriptive name for easy identification.
Organizing Sections
To rearrange your sections, you can drag and drop them to the desired position. Alternatively, right-click on a section and choose “Move Section Up” or “Move Section Down.”
Removing Sections
If a section is no longer needed, right-click on its name and select “Remove Section.” Be cautious, as this action deletes both the section and its associated slides.
Using Sections for Maximum Efficiency
Now that you’ve created and organized your sections, here’s how to leverage them for a smoother workflow:
Applying Commands to Specific Sections
- In the Thumbnail View, select a section by clicking on its name.
- Right-click on a slide within the section.
- You’ll see commands that can be applied to all slides in that section, such as copying, duplicating, deleting, changing backgrounds, or hiding/unhiding slides.
Bulk Editing
Want to change the background color, transition type, or slide layout for all slides in a section? It’s a breeze! Just select the section and apply the desired changes.
Slideshow Customization
During a presentation, you can choose to hide specific sections to focus on specific content. Simply select the section, go to the “Slideshow” tab, and click “Hide Slide.”
Conclusion
Mastering PowerPoint Sections is a game-changer for anyone who frequently works with this presentation software. It brings a new level of control and organization to your slides, ensuring your presentations are polished and professional. Start using sections in your PowerPoint presentations and experience the benefits firsthand.
In our next post, we’ll explore advanced techniques for using PowerPoint transitions to make your presentations more dynamic and engaging.
Stay tuned, and keep creating stunning presentations!


