
In this article, we will describe all the steps required to convert your PowerPoint Presentation to video as a single file. When you convert your presentation to a video, then PowerPoint automatically preserves all the animations, transitions, and media files available on all the slides. Along with that, you can also include all recorded timings, narrations, and ink strokes. PowerPoint only supports exporting your presentation into MP4 format only. So, let’s begin and see what PowerPoint has to offer when converting a PPT to MP4.
Save A Presentation To Video
The steps to save a Presentation as a video are easy but below we are also describing all the other options that can be useful for you when saving your presentation as a video.
- Open your presentation that you wish to save as video.
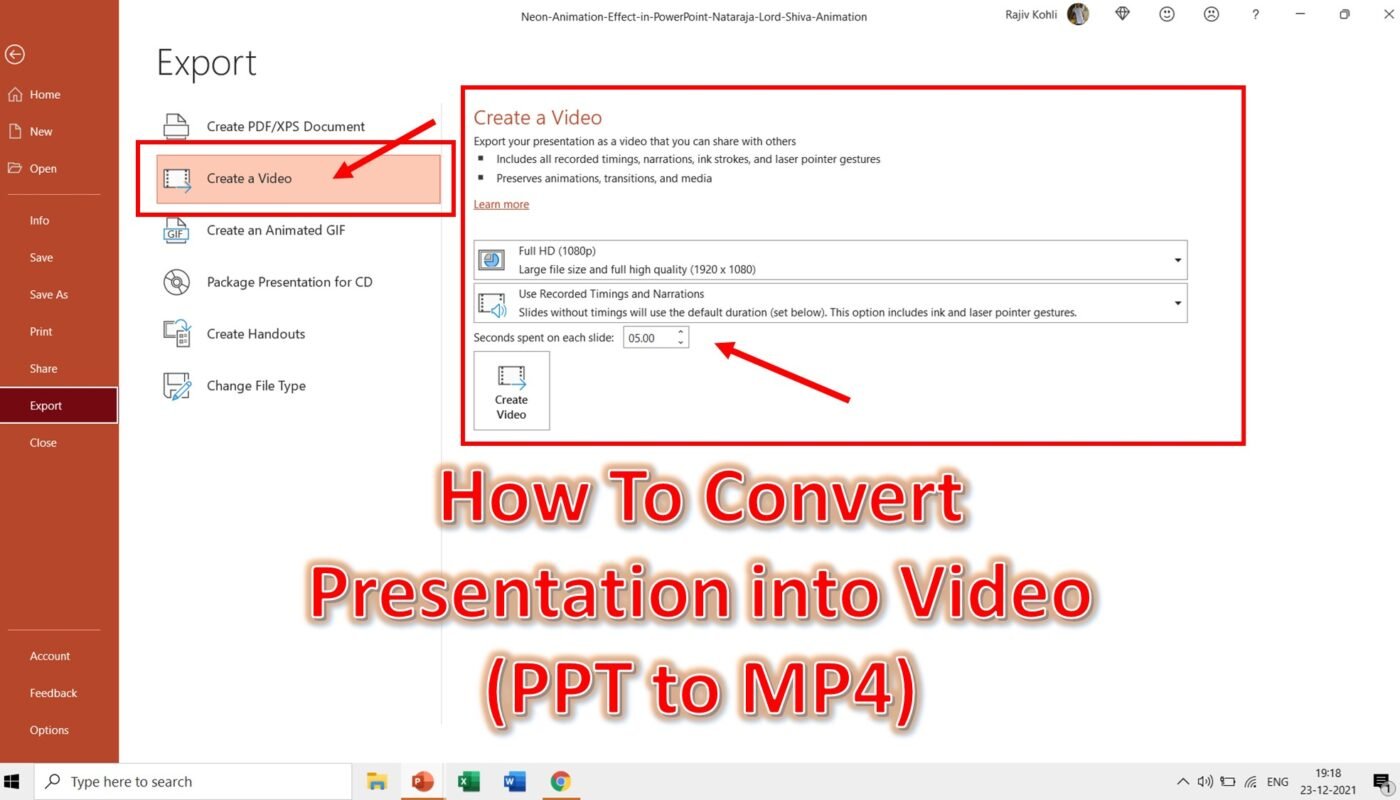
- Click File menu – Export – Create a Video
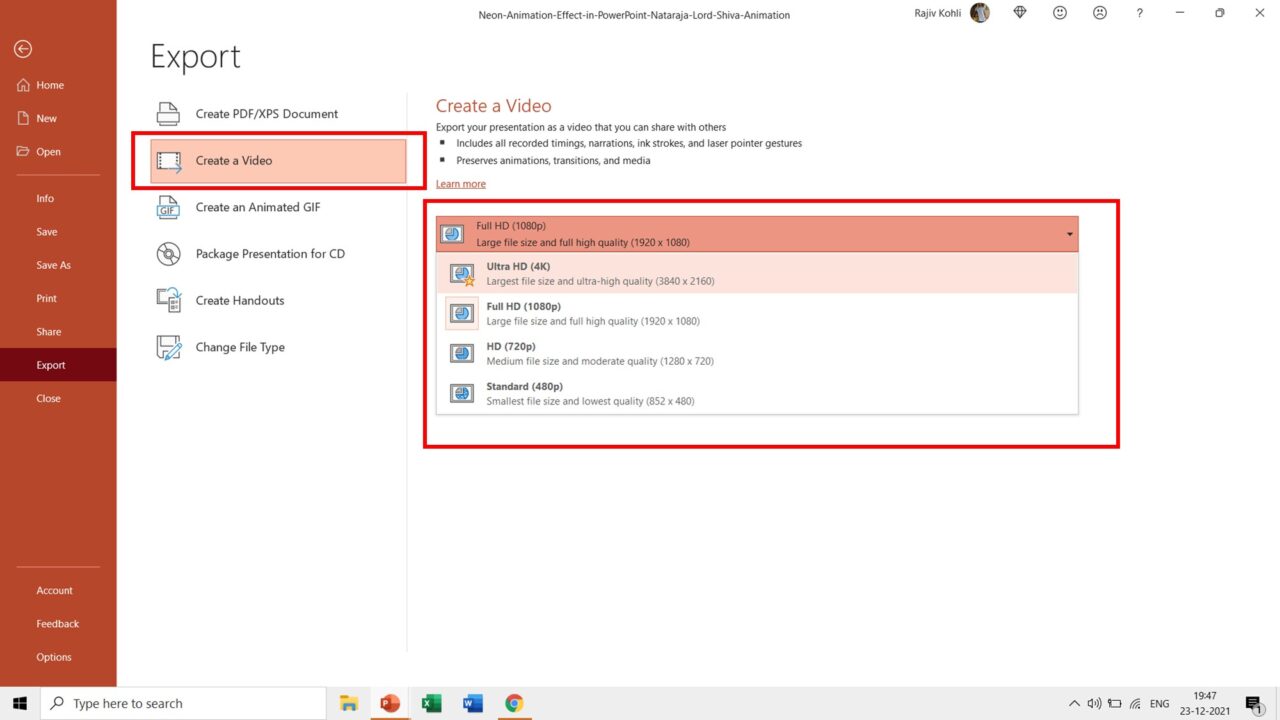
- The first option here is to choose the quality of the video and you have the following options:
- Ultra HD (4K) with 3840×2160 Resolution but will create a larger size video file.
- Full HD (1080p) with 1920×1080 Resolution, mostly used nowadays.
- HD (720p) with 1280×720 Resolution, best with normal video file size and standard HD video quality.
- Standard (480p) with 852×480 Resolution, small video file size with Standard Video Quality.
Using Recorded Timings & Narrations
In case, if you have only one slide in the presentations or you haven’t defined any Timings or haven’t recorded any Narrations then the “Use Recorded Timings and Narrations” option might be disabled by default as shown in the following screenshot:
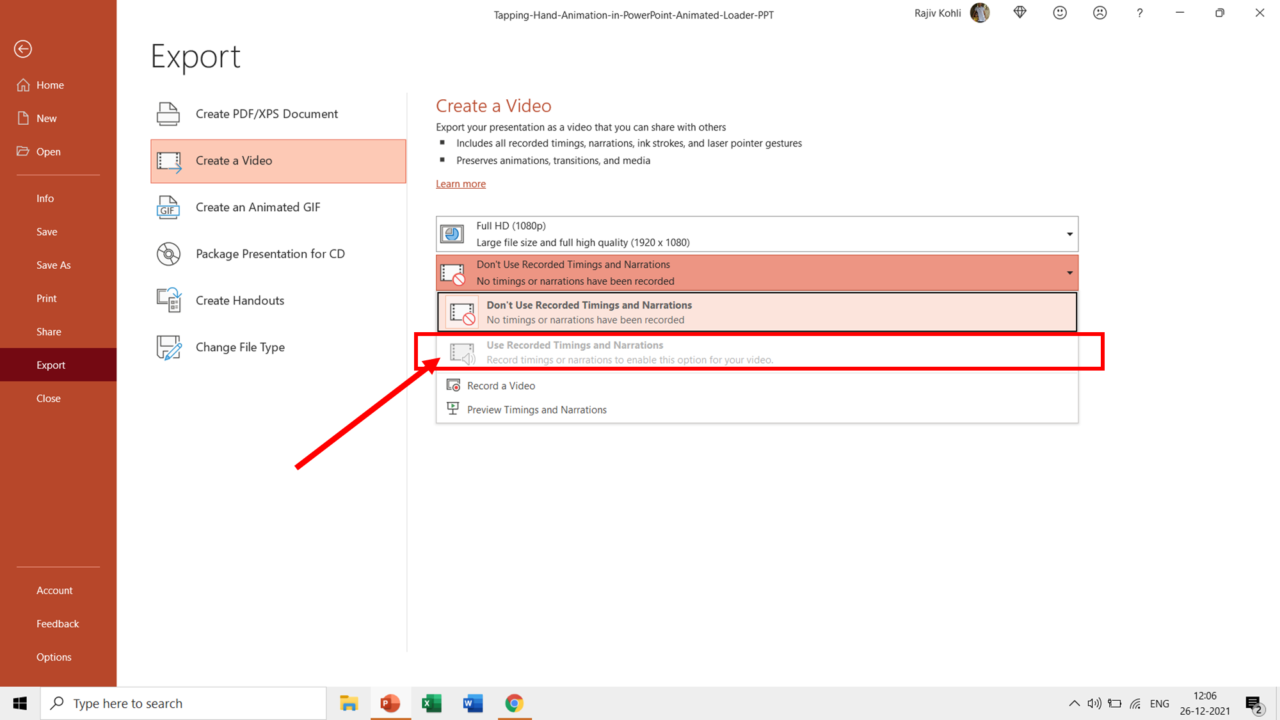
But if you have more than one slide and you have also defined the Advanced Slide timings through the Transitions tab and have unchecked the option “On Mouse Click” then while exporting the video “Use Recorded Timings and Narrations” options will be selected by default.
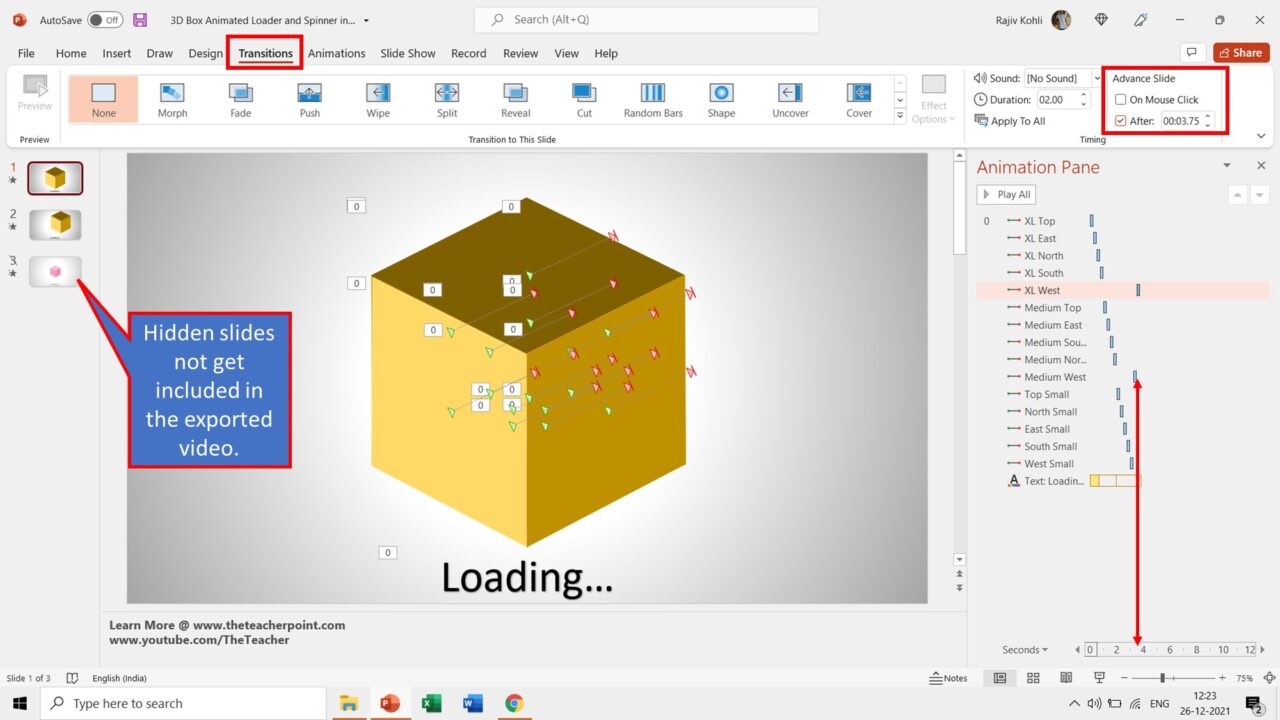
Do note that the slides which are hidden will not be included in the exported video.
In the following screenshot, we have 3 slides in the presentation and the 3rd slide is hidden. On the 1st and 2nd Slides, we have defined the Advanced Slide timings according to the total duration of the animations we have defined in the Animation Pane and we have also unchecked the option on “Mouse Click.”
For instance, on the 1st slide, the total length of all the animation effects applied to different 3D Box objects is 3.75 Seconds. So, we used the same duration for Advanced Slide. If we use let’s say 5 seconds instead of 3.75 seconds, then during slideshow the slide will remain on screen for 5 seconds even all the animation effects get finished after 3.75 seconds. It is like, we want our 1st slide to remain visible for further 1.25 seconds even after all animation effects get completed.
So while exporting the video, PowerPoint will take the Advanced Slide timings into the account doesn’t matter what are the total timings of animation effects applied to the objects in the slide.
But PowerPoint will do that only if the Advanced Slide timings are greater than the total animation effects length. Like, if you try to shorten the length of Advanced Slide timings to 1 second even when the total length of animation effects is 3.75 then while exporting the video, PowerPoint will ignore the Advanced Slide timings and will use the total animation effects length for that slide.
Finally, if you haven’t applied any animation effects to your slide and want to use a fixed timing for each of the slides then you can also do that while exporting the video. For instance, if you want each of the slides to remain visible for 3 seconds in the video and want to ignore the Advanced Slide timings then you can do that by applying the “Seconds Spent On Each Slide” option while exporting the video as shown in the following figure:
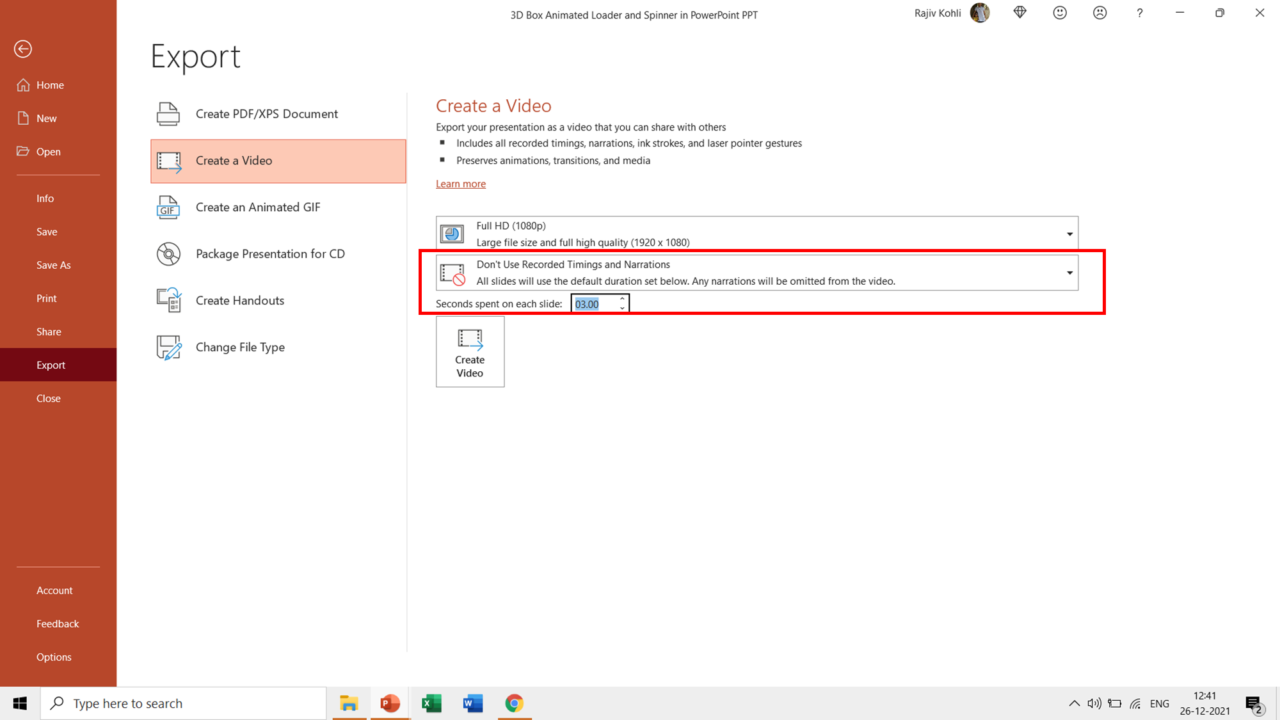
This option can be useful if let’s say you have 20 slides each having a picture on it and you want to convert that into a video without defining any Advanced Slide timings or Use Recorded Timings and Narration Option. Then you can simply use the “Don’t Use Recorded Timings and Narration” option and define “Seconds spent on each slide” let’s say to 3 seconds.
The total length of the video will be then 60 seconds (20 Slides x 3 Seconds each) while each slide will remain visible in the video for 3 seconds and it will automatically move to the next slide. That feature could be useful if you quickly want to make a picture slideshow without warring about the durations and timings.
You can also watch our video tutorial for a little bit more information about the topic. I hope you got The Teacher Point!


