

While looking at the Animation Pane of this presentation, it seems that 100s of different animation effects have been applied to create this Realistic Snowfall Animation Effect in PowerPoint. But in reality, only Grow / Shrink, Motion Path, and Fade Out effects has been used on one of the Snow Particle and then we created 100s of duplicates of the same particle. We then changed their Positions, Duration, and Delay timings. That’s all it takes to create this Snowfall animation.
Fade Out is not necessary as you can draw the Motion Path length larger than the slide size. But if you want to Fade Out a few Snow Particles on the screen during Slideshow then you can use the Fade Exit effect.
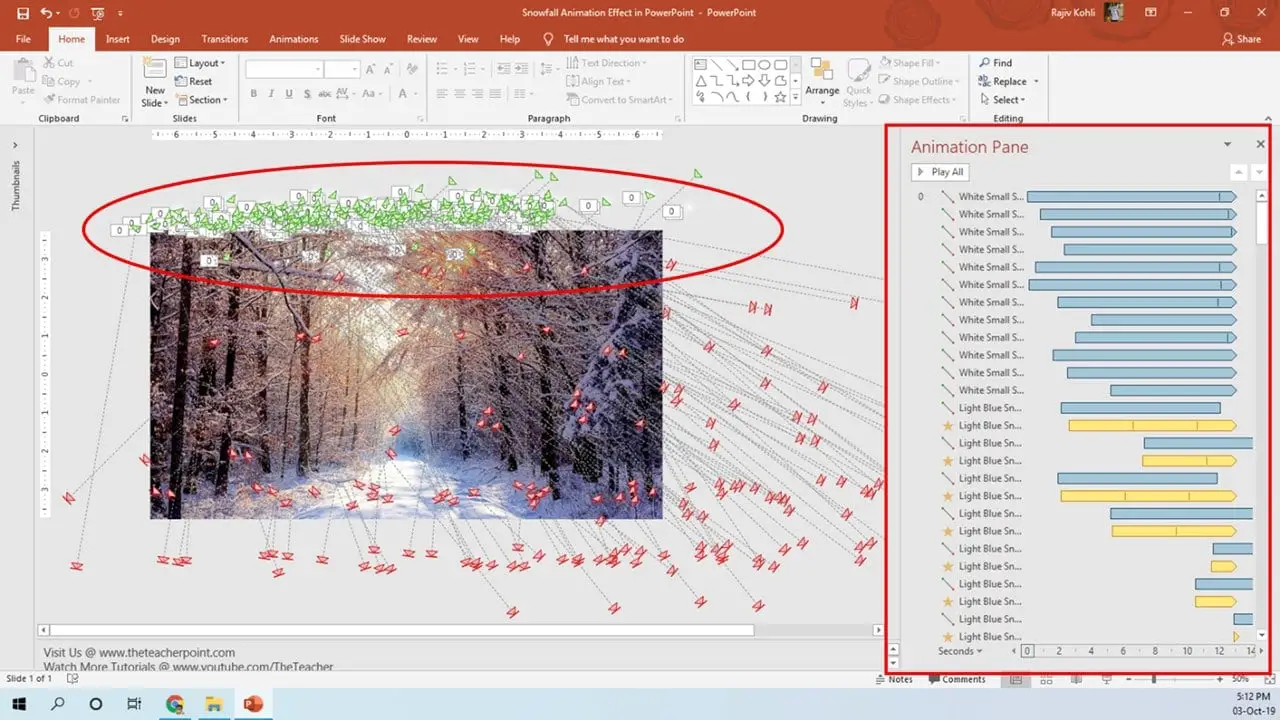
Figure 1.1
How to Draw Snow Particles?
- We used an Oval shape with the smallest size of 0.10 x 0.10 and the Glow Shape Effects option.
- White Fill Color and White is the Glow color with Size 18pt and Transparency is set at 60%. You can try different Glow options as you like.

Figure 1.2
- After applying the animation effects, you can later enlarge or reduce the size to create different size Snow particles.
- See Figure 1.3, where we placed 3 different size particles having different Fill Color and Glow options.
Animation Effects For Snow Particles
- You can apply Diagonal Down Right and Diagonal Down Left Motion Paths. If you are not using Fade Out to hide the particle on-screen during the slideshow, you should draw a path length larger than the slide size. So, while Growing and Shrinking the particle with travel the motion path and will get out of the screen, and will repeat the same steps until the End of the Slide.
- Always apply the animations first and then make duplicates.
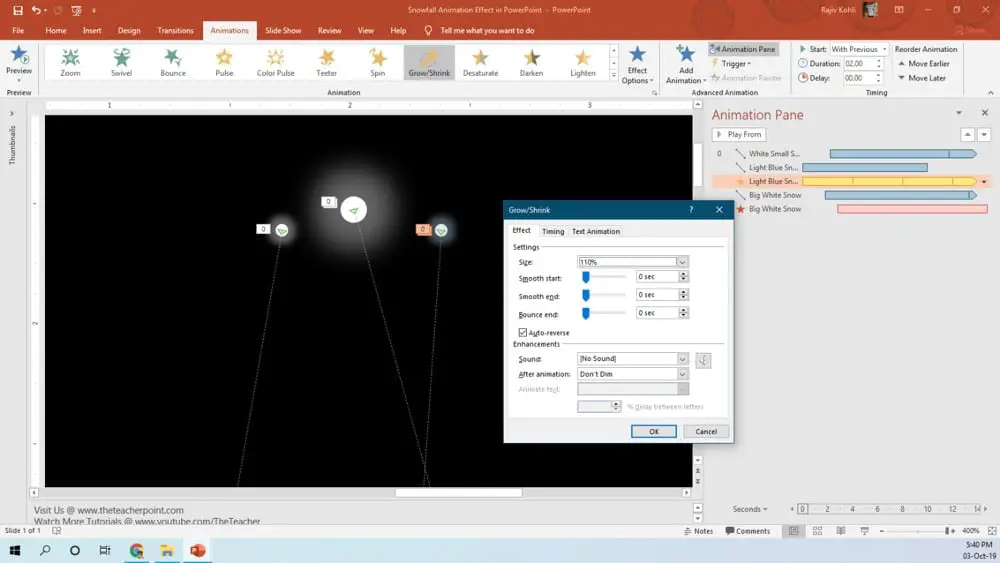
- Grow / Shrink has been applied to a few particles with 110% Grow Rate, without Smoothness, Auto Reverse, Duration 2 Seconds, and Repeat Until End of Slide. You can customize all these effects as required.
- You can apply a duration of 10 to 15 seconds for the Motion Path depending on how long you want the particle to travel the distance.
- Place the newly created different types of snow particles on top but outside of the slide.
- Create more duplicates and place them side-by-side.
- Because of Repeat Until End of Slide, different Duration, and Delay Timings; you will see repeats of the same particles running on the screen at different times.
Figure 1.1 shows that all the Snow Particles have been placed on top of the slide having different Duration and Delay Timings. So, playing the Slideshow will give you the following results as shown in the video tutorial.
I hope you got The Teacher Point.
Watch Snowfall Animation in PowerPoint Tutorial Video
The article How To Snowfall Animation also applies to the following versions:
- PowerPoint 2007
- PowerPoint 2010
- PowerPoint 2013
- PowerPoint 2016
- PowerPoint 2019
Download Snowfall Animation Presentation PPT
PPT Info
PowerPoint Presentation
File Type: PPT / PPTX
File Size: 1MB
Number of Slides: 1
Model: Snowfall Animation


