
In this tutorial, we’ll guide you through creating stunning text animations in PowerPoint using Motion Path Effects, inspired by the motion graphics of Noah Alam.
In today’s digital age, captivating your audience during presentations is more important than ever. And what better way to do that than by adding eye-catching animations to your slides?
Before we dive in, make sure to check out the video tutorial for a visual representation of the steps:
Noah Alam is known for his impressive motion graphics animations, and in this tutorial, we aim to bring a taste of that creativity to your PowerPoint presentations. So, let’s get started!
Setting the Stage For Motion Path Effects
- Starting Fresh: Begin with a new presentation and choose a blank layout. This provides a clean canvas for your animation masterpiece.
- Text Customization: Select a WordArt style and format your text as you like. It’s recommended to apply only the outline color and remove the text fill color for a sleek look.
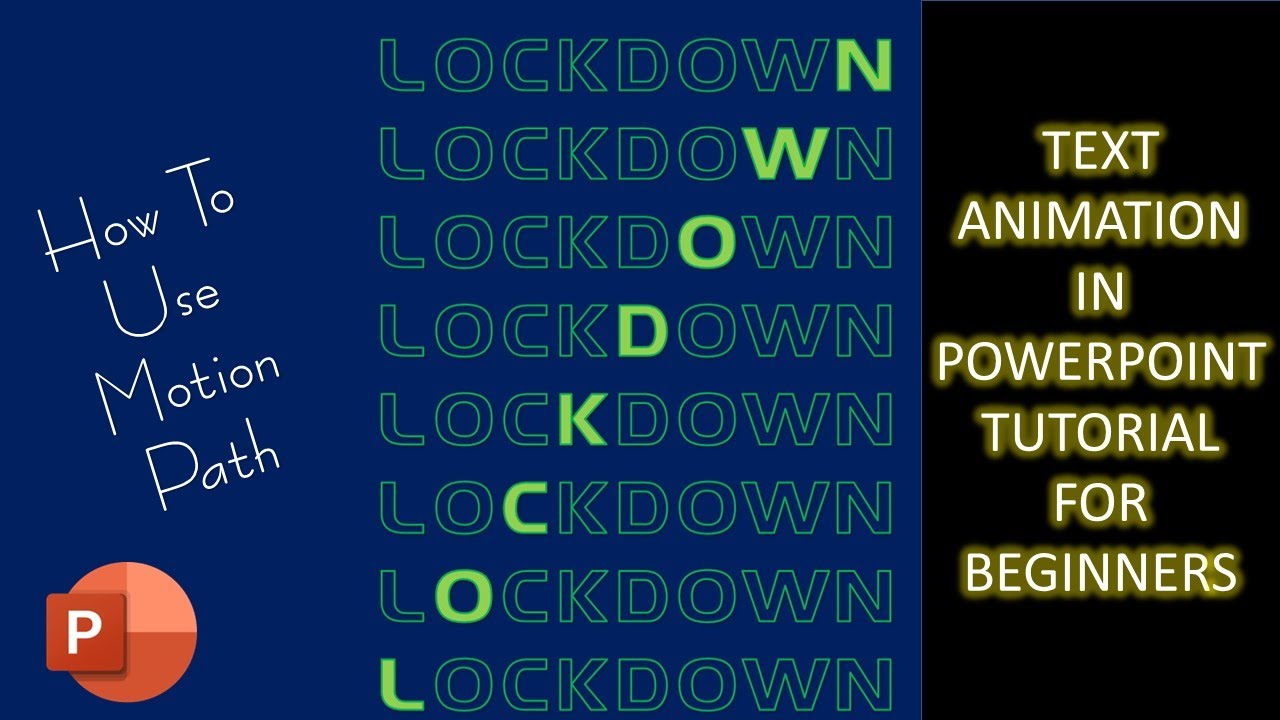
- Duplicating Text: Duplicate your text boxes to create a total of eight. You can use the copy-paste method or hold the Control key while dragging to make copies with precise spacing.
Adding Style and Color
- Background Customization: Enhance your slide’s appeal by selecting a background color that matches your theme. A colorful background can make your text animations pop.
- Text Fill: Apply the same text fill color to each letter in your text boxes, ensuring consistency throughout the animation.
Animating Your Text
- Getting Animated: It’s time to bring your text to life. We’ll start with the first four text boxes, and for that, we’ll use the Down motion path.
- Fine-Tuning: Adjust the length of the Down motion path and position its endpoint precisely over the eighth text box.
- Timing is Everything: Open the Animation Pane and set the animation to start with the previous effect with a time duration of your choice (4 seconds is used as an example). You can also adjust the start and end smoothness to match your preferences.
- Auto-Reverse: Enable the auto-reverse option to make the first text box move down to the eighth box. Set it to repeat until the end of the slide for a seamless effect.
- Animation Painter: To save time and maintain consistency, use the Animation Painter to apply the same Down motion path to the next three text boxes.
- Fine-Tuning, Part Two: Adjust the length of the motion paths for the second, third, and fourth text boxes to ensure your animation flows smoothly.
Completing the Animation
- Upward Motion: Now, it’s time to move the bottom four text boxes upward. Apply the Up motion path to the eighth text box and configure the same Effect Options as for the Down motion path. Ensure the endpoint of this Up motion path aligns with the first text box.
- Animation Painter, Again: Make your life easier by using the Animation Painter to replicate the Up motion path on the seventh, sixth, and fifth text boxes.
- Fine-Tuning, Part Three: Adjust the length of the Up motion paths for the seventh, sixth, and fifth text boxes to create a seamless transition.
Adding a Touch of Creativity
- Letter-By-Letter Animation: To make your animation even more engaging, select all the animation effects in the Animation Pane and configure the “Animate text” option to “By letter.” Experiment with the delay between letters and default settings to achieve your desired effect.
- Admire Your Work: Finally, take a moment to enjoy the slideshow. Your presentation now features a dynamic and captivating text animation that’s sure to leave a lasting impression on your audience.
Download the Presentation File
To try out this animation for yourself and explore the details, you can download the presentation file here:
Download Text Animation with Motion Path Presentation.
In Conclusion
With the help of this Noah Alam inspired tutorial, you’ve learned how to create visually stunning text animations in PowerPoint. Whether you’re a student, a professional, or simply someone looking to enhance their presentation skills, these techniques are sure to add a unique and engaging element to your slides.
If you found this tutorial informative and interesting, don’t forget to check out the video tutorial for a visual guide. Like, share, and comment to let us know your thoughts, and be sure to subscribe to our channel and turn on notifications. We have many more exciting tutorials in store for you. Thanks for your time, and we wish you a fantastic weekend filled with creative presentations! 🎶


