
Today, we embark on a journey to create a mesmerizing crow animation with lifelike flapping wings. Inspired by the ingenious work of Kidar Ambakar on Dribbble.com, this tutorial will guide you through the process of turning a static PowerPoint slide into a dynamic masterpiece.
Understanding the Animation Design:
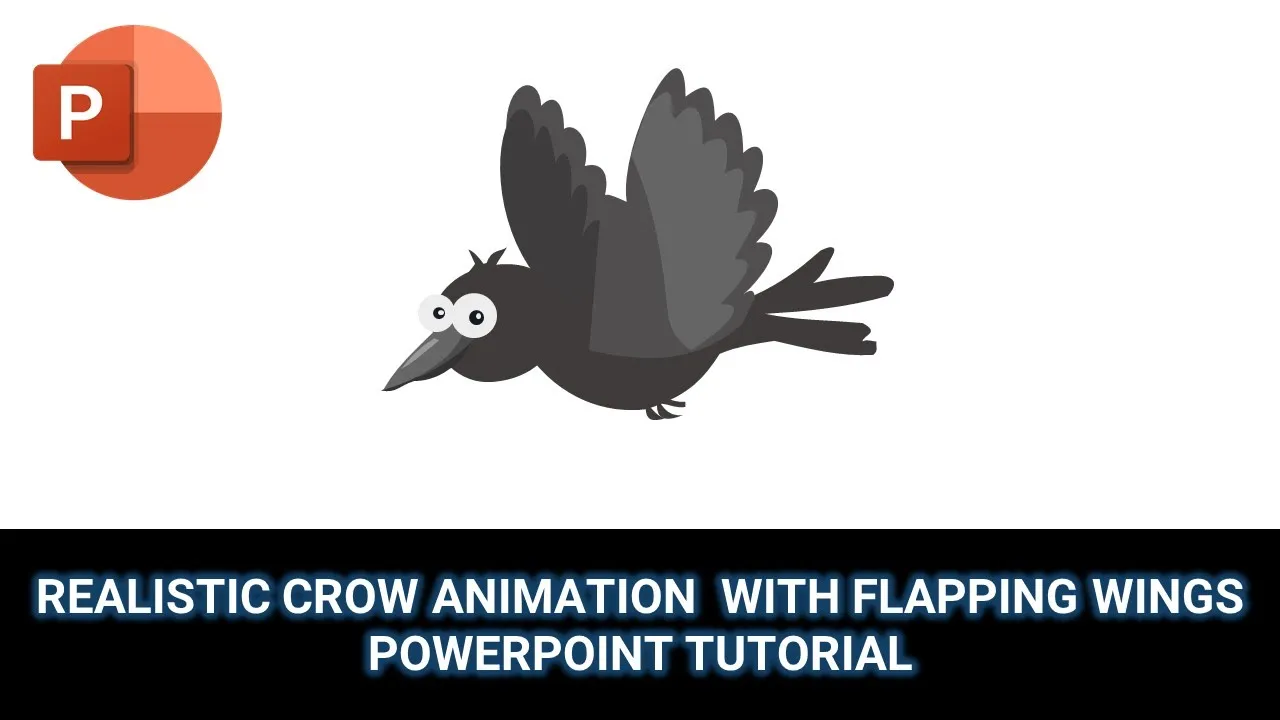
To kick things off, let’s delve into the anatomy of our crow animation. Open the Selection Pane from the Home tab to reveal a list of shape objects used in this presentation. Notably, the body, legs, head, left and right wings are crucial elements. Additionally, there are 20 different poses for each wing, which are pivotal in creating the realistic flapping effect.
In the Animation Pane, observe the application of six effects to these five shape objects. The body, head, and legs utilize the “Up” motion path with a short length, creating a gentle up-and-down movement. Group these three objects to simplify the animation process, positioning them between the left and right wings.
The crow’s head gets a touch of flair with the spin effect, adding a subtle yet captivating element to the animation.
Flapping Wings Magic:
The highlight of this tutorial is, undoubtedly, the flapping wings. We employ the “Flash Once” animation effect on all 21 different left and right wings, each crafted using the Freeform Shape tool. The meticulous use of delay timings (0.10 seconds) between each wing pose creates a seamless and continuous flapping motion.
Though time-consuming, drawing the wings and applying the “Flash Once” effect to each with distinct delay timings is the key to the crow’s enchanting flight.
Incorporating Landscape Parallax Animation:
For an extra touch of sophistication, consider integrating landscape parallax animation featuring moving clouds and mountains. Download the “Flash Once” effect and landscape parallax effect from the provided links. After removing the toy train and track from the parallax animation, paste the mountains and clouds behind the crow.
Align the scene by selecting the motion path effects in the Animation Pane, choosing “Reverse Path Direction” from the Effect Options dropdown menu. Voila! Your crow is now soaring through a dynamic landscape.
Watch the Tutorial:
Without further ado, let’s bring your crow to life! Watch the detailed tutorial below for a visual representation of each step:
Conclusion:
We hope you found this tutorial both interesting and informative. For more engaging PowerPoint tutorials and creative insights, remember to like, share, comment, and subscribe to our channel. Your support keeps us inspired to bring you more exciting content.
Until next time, happy animating!
Download the Presentation File:
Before diving into the tutorial, download the presentation file from the following links to follow along seamlessly.


