
Introduction
Perhaps, it is quite possible that I miss some steps in the video tutorial How To Make Duck Animation in PowerPoint Tutorial, as English is not my native language, and hesitate a lot while speaking. So, writing this post and will try to cover all the basic techniques used in this presentation.
Duck Graphics Designing
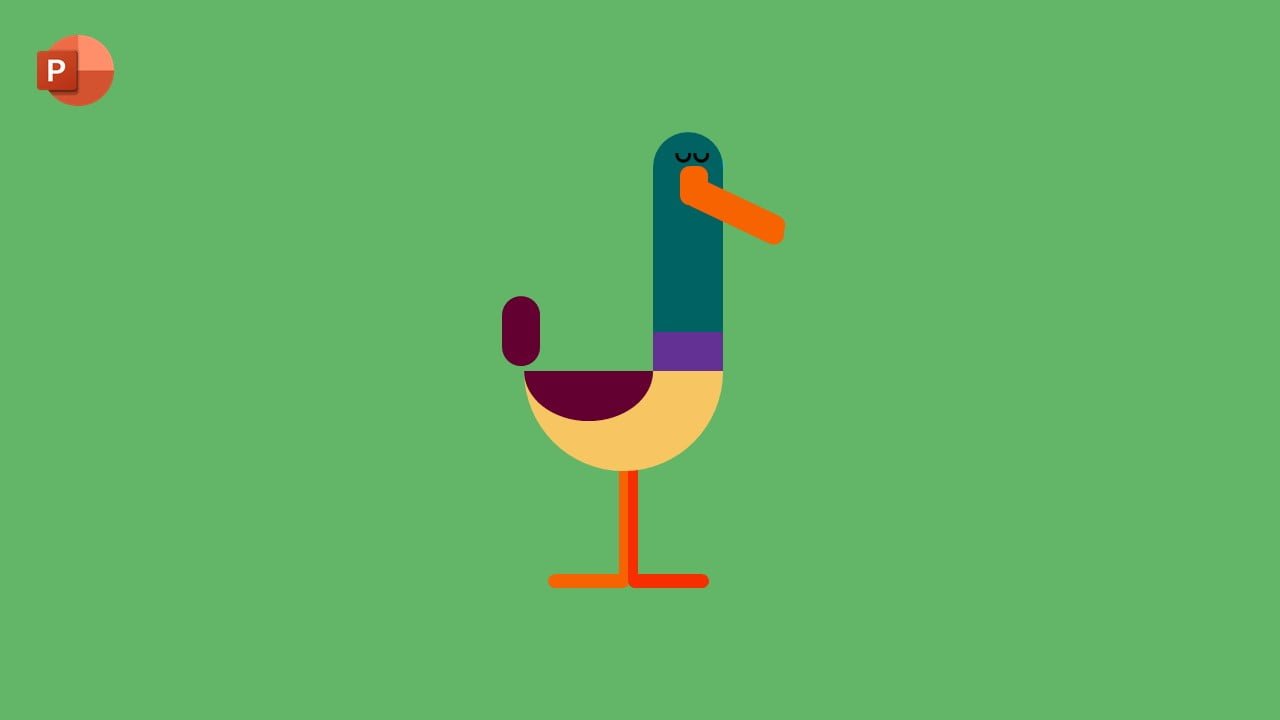
Is it possible to make animations in PowerPoint? Certainly Yes! but if you first know how to design the characters and animation scene. You can follow the link to learn more about Graphics Designing in PowerPoint using Shape Tools. Take a look at the Wireframe View in Figure 1.1 and you can make guess which shapes have been used to draw the Duck Character.
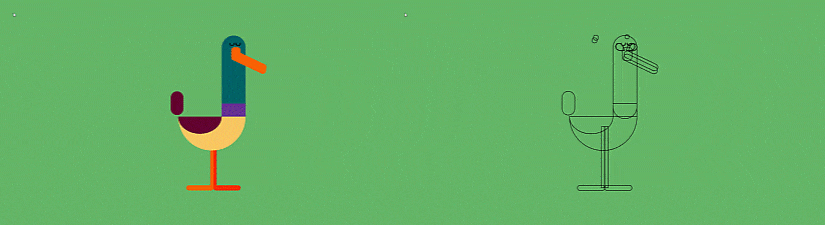
Figure 1.1
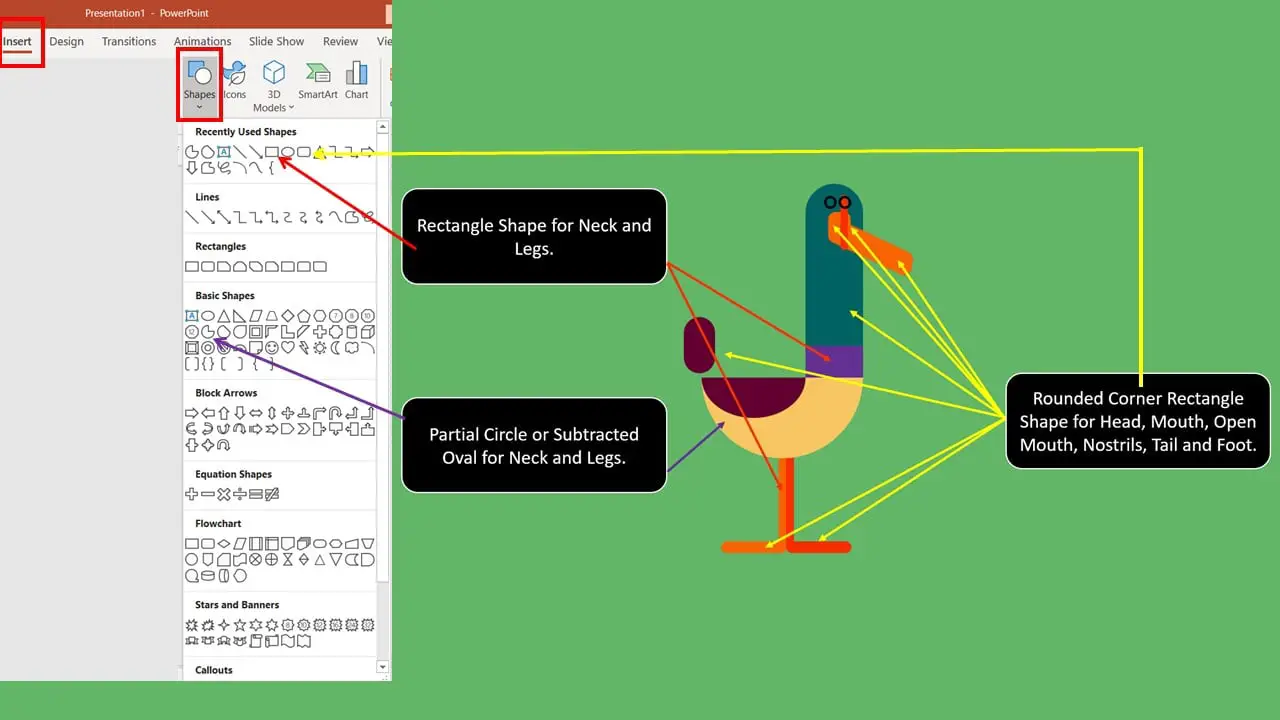
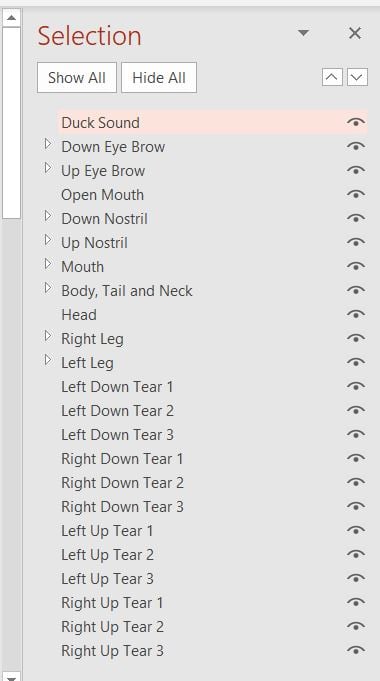
You can download the presentation from the link below and then open the Selection Pane from the Home tab to see all the shapes which are Rectangles (Neck and Legs), Rounded Corner Rectangles (Head, Mouth, Open Mouth, Nostrils, and Foot), and Subtracted Oval or Partial Circle (Body). Take a look at Figure 1.2 and Figure 1.3 for more information:
Duck Animation Effects
The original animation inspiration is from Lustik at Tumblr. You should visit him to explore more animation #possibilitieswithpowerpoint
I tried my best – The Teacher


Figure 1.4
- Figure 1.4 above illustrates that the Body, Tail, and Neck are single-grouped objects. One Down and Up Motion Path effects have been applied.
- A Short Down Motion Path with a time duration of 0.15 Seconds and Repeating 4 Times with Auto Reverse. A single loop of a short Up and Down motion path will then take 0.30 total duration to complete one cycle. So, this effect will run for a total of 1.20 Seconds to complete 4 Repeat loops. (Effect Options highlighted in Red)
- The second animation effect is an Up Motion Path but with a longer path length than the earlier one. Do note that the Starting Position of the Up Motion Path effect begins at the Ending Position of the short Down Motion Path. The Time Duration is 0.60 Seconds with Auto Reverse. So, the total duration of this effect is 1.20 Seconds; ending at 2.40 Seconds. It also has a Delay Timings of 1.20 Seconds. Delay Timings have been added because we need to run the Up Motion Path effect after the 4 short Down Motion Path loops end. (Effect Options highlighted in Yellow)
Useful PowerPoint Tips:
An animation effect in PowerPoint takes double-time when Auto Reverse is used.
Motion Paths with Auto Reverse will always take the objects back to their Starting Position.
Effect Options Properties window can be opened by double-clicking on effect in Animation Pane.
The Teacher
- In Figure 1.5, the Head has been included and we are using the similar Motion Path effects on the Head as we did for Duck Body. So, you can use Animation Painter to replicate the same effects from Body to Head. Both these effects also have a Delay Timing of 0.05 Seconds for the Head Down Motion Path and 1.25 Seconds Delay Timing for Up Motion Path. We added this delay to create a bit spring-like effect when the head moves along with the body with a short delay.

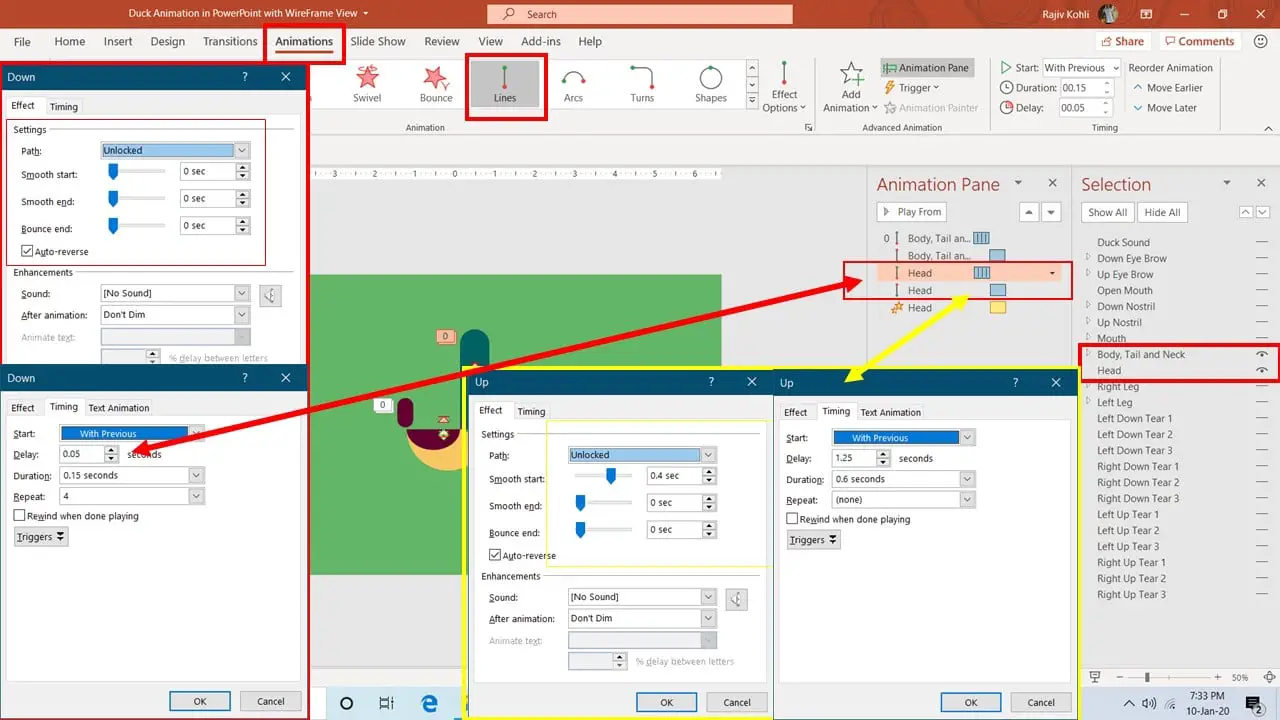
Figure 1.5
- Grow/Shrink has also been applied to the Head with 105% Vertical Growth only, with 0.40 Seconds Smoothness, Auto Reverse with Duration of 0.60 Seconds, and a Delay of 1.25 seconds. It looks more realistic as the Head gets stretched vertically a bit along with the movements. Take a look at Figure 1.6:
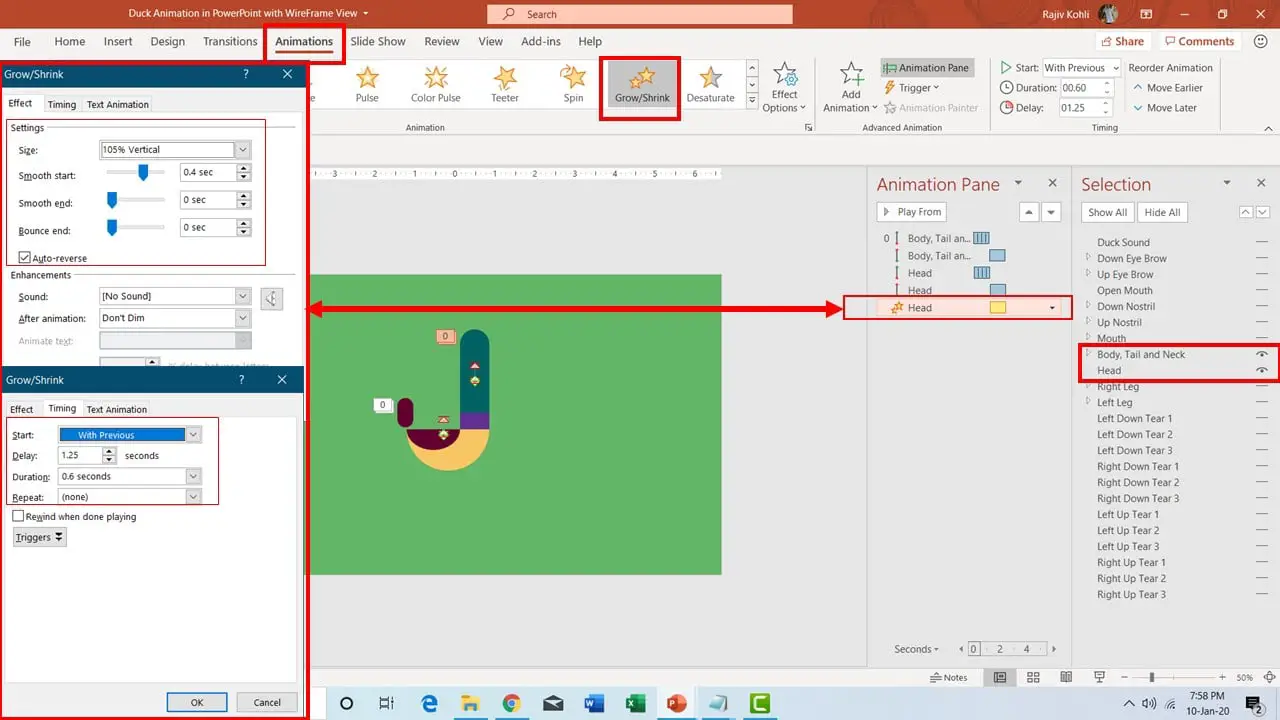
Figure 1.6
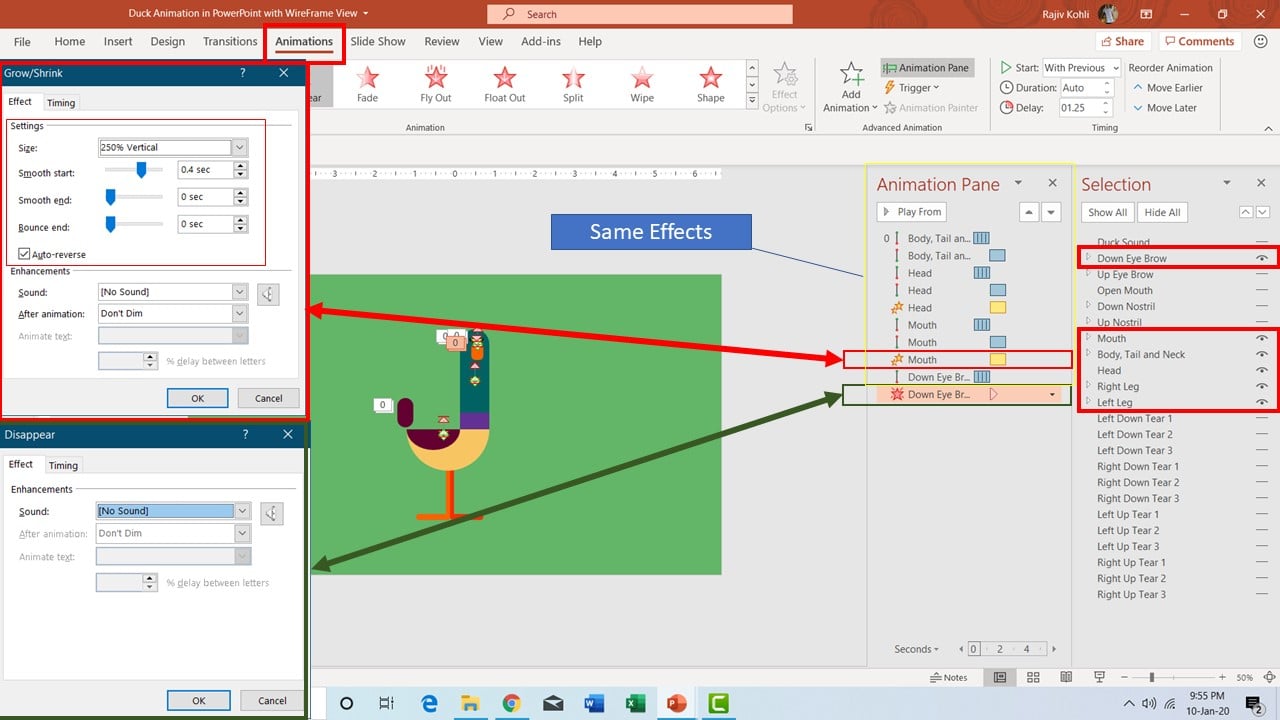
- Now adding Mouth and Down Eyebrow along with static Duck’s Legs. No animation effects for Legs. You can again use Animation Painter to replicate the Motion Paths effects from Head to Mouth. We just increased the Growth Rate to 250% Vertically for Mouth’s Grow/Shrink effect.
- For Down Eyebrows, we are using the same short Down Motion Path, repeating 4 times as the Eyebrows are also moving along with the Body and Head. Later hiding the Eyebrows using Disappear effect at 1.25 Seconds. See Figure 1.7:
- Let’s talk about TearDrops and there are a total of 12 of them on top of each other. To each of the teardrops, 3 animation effects have been applied: Arc Up Motion Path, Spin, and Grow/Shrink. In simple words, we created a single teardrop and then applied 3 animations to it. Later, we replicated the same and changed the Arc Path, Spin, and Grow/Shrink rate.
- Basically, a Teardrop is following the Arc Path direction; Spinning and Shrinking to 0% in size and disappearing finally. As all of the teardrops are hidden behind the head, so you don’t see them during the slideshow and of course, you should use Animation Painter to replicate animation effects. Take a look at Figure 1.8 for more information about the Spin and Grow/Shrink effect properties.


Figure 1.8
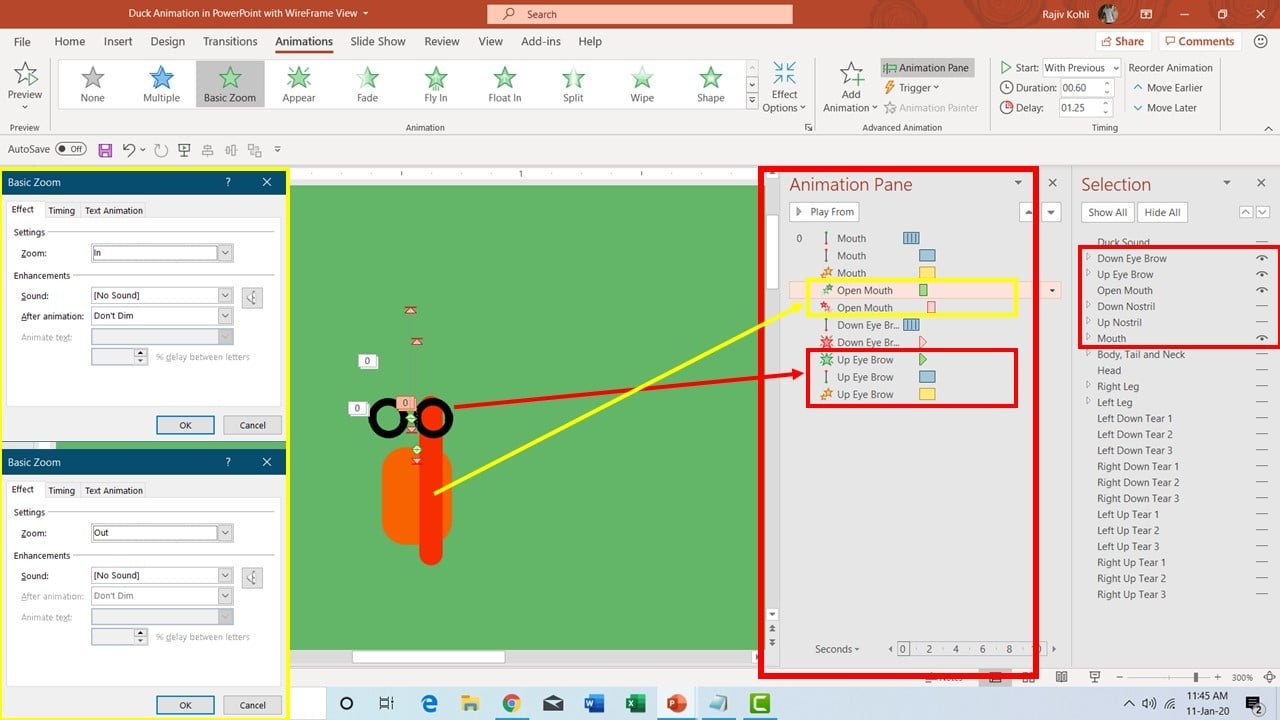
- So we will now combine Up Eye Brow and Open Mouth with the previously explained objects and let’s see what we get. To different eyebrows because they are flipping vertically during animation and there is no effect to flip the eyebrows like this. So, we are hiding the Down Eye Brow and showing Up Eye Brow to create the flip effect.
- An open Mouth in Red Color appears when the Head gets stretched and takes the Up Motion Path. We used Basic Zoom In Entrance effect and Basic Zoom Out Exit effect to create the Open Mouth effect.

- Take a look at Figure 1.9. Yellow indicates the Zoom In and Out Effect Properties, while the Red indicates that the Up Eye Brow exactly appears at the same time when Down Eye Brow disappears. Also following the same Motion Path with a 105% Grow/Shrink rate.
- Finally, the Duck Nostrils animation and for that you need the understand why and how to define Custom Anchor Points in PowerPoint. Custom Anchor points have been shown in Figure 2 as Black Circles around the Nostrils. These ovals have been grouped along with Nostrils and Mouth to define a specific position for rotation.

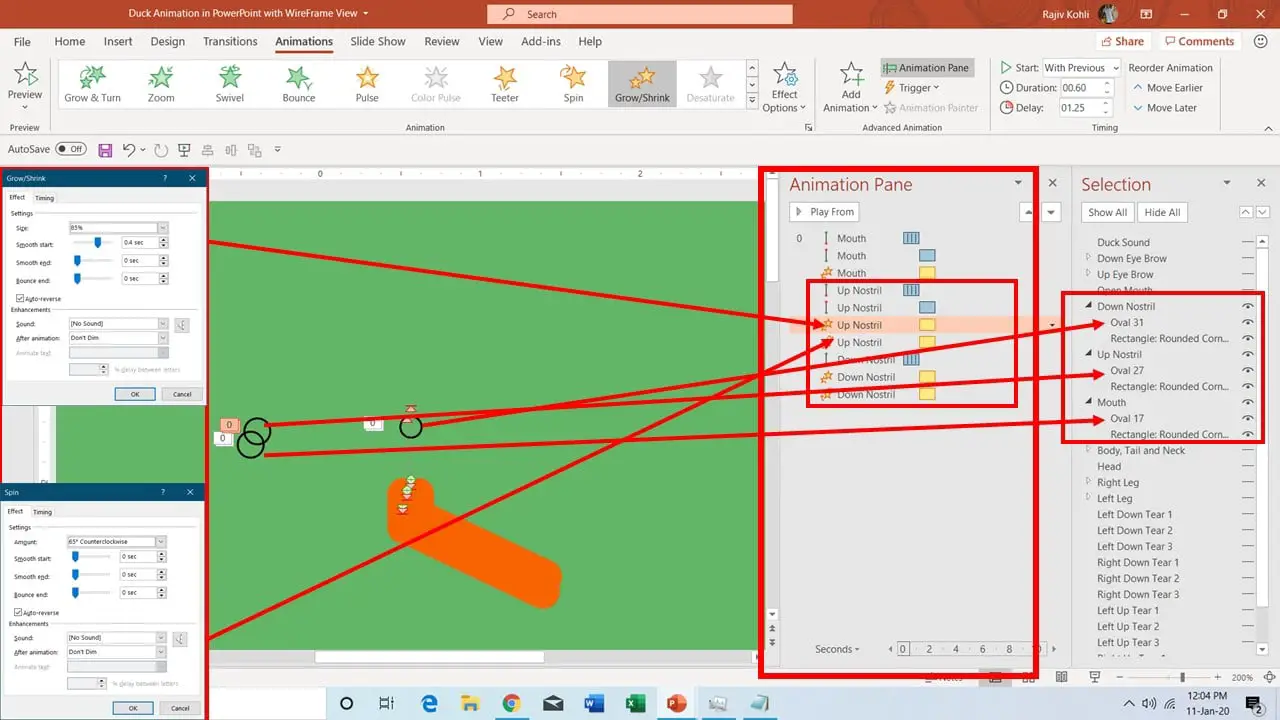
Figure 2
I hope you got The Teacher Point.
Watch Duck Animation in PowerPoint Tutorial Video
The article also applies to the following versions:
- PowerPoint 2007
- PowerPoint 2010
- PowerPoint 2013
- PowerPoint 2016
- PowerPoint 2019
- Office 365 With Morph Transition
Download Duck Animation PowerPoint PPT
PPT Info.
PowerPoint Template
Youtube Intro
File Type: PPT / PPTX
File Size: 228KB
Number of Slides: 2
Download DUCK ANIMATION POWERPOINT TEMPLATE
DON’T FORGET TO LEAVE A RESPONSE.


