
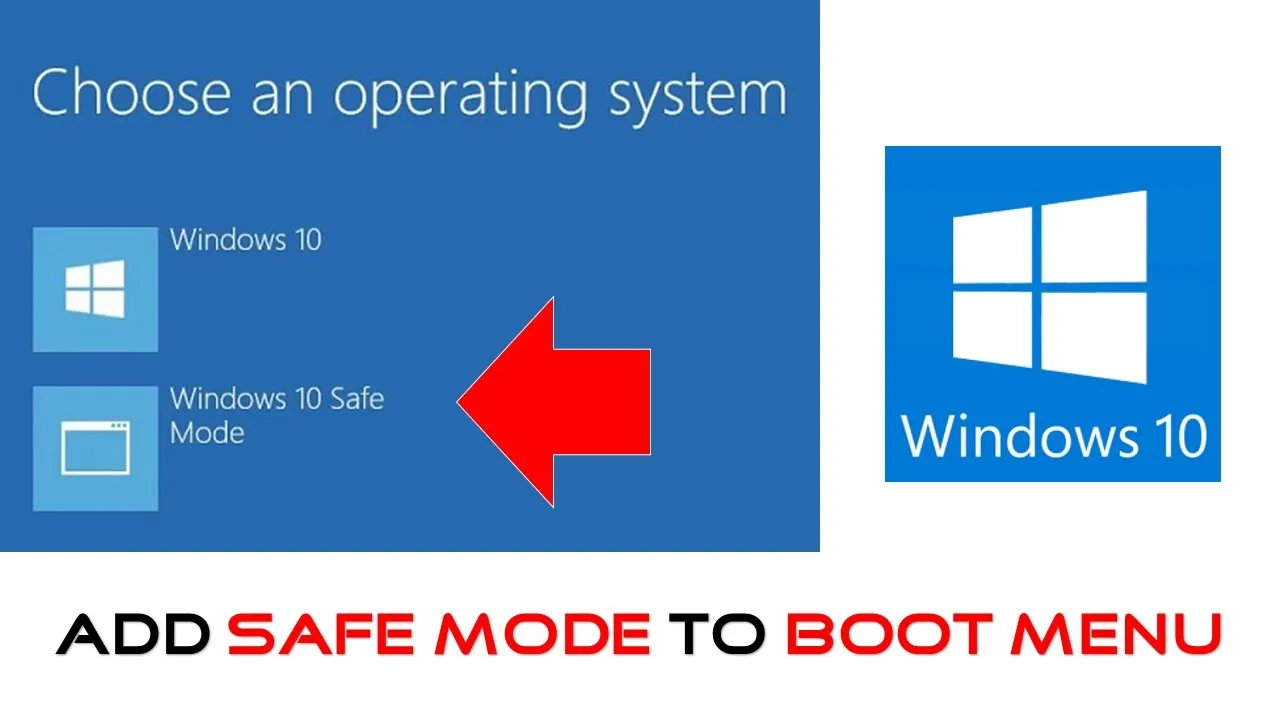
Safe Mode is a useful feature in Windows 10 that allows you to troubleshoot and fix issues with your computer when it’s not functioning correctly. It loads only essential drivers and system files, making it easier to diagnose and resolve problems. In this tutorial, we will guide you on how to add the Safe Mode option to your Windows 10 Boot Menu for quick and easy access without the need for the F8 key or other advanced boot menu options.
Step 1: Accessing the Elevated Command Prompt
To begin, we need to open an Elevated Command Prompt, which will allow us to make the necessary changes. Here’s how to do it:
- Right-click on the Start button in the bottom-left corner of your screen.
- From the context menu, select “Command Prompt (Admin).”
Step 2: Identify the Current Identifier
In this step, we’ll identify the current identifier under Windows Boot Loader, which we’ll later copy and use for our Safe Mode entry. Please note that if you have only one operating system installed, you may not see the Boot Loader menu during startup. However, if you have multiple operating systems, such as Windows 7 and Windows 10, you’ll have the option to choose which one to load.
Step 3: Adding Safe Mode Option
Here’s how you can add the Safe Mode option to the Windows Boot Loader:
- Type the following command in the Elevated Command Prompt:
BCDEDIT /copy {current} /d "Windows 10 Safe Mode"You can customize the description within the quotes as you like.
- Close the Elevated Command Prompt.
Step 4: Configuring Safe Mode in System Configuration Utility
To set up Safe Mode for the newly created boot entry, follow these steps:
- Open the Run command by either right-clicking on the Start button and selecting “Run” or pressing Windows+R on your keyboard.
- Type “MSCONFIG” and press “OK.”
- In the System Configuration Utility, click on the “Boot” tab.
- You’ll now see two entries in the boot menu. Select the second entry, which is the one we created in the previous step.
- Check the “Safe Boot” option with “Minimal” configuration. This enables Safe Mode with a graphical user interface (GUI) for this specific boot identifier.
- You can set a timeout for the Boot Loader menu, and below that, check the option that says “Make all boot settings permanent.” This ensures that the applied settings remain safe in boot configuration data.
- Click “Yes” if a warning message appears. Don’t worry; you can remove the newly created entry at any time.
Step 5: Testing and Future Customizations
If you want to test the settings immediately, click “Restart.” Otherwise, you will see the Boot Loader Menu with the Safe Mode entry on the next boot.
You can further customize the boot menu by adding more identifiers, such as “Windows 10 Safe Mode with Networking” or “Windows 10 Safe Mode with Command Prompt.” You can then configure different Safe Mode options for these entries through the MSCONFIG utility.
Conclusion:
Adding the Safe Mode option to your Windows 10 Boot Menu is a convenient way to access this troubleshooting mode when needed. This tutorial has shown you how to do it step by step, and you can now quickly switch to Safe Mode without the need for additional advanced boot menu options. Whether you’re a novice or an experienced user, this feature can be invaluable in resolving issues with your Windows 10 system.


