Introduction
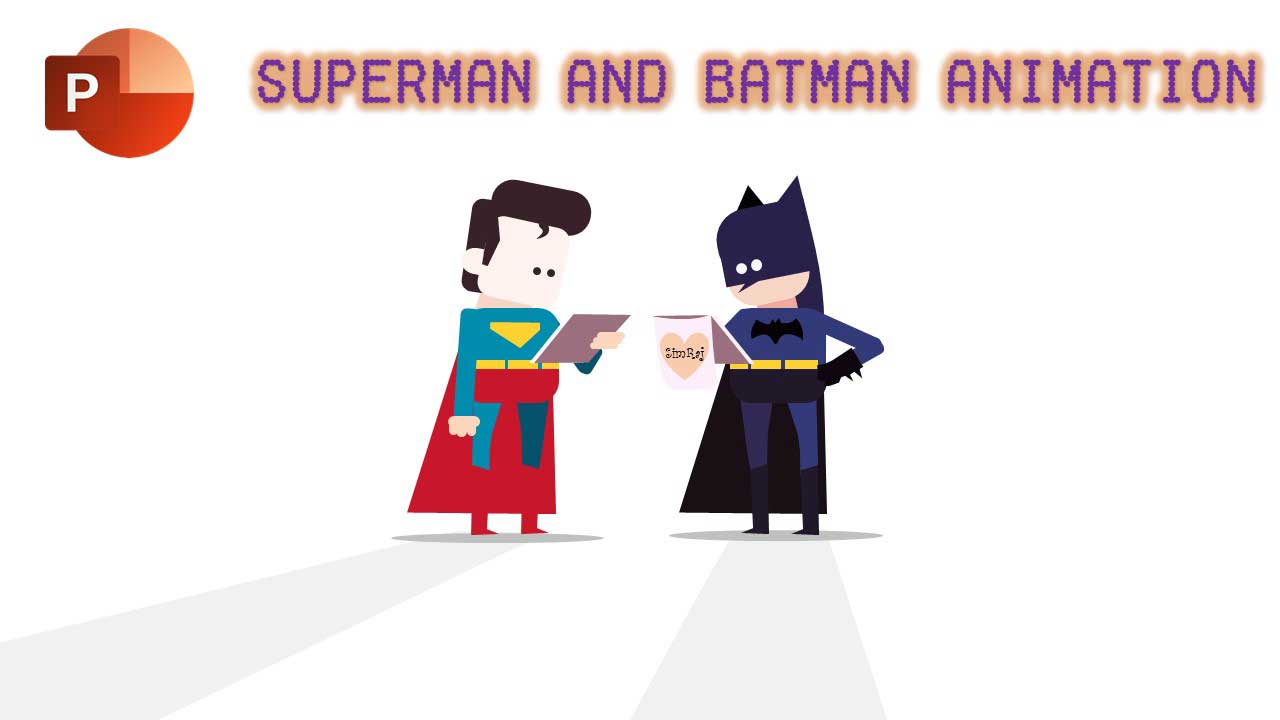
One of my favorite Superman and Batman Animations, not just because I tried something new with this 15-second long animation but unknowingly this short movie is also predicting an event. Watch the Superman and Batman Motion Graphics Tutorial on our Youtube Channel and see if you can find it. Anyway, let’s concentrate on our studies.
The animation and graphics design inspiration is from
Fran Solo at Behance
Let me clearly explain to you one thing if you are serious about doing the animation stuff in PowerPoint; then according to my studies; you must also be a good Graphic Designer. So, if we talk about designing these two Superman and Batman Characters then surely PowerPoint Shape Tools has been used and if you are a beginner then you must watch the Microsoft Word Drawing / Shapes Tools Tutorial Video series.
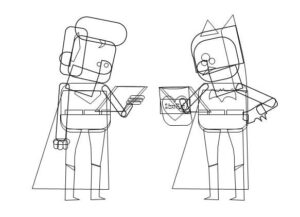
Remember, Shapes Tools work similarly in most Microsoft Office (Word, Excel, and of course PowerPoint) apps. You can’t learn how to draw this or that character instead you should learn to use the Drawing / Formatting Tools and your mind will amazingly combine all those techniques to bring up some wonderful results. Look at the Framework:
You must know How To Use the Selection Pane in Microsoft Office or you can imagine working with so many shapes on a single PowerPoint Slide. Isn’t? Look at the list of Layers used in this presentation. So Before Learn To Animate, Learn How to Draw?
Understanding Animation Effects
Let’s talk about the Animation Effects used in this presentation. Look at those different Signs in front of Layers / Objects name :
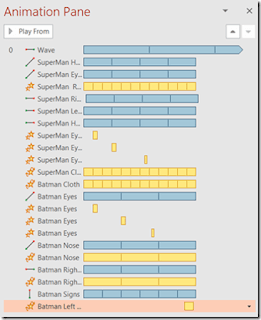
The Yellow Stars represent Emphasis effects and those lines with Red / Green dots represent Motion Paths. Keep in mind that looking into the Animation Pane, the first thing you should notice is the type of Animations used in the presentation. The following image illustrates that only 2 types of animations have been applied in this presentation: Emphasis and Motion Paths.

A deeper look into the Animation list of this presentation will also let you know that almost the same animation effects have been used for both Superman and Batman with almost the same Delay Timings and Animation Duration.
Things to learn and remember!
All animations in this presentation are starting With Previous on specified Delay Timings and for said Duration. Selecting an animation from the list will display its Start type (Mouse Click, With Previous or After Previous), Duration, and Delay Timings in the Timings section. So, if you are Beginner To PowerPoint then you should watch my video on Introduction to PowerPoint 2016 for Beginners for more information on how to apply Animation Effects while working inside your first presentation with brief information from Welcome Screen to various other “Dare to Know!” stuff. Double-clicking on an Animation effect from the Animation Pane will open the Properties window of that effect.
You can learn more about effect properties by double-clicking on an animation in the Animation Pane window.
2 Slides have been used to create this entire 10-second-long animation. You can download the presentation in the PPTX format from the link below. After downloading the presentation, make sure to open both the Selection and Animation Panes, so you may see all the Shape Layers and Effects.
Effects Used For Superman and Batman Animation
- Wave Animation
- Select the Wave shape from the Selection Pane, which has a long animation Duration of 7 Seconds without any Delay Timings, No Smoothness, and No Auto Reverse but Repeating this effect until the End of the Slide. While applying the Motion Path, make sure to match the ending position of the Moth Path. Watch the video tutorial to have a better look. This effect is repeating itself until the end of the slide, so an exact ending position of the path will repeat this effect without any glitches between the repeats during the slideshow.
- Hairs
- Again Diagonal Motion Path has been used for both of these shapes. As you might know that you can use the Line Motion Path and can later change the direction of the path in any direction, as required. You don’t especially need to apply a particular Diagonal path. Very short paths have been defined. You might need to Zoom the presentation up to 400% to define these kinds of short motion paths to an object.
- Ears
- Again, very short Motion Paths have been used to move the Ears. Eyes, Hairs, and Ears are the important parts of the character that should be moved correctly to create the Head Shift / Move animation to make the character look as if they are turning their heads.
- Body
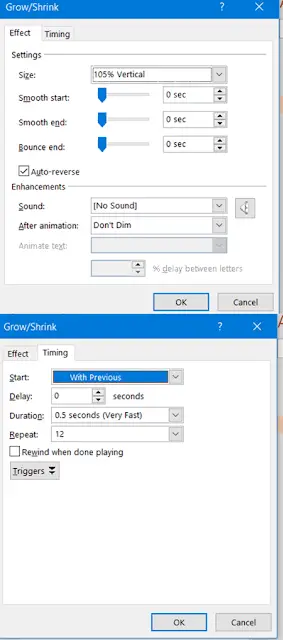
- To create the breathing effect for Superman, we applied the Grow / Shrink effect with 105% Vertical Grow with Auto Reverse, 12 Repeats, and 0.50 Seconds short Duration i.e. a total of 6 breaths. Whereas, to create a similar effect for Batman, we used Motion Paths to move the body up and down. So, you have two ideas for creating the same effect.
- Eyes
- One way of creating the Blinking Eye effect in PowerPoint, you can use Grow / Shrink animation like applying 0% Vertical Growth with Auto Reverse with a short animation Duration. We applied the same effect 3 times (or you can go for more) with different delay timings.
- Cloths
- To rotate the clothes, we used the SPIN Effect but we also defined a Custom Anchor Point, so we can choose the exact position from where you want to rotate the clothes. To learn more, you can watch our tutorial on How To Define A Custom Anchor Point in Microsoft PowerPoint. We also defined a custom anchor point for Batman’s hand as well. Use the Selection Pane to look deep into the shape layers used in the presentation.
- Slide No. 2
- As you might already have guessed on the second slide (make sure to check the shape names from the Selection Pane; maybe Batman is also Superman on this slide) we grouped a few shapes like Eyes, Hairs, Heads, and Ears of the characters to apply the SPIN effect and a few more Motion Paths has been used to place the things on the right position.
All the body parts which are in Motion should be drawn separately from the rest of the layers as you can not apply different animations on a grouped object in PowerPoint.
This animation is just an illustration of exploring the animation #possibilitieswithpowerpoint.
I hope you got The Teacher Point!
Watch Superman and Batman Animation in PowerPoint Tutorial
The article How To Make Superman and Batman Animation also applies to the following versions:
- PowerPoint 2007
- PowerPoint 2010
- PowerPoint 2013
- PowerPoint 2016
- PowerPoint 2019
- Microsoft Office 365
Download Superman and Batman Animation PowerPoint Presentation (PPT)
PPT Info.
PowerPoint Template
Character Animation
File Type: PPT / PPTX
File Size: 89KB
Number of Slides: 2
Download SUPERMAN AND BATMAN ANIMATION POWERPOINT TEMPLATE
DON’T FORGET TO LEAVE A RESPONSE.


