
In today’s fast-paced digital world, optimizing every aspect of your computing experience is essential. One often overlooked but significant element is your default printer. Whether you’re a student, a professional, or just someone who occasionally needs to print, setting a default printer in Windows 10 can save you precious time and enhance your productivity.
In this blog post, we’re going to explore the concept of a default printer in Windows 10 and how to set it up. If you’re more of a visual learner, we’ve got an informative video tutorial to guide you through the process. So, grab a coffee, sit back, and let’s dive into the world of default printers.
Understanding Default Printers
Before we jump into the tutorial, let’s clarify what a default printer is and why it matters. Your default printer is the one that Windows 10 automatically selects when you send a print command. Imagine you have multiple printers connected to your system; the default printer is your go-to choice. This means you don’t have to sift through a list of available printers every time you need to print something.
Now, let’s break down the process step by step.
Step 1: Accessing Devices and Printers
To begin, you need to access the Devices and Printers settings in Windows 10. There are two ways to do this: you can either type “Devices and Printers” in the Start menu search box or access it through the Control Panel.
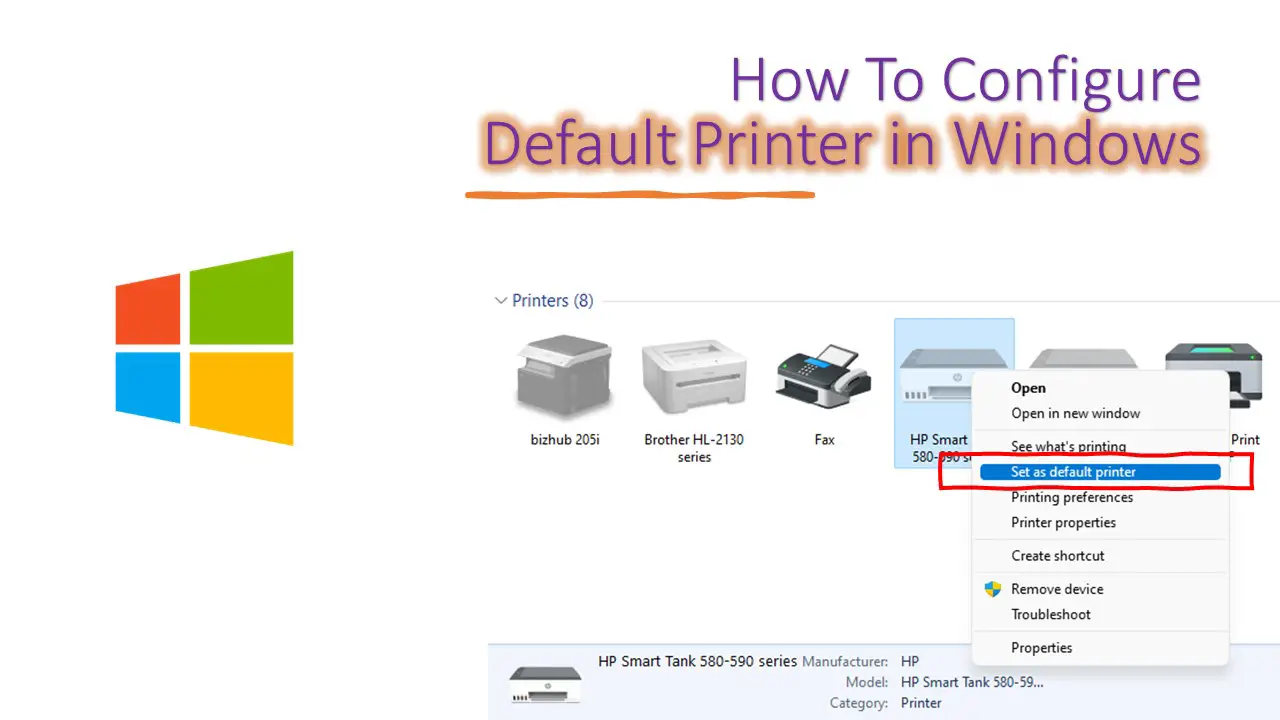
Step 2: Manually Setting Your Default Printer
If you have a specific printer you’d like to set as your default, this step is for you. It’s incredibly simple – just right-click on your preferred printer and select “Set as Default Printer.” It’s a one-time action that will save you a lot of time in the long run.
Step 3: Automatic Default Printer Management
Now, here’s where Windows 10 becomes even more user-friendly. Starting from build 10586, Windows offers an option to automatically manage your default printer. This means that the last printer you used will become your default printer. No need to change it manually every time you print something different.
We recommend watching our video tutorial for a visual representation of these steps. It makes the process even more straightforward and showcases how your choice of default printer affects your daily tasks.
Tips for Optimizing Your Printing Experience
As you set up your default printer, you might want to personalize it to suit your specific needs. For example, if you primarily print in black and white, you can customize your default printer settings to reflect this preference. Our video tutorial will provide you with valuable tips for achieving optimal printing results.
Final Thoughts
Setting a default printer in Windows 10 may seem like a small tweak, but its impact on your productivity is significant. You’ll save time and eliminate the frustration of having to select your preferred printer every time you need to print something. To get a hands-on visual guide, be sure to watch our video tutorial.
We hope this blog post has shed light on the concept of default printers and how to set one up in Windows 10. If you found this information helpful, don’t forget to hit the thumbs up button and share it with your friends. Consider subscribing to The Teacher’s channel for more useful tutorials.
And there you have it – an easy way to streamline your printing experience in Windows 10. Happy printing!


