
Welcome to “The Teacher”! In this tutorial, we will walk you through the process of creating new voucher types in Tally Prime or Tally ERP 9. We’ll also explain why you might need to create new voucher types and the benefits they offer. By the end of this guide, you’ll have a solid understanding of how to manage your financial transactions more efficiently using voucher types.

Why Create New Voucher Types
Before we dive into the step-by-step process of creating voucher types, let’s first understand why you might want to create them. Voucher types play a crucial role in organizing and categorizing your financial transactions. They help you distinguish between different types of transactions, making it easier to track and manage your accounts.
In Tally, when you access the “Display More Reports” under the “Stats” section, you can view a comprehensive list of voucher types supported by Tally Prime and Tally ERP 9. For example, you can see how many contra vouchers have been entered for a specific company and year. This summary provides valuable insights into your financial transactions.

To gain more detailed insights, you can select a specific voucher type, such as “Contra,” and access a monthly-wise report of the transactions. This report shows you the number of entries for each month. When you press Enter again, you can see the details of all 12 entries, including the voucher type, voucher number, debit ledger, credit ledger, and amounts.
Voucher types also have a presence in various financial books, such as the “Day Book” and “Cash Book.” This makes it easy to identify the voucher type associated with individual entries, even in the absence of detailed descriptions.
For example, if you open a “Day Book” and see an entry like “Axis Bank Limited” credited with 5000, you immediately recognize it as a contra entry involving a bank transaction. However, for beginners, it can be confusing, and they may need to press Enter to view the actual debit and credit ledger names when they are not immediately obvious.

This is where creating new voucher types comes into play. It allows you to differentiate between various types of transactions more effectively, avoiding confusion, and streamlining your accounting process.
Now, let’s walk through the steps to create new voucher types in Tally Prime or Tally ERP 9.
Creating New Voucher Types
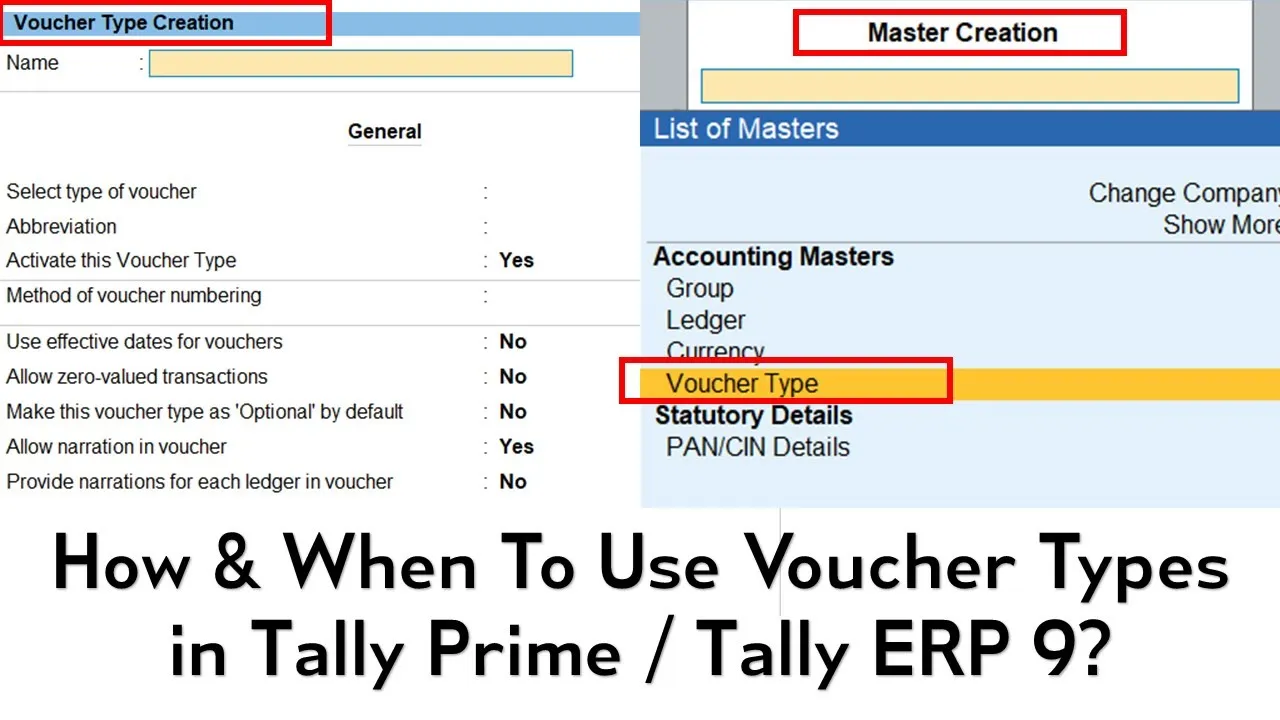
Step 1: Access Voucher Types
In Tally Prime, navigate to the “Create” section of Masters after selecting the company. For Tally ERP 9, you can access voucher types by going to “Accounts Information” under the Gateway of Tally. Select the company, and you’ll find the option for voucher types.

Step 2: Create a New Voucher Type
Once you’re in the voucher types section, you can start creating your new voucher types. Let’s illustrate this with an example. Suppose you want to distinguish between cash payment and cash receipt entries.
- In the “Name” field, type the name of the voucher type you want to create, such as “Cash Payment.”
- By default, this new voucher type will be placed under “Payment Voucher.” You can change this if needed.
- Assign an abbreviation for this voucher type, which can be useful for quick reference.

Step 3: Save the New Voucher Type
Ensure that you save the new voucher type with the basic settings. You can explore more advanced options in other tutorials. Save the voucher type you’ve just created.

Step 4: Use the New Voucher Type
Now, when you move to the vouchers section, you’ll notice the new voucher type you created, such as “Cash Payment.” You can select this voucher type when entering transactions.

By using this voucher type, you can specify the details of your cash payment entries, making it easy to differentiate them from other types of transactions.
Advanced Tip: Using Classes to Enhance Voucher Types
If you want to make your voucher types even more powerful and foolproof, you can use voucher classes. Voucher classes allow you to specify which groups or ledgers should be available when you’re using a particular voucher type.
For instance, you can create a class named “Cash” and include groups or ledgers related to cash transactions. Another class, “Bank,” can include groups or ledgers associated with bank transactions. This ensures that when you select a voucher type, the appropriate ledger options are automatically available, reducing the chance of errors.
To create voucher classes, you can follow these steps:
- Access the “Alter” section of masters and select “Voucher Type.”
- Choose the voucher type you want to enhance, such as “Cash Payment.”
- Create a class for that voucher type, like “Cash,” and specify the groups or ledgers you want to include.
- Save the changes.

This approach makes it even more convenient to handle different transaction types, minimizing the need to press extra keys or perform additional checks.
Conclusion
In this tutorial, we’ve explored the importance of voucher types in Tally Prime and Tally ERP 9 and demonstrated how to create new voucher types. By creating new voucher types or using voucher classes, you can enhance your accounting workflow, reduce errors, and gain better control over your financial transactions.
We hope this guide helps you better manage your accounting tasks in Tally. If you found this tutorial useful, please consider liking, sharing, and commenting on this video. You can also subscribe to our channel for more upcoming tutorial videos.
[Insert Screenshots Here – Please provide corresponding screenshots with labels for each step mentioned in this blog post.]
Thank you for watching and have a great day!
[Insert Closing Music]
Please note that the screenshots mentioned in the placeholders should be inserted according to their corresponding steps. Additionally, make sure the screenshots are labeled appropriately for clarity.


